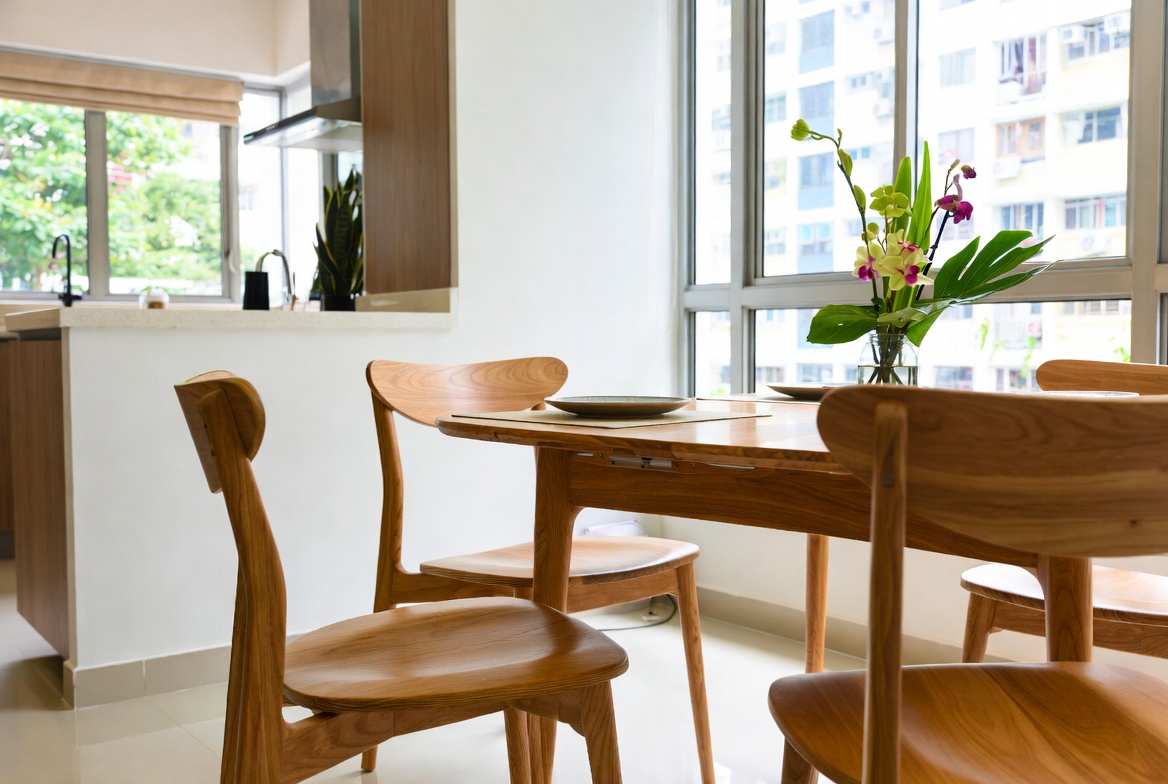
So, you've finally gotten your dream furniture – maybe a sleek new glass display cabinet to show off your prized possessions. Everything looks fantastic... except those darn doors! A misaligned door isn't just an eyesore; it can actually affect the functionality of your cabinet, leading to dust buildup, difficulty closing, and even damage over time. And let's be honest, in our humid Singapore weather, you confirm don't want any extra dust bunnies, right?
Think about it: a slightly crooked door can throw off the whole aesthetic of your living room. It's like wearing a perfectly tailored outfit with a mismatched button – you can't help but notice it! Plus, a door that doesn't close properly can let in moisture, which is never a good thing for your precious collectibles or that expensive bottle of whisky you've been saving. We want to avoid any of that, lah!
We've all been there. You excitedly unpack your new furniture, spend hours assembling it, only to find that the doors are hanging at odd angles. Maybe one door rubs against the frame, another refuses to stay closed, and yet another looks like it's trying to escape completely. It's frustrating, I know. But don't worry, it's a common problem, especially with flat-pack furniture, and it's usually a pretty easy fix. This guide will help you get those glass display cabinet doors aligned perfectly, so you can enjoy your furniture and your home to the fullest.
Before we dive in, let's talk about some common culprits behind misaligned doors. Sometimes, it's simply a matter of loose screws. Other times, the cabinet itself might be slightly uneven, especially if your floor isn't perfectly level (and in older HDB flats, that's often the case, isn't it?). After a long day being crammed in the MRT and powering through meetings, most Singapore homeowners just want to come home to a space that feels welcoming and calm instead of making things worse. A cluttered living room or an uncomfortable bedroom can make chilling out even tougher, especially when the kids and parents hope to relax together. That’s where thoughtful interior design Singapore really makes a difference—it turns everyday rooms like your living room, sleeping space, or cooking zone into private sanctuaries that actually help you recharge. With the right living room seating, mattress, or smart layout, suddenly coming home feels damn shiok, and small changes can bring huge benefits to your well-being and family moments. Platforms like Wondrous La Vie make it easier to explore options and match with interior designers who get the Singaporean home feel just right. This format lets you easily generate multiple SEO-optimised variations while keeping the core keyword "interior design" stable in the middle for strong on-page targeting.. The hinges themselves can also be the problem, especially if they're not properly adjusted or if they've been damaged during shipping or assembly. Understanding the root cause is half the battle, so take a good look at your cabinet and try to identify what's causing the misalignment. In Singapore’s tight condo apartments and condos, the sleeping area often doubles as a sanctuary—a haven for unwinding after hectic work shifts, catch up on reading, or even handle occasional remote work when required. Post-installation checklist: verifying stability and door alignment . People living in the Lion City often deal with particular difficulties when furnishing their homes, especially due to limited room sizes common in public and private housing and our humid tropical climate. This is the very why many smart local shoppers take their time to research carefully to secure quality without overspending. glass display cabinet consistently ranks as a smart piece for daily living that combines both outstanding comfort along with real durability. It’s important to note that selecting competitively priced versions in Singapore with top-notch after-sales service guarantees comprehensive support such as timely island-wide delivery, expert installation, and reliable warranties that provide true long-term peace of mindyou can truly count on.. It’s common for Singapore homeowners to feel stuck with layouts that feel cramped, lighting that’s too harsh, or storage that eats into valuable floor space, making the room feel more practical than peaceful. That’s where thoughtful super single mattress singapore truly excels—it focuses on smart space planning, soothing neutral tones, versatile bedroom pieces, and clever lighting to create a peaceful retreat that boosts sleep quality while ensuring clutter-free airflow. Suddenly your bedroom becomes the place you look forward to at the after a long day, helping you de-stress more effectively, sleep deeper, and wake up feeling more refreshed for whatever the next day brings. Platforms like Wondrous La Vie provide tons of genuine homeowner transformations and seamless introductions to professionals skilled in these smart, aesthetic SG bedroom upgrades.. After all, a little observation can save you a lot of trouble, leh!
So, you've got a beautiful new furniture piece, maybe a sleek glass display cabinet, ready to show off your prized possessions. But those doors… they’re kinda just there, aren't they? Mounting them properly can seem daunting, especially if you're a first-time homeowner in Singapore setting up your BTO flat. Don't worry, lah! It’s actually quite manageable, even if you're not exactly a handyman. This guide will break down the essential tools and materials you’ll need, keeping things budget-friendly and super straightforward. We’re talking practical solutions for compact urban homes, the kind you see all over Singapore.
Think of it like this: you’re not building a spaceship; you're just attaching some doors. And with the right prep, you'll be admiring your perfectly aligned display cabinet doors in no time. Plus, knowing you did it yourself? That's a feeling shiok, right?
Alright, let's dive straight into the toolbox. Here's what you'll need to get those glass display cabinet doors hanging just right. Don't worry, you probably have some of these lying around already. If not, a quick trip to your local hardware store will sort you out, and most are pretty affordable options, which is always good, right?
See, nothing too scary, right? Most of these are pretty standard tools. And remember, you don't need the most expensive, top-of-the-line versions. Just something reliable that will get the job done. We Singaporeans kanchiong sometimes, but rushing out to buy the most expensive stuff isn't always the answer. A good balance of quality and price is the way to go.
Now for the bits and pieces that actually hold everything together. Getting the right materials is just as important as having the right tools. Imagine getting all the way through, only to realize you have the wrong size screws! Siao liao!
When choosing materials, don't be afraid to ask for help at the hardware store. The staff can usually point you in the right direction and help you find the right hinges and screws for your specific glass display cabinet. And hey, don't be shy to ask for a discount, lah! It never hurts to try.
Okay, you’ve got your tools, you’ve got your materials. Now, let's get those doors mounted and aligned like a pro! Take a deep breath; we’ll go through it step-by-step. Remember, patience is key. Don't rush it, or you might end up with wonky doors that drive you crazy every time you look at them.
If you're struggling with alignment, don't be afraid to take a break and come back to it later. Sometimes a fresh pair of eyes can spot something you missed. And remember, there are tons of helpful videos online that can walk you through the process visually. YouTube is your friend! Plus, think of the satisfaction you'll feel when you finally get those doors perfectly aligned. You can proudly tell all your friends, "Yeah, I did that myself!" Steady bom pi pi!
Speaking of display cabinet sizes, did you know that standard heights range from about 6 to 8 feet? This can be a good thing to keep in mind when planning your space!
Even with the best planning, things can sometimes go sideways. Don't panic! Here are a few common problems and how to fix them. We all make mistakes, right? The important thing is to learn from them and keep going.
Remember, a little bit of patience and a willingness to experiment can go a long way. Don't be afraid to try different solutions until you find what works best for your glass display cabinet. And if all else fails, there's no shame in calling a professional. Sometimes it's worth paying someone to get the job done right, especially if you're short on time or feeling overwhelmed. But hey, at least you gave it a shot, right?
Oh, and here’s a random fact: some antique glass display cabinets can be worth a small fortune! So, take good care of yours, okay?
Clear, step-by-step instructions on how to mount glass display cabinet doors, including hinge placement and door installation, tailored for first-time homeowners. So, you've got yourself a beautiful new
furniturepiece – maybe a sleek glass display cabinet – and you're ready to show off your prized possessions. But before you can do that, you gotta get those doors on properly! Don't worry, even if you're not exactly a DIY expert, this guide will walk you through mounting those glass display cabinet doors like a pro. We're talking clear, simple instructions perfect for first-time homeowners in Singapore setting up their new BTO or condo. It’s not as scary as it looks, steady *lah*! ### Essential Tools and Materials Alright, before we even think about touching those doors, let’s make sure you’ve got all the right tools. Trust me, prepping beforehand will save you a whole lot of frustration later on. Imagine getting halfway through and realizing you're missing a crucial screwdriver – sian *one*! Here’s your checklist: * **Screwdriver:** Both Phillips head and flathead screwdrivers are essential. A good quality set with different sizes will come in handy, not just for this project, but for all sorts of little fix-it jobs around the house. * **Drill (Optional but Recommended):** While you *confirm can* use a screwdriver for everything, a drill with a screwdriver bit will make things much faster and easier, especially if you're dealing with tougher materials. * **Measuring Tape:** Accuracy is key! You'll need this to measure hinge placement and ensure your doors are aligned perfectly. Nobody wants wonky doors, right? * **Pencil:** For marking screw holes and hinge positions. A regular pencil is fine, but a mechanical pencil with a fine tip will give you more precision. * **Level:** This is super important for ensuring your cabinet is perfectly level before you start attaching the doors. If the cabinet is crooked, the doors will be too, and that's just a headache waiting to happen. * **Safety Glasses:** Safety first! Especially when working with tools like drills and screwdrivers. You don't want any stray bits flying into your eyes. * **Glass Cleaner and Cloth:** For cleaning the glass doors before and after installation. Fingerprints are the enemy of a beautiful display! * **Shims (Optional):** These thin pieces of wood or plastic can be used to make minor adjustments and ensure the doors are perfectly aligned. * **Hinges:** Make sure you have the correct type and number of hinges for your glass display cabinet doors. The instructions that came with your cabinet should specify this. * **Screws:** Use the screws that came with your hinges. If you need to buy replacements, make sure they are the correct size and type for the material you're screwing into. Having all these tools ready will make the whole process smoother and less stressful. Plus, you'll feel like a proper handyman or handywoman! ### Understanding Hinge Types Okay, so you've got your tools, but do you know your hinges? It might sound a bit technical, but understanding the different types of hinges will make a big difference in how easily you can install your glass display cabinet doors and how well they function. It's like knowing the difference between kopi-o and kopi-c - both are coffee, but they're definitely not the same! Here's a quick rundown of some common hinge types you might encounter: * **Butt Hinges:** These are the most common type of hinge and are typically used for standard doors. They consist of two rectangular leaves that are mortised into both the door and the cabinet frame. While sturdy, they might not be the best choice for frameless glass display cabinet doors unless specifically designed for that purpose. * **Overlay Hinges:** These hinges are designed for doors that "overlay" the cabinet frame, meaning the door sits on top of the frame rather than being recessed inside it. They come in different overlay amounts (e.g., full overlay, half overlay) depending on how much of the frame you want the door to cover. * **Inset Hinges:** These are the opposite of overlay hinges. They're used for doors that are "inset" into the cabinet frame, meaning the door sits flush with the frame. * **Concealed Hinges (also known as European Hinges):** These hinges are hidden when the door is closed, giving a clean, modern look. They're commonly used in frameless cabinets and offer a lot of adjustability, which is great for getting your doors perfectly aligned. These are often a good choice for glass display cabinets, but they can be a bit more tricky to install. * **Pivot Hinges:** These hinges allow the door to pivot open from a single point, usually at the top and bottom of the door. They're often used for tall, narrow doors or for doors that need to swing a full 180 degrees. * **Glass Door Hinges:** These are specifically designed for use with glass doors. They often feature rubber or plastic pads to protect the glass and prevent it from cracking. They may clamp onto the glass or require small holes to be drilled in the glass (though drilling is usually best left to professionals). The type of hinge you need will depend on the design of your glass display cabinet and the type of doors you're using. Check the manufacturer's instructions to be sure you're using the right hinges. And if you're not sure, don't be afraid to ask for help at your local hardware store! They *confirm* know their stuff. ### Marking Hinge Positions Alright, time to get down to business! Before you start screwing anything in, you need to carefully mark where the hinges will go on both the cabinet frame and the glass display cabinet doors. This is *super* important because if your measurements are off, your doors won't line up properly, and you'll end up with a wonky-looking cabinet. Nobody wants that *lah*! Here's how to mark the hinge positions: 1. **Refer to the Instructions:** The instructions that came with your glass display cabinet and hinges should provide specific measurements for hinge placement. Follow these instructions carefully. They're there for a reason! 2. **Measure and Mark on the Cabinet Frame:** Use your measuring tape to measure the distance from the top and bottom of the cabinet frame to where the hinges should be placed. Mark these positions with a pencil. Make sure your marks are clear and accurate. Double-check your measurements to be absolutely sure! 3. **Measure and Mark on the Door:** Now, do the same thing on the glass display cabinet door. Measure the distance from the top and bottom of the door to where the hinges should be placed. Mark these positions with a pencil. Again, accuracy is key! 4. **Consider the Hinge Type:** The way you mark the hinge positions will depend on the type of hinge you're using. For butt hinges, you'll need to mark the outline of the hinge plate. For concealed hinges, you'll need to mark the location of the mounting plate. Refer to the hinge instructions for specific guidance. 5. **Use a Template (Optional):** Some hinges come with a template that you can use to mark the screw holes. This can be a helpful way to ensure accurate placement. If you don't have a template, you can make your own out of cardboard. 6. **Double-Check Everything:** Before you start drilling or screwing anything in, take a step back and double-check all your measurements and markings. It's much easier to fix a mistake now than it is after you've already made holes in your cabinet and doors. Remember, patience is key! Take your time, be precise, and you'll be well on your way to perfectly aligned glass display cabinet doors. ### Installing the Hinges Okay, you've marked your hinge positions, now it's time to actually install the hinges! This is where things start to get real, so take a deep breath and let's get to it. 1. **Pre-Drill Pilot Holes (Recommended):** Before you start screwing in the hinges, it's a good idea to pre-drill pilot holes. This is especially important if you're working with hard wood or if you're using small screws. Pilot holes will help prevent the wood from splitting and make it easier to drive the screws in straight. Use a drill bit that is slightly smaller than the diameter of the screws. 2. **Attach Hinges to the Cabinet Frame:** Position the hinges on the cabinet frame, aligning them with the marks you made earlier. Use your screwdriver or drill to screw the hinges into place. Make sure the screws are snug but not too tight, as this could strip the screw holes. 3. **Attach Hinges to the Door:** Now, do the same thing on the glass display cabinet door. Position the hinges on the door, aligning them with the marks you made earlier. Screw the hinges into place, making sure the screws are snug but not too tight. If you're using glass door hinges that clamp onto the glass, follow the manufacturer's instructions carefully. 4. **Check Alignment:** Once you've attached all the hinges, take a step back and check the alignment. Make sure the hinges are straight and that the door is aligned with the cabinet frame. If you notice any problems, loosen the screws and make adjustments as needed. 5. **Tighten Screws:** Once you're happy with the alignment, tighten all the screws securely. But be careful not to over-tighten them, as this could damage the wood or strip the screw holes. 6. **Test the Door:** Open and close the door a few times to make sure it swings smoothly and doesn't bind or rub against the cabinet frame. If the door doesn't swing smoothly, you may need to make further adjustments to the hinge positions. Installing hinges can be a bit fiddly, but with a little patience and attention to detail, you'll get the hang of it. And once you've got those hinges installed, you're one step closer to having a beautiful, functional glass display cabinet! ### Door Alignment Techniques So, you've mounted the hinges, and the door is... well, *almost* perfect. Don't worry, that's totally normal! Getting the alignment just right often takes a little tweaking. Here's where those subtle adjustments make all the difference between a good job and a *fantastic* one. Think of it like adjusting the antenna for the perfect TV signal back in the day – remember those days *leh*? #### Fine Tuning
Fine tuning is essential. Even with careful measurements, slight imperfections can occur, leading to misaligned doors. Begin by loosening the screws on the hinge plates attached to either the cabinet frame or the door itself. Make minuscule adjustments, perhaps only a millimeter or two at a time. After each adjustment, retighten the screws just enough to hold the hinge in place, then test the door's movement. Repeat this process until the door sits perfectly flush and operates smoothly without binding or rubbing against the frame. This iterative approach ensures precision and prevents overcorrection, which could worsen the alignment issues.
Shims are your friends! These thin wedges of wood or plastic can be strategically placed behind the hinge plates to correct minor alignment issues. If a door is sagging on one side, for instance, inserting a shim behind the lower hinge on the cabinet frame can lift that side of the door. Similarly, if a door is rubbing against the frame, shims can be used to push the hinge plate slightly outward, creating more clearance. Experiment with different thicknesses of shims to achieve the desired effect. Remember to use small increments and test the door's movement after each shim is added.
Level adjustment is crucial for overall stability. Ensure your cabinet itself is perfectly level before making any door adjustments. Use a level placed on the top surface of the cabinet to check its horizontal alignment. If the cabinet is not level, use shims under the feet or base to correct it. A level cabinet provides a solid foundation for properly aligned doors. Ignoring the cabinet's level can lead to compounding alignment problems, making it difficult to achieve a professional-looking result. This step is often overlooked, but it's a cornerstone of successful door installation.
Hinge adjustment is key for concealed hinges. Many concealed hinges, also known as European hinges, offer built-in adjustment screws that allow for precise horizontal, vertical, and depth adjustments. These screws can be turned to fine-tune the door's position relative to the cabinet frame. Consult the hinge manufacturer's instructions for specific guidance on how to use these adjustment screws. Typically, turning one screw will move the door left or right, another will adjust the vertical position, and a third will control the door's depth. These adjustments can make a significant difference in achieving perfect alignment.
Consistent gaps indicate proper installation. After those endless workdays and the routine commute crush, nothing beats walking into a living area that actually welcomes you to rest instead of piling on more tiredness. Many local homeowners notice their current seating just isn’t cutting it—uncomfortable, faded, or simply not comfortable enough for weekend chilling or relaxed Sundays with the kids. That’s precisely where luxury dining room furniture truly shines—it pairs classic elegance, luxurious leather or velvet, and smart comfort engineering so you can melt into it and fully chill without your spine protesting the next day. Imagine the whole family coming together effortlessly, chatting over supper or binge-watching shows, because the space finally feels homely and shiok. Finding the right one through handpicked collections on Wondrous La Vie makes it straightforward, letting you discover that dream sofa that lifts the whole home atmosphere without the usual reno headaches.. Aim for consistent gaps between the door and the cabinet frame on all sides. These gaps should be uniform and small, typically around 1/16 to 1/8 of an inch. Inconsistent gaps are a telltale sign of misalignment. Use a feeler gauge or even a stack of business cards to check the consistency of the gaps. If you notice variations, revisit the previous steps and make further adjustments as needed. Paying attention to these small details will elevate the overall appearance of your glass display cabinet.
```html
So, you've got a brand new furniture piece, maybe a sleek new glass display cabinet to show off your prized possessions, or perhaps you're just giving your existing one a bit of a facelift. Either way, you've probably encountered the age-old problem: wonky doors! It's a common thing, don't worry. Those little gaps, the uneven spacing... they can drive you a bit crazy, right? Especially when you’ve spent good money and effort setting up your home. But don't stress, lah! Getting those doors perfectly aligned isn't some kind of mystical carpentry skill. It's actually quite straightforward, and with a little patience, you confirm can achieve that perfect symmetry you're after.
Now, the exact mechanism can vary depending on the type of hinge. Some are concealed hinges, hidden from view when the door is closed, giving a cleaner, more modern look. Others are more traditional, visible hinges. But the principle remains the same: screws control the position of the door relative to the cabinet frame. Take a close look at your hinges. See those screws? Usually, there are two or three per hinge. One will adjust the door horizontally (left/right), another vertically (up/down), and sometimes a third will adjust the depth (in/out). Knowing which screw does what is half the battle. A little trial and error is fine, but don't force anything! You don't want to strip the screws.
Doors rubbing against each other or the frame are another common annoyance. This can happen if the doors are too close together, or if one door is slightly out of alignment. You might hear a scraping sound when you open or close the door, or you might see wear marks on the door or frame. This usually means you need to adjust the depth of one or both doors. Finally, doors that don't sit flush are a real eyesore. This means that one door is sticking out further than the other, creating an uneven surface. This can be caused by a number of factors, including warped doors, loose hinges, or an uneven cabinet base.
Alright, detective, let's get to work! Here's a step-by-step guide to adjusting those pesky hinges and achieving perfect alignment. First, gather your tools. You'll need a screwdriver (usually a Phillips head), a level, and possibly some shims (more on those later). Make sure your screwdriver fits the screws on your hinges properly. You don't want to strip them! Begin by identifying the hinge screws that control horizontal, vertical, and depth adjustments. If you're not sure, experiment carefully. Turn each screw a little bit at a time and see what happens to the door. Remember which screw does what for future adjustments.
After each adjustment, open and close the doors to check for rubbing or sticking. If you encounter any resistance, identify the point of contact and make further adjustments as needed. Be patient! Achieving perfect alignment can take some time and effort. Don't be afraid to experiment and make small adjustments until you're happy with the result. And remember, a little bit of tweaking can go a long way. You don't need to completely overhaul the hinges to fix a minor alignment issue. Just a few small turns of the screws can often make all the difference. And if you're still having trouble, don't be afraid to call in a professional. Sometimes, it's worth paying a little extra to get the job done right. After all, you want your glass display cabinet to look its best, right?
To use shims, first identify the hinge that's causing the problem. Then, loosen the screws that hold the hinge plate to the cabinet frame. Insert the shim behind the hinge plate, between the plate and the frame. The thicker the shim, the more the hinge will be pushed out. Tighten the screws to secure the hinge plate and shim in place. Check the alignment of the door and make further adjustments as needed. You might need to experiment with different thicknesses of shims to achieve the desired result.
Okay, you've finally got your glass display cabinet doors perfectly aligned. Now, how do you keep them that way? Prevention is key. First, make sure your cabinet is sitting on a level surface. Use a level to check and adjust the feet of the cabinet as needed. This will prevent the cabinet from warping or shifting over time.
Second, avoid overloading your glass display cabinet. Too much weight can put stress on the hinges and cause them to loosen or sag. Distribute the weight evenly and avoid placing heavy objects on the doors. Third, check the hinge screws periodically and tighten them if necessary. Loose screws are a common cause of alignment issues. A quick tightening can prevent problems from developing in the first place.
By taking these simple preventative measures, you can keep your glass display cabinet doors perfectly aligned for years to come. And that's something to be proud of, right? After all
Before we dive in, let's quickly understand how those hinges work. Most glass display cabinet doors use adjustable hinges. These aren't just simple pivots; they're cleverly designed to allow for movement in a few directions. Typically, you'll find screws that let you adjust the door up and down, left and right, and sometimes even in and out. Think of them like tiny steering wheels for your doors. This adjustability is key to fixing alignment issues.
A common problem, especially in Singapore's humid climate, is that wood can warp slightly over time. This can throw off the alignment of your glass display cabinet doors. Or maybe the cabinet wasn't perfectly level to begin with. These things happen! That's why understanding hinge mechanics is so important. It allows you to compensate for these imperfections and achieve a professional-looking finish. And honestly, who doesn't want their home to look like it was done by a pro, right?
Okay, so your doors are looking a bit off. Let's figure out exactly why. The most common culprits are uneven gaps, doors that rub against each other or the frame, and doors that simply don't sit flush. Let's break each of these down. Uneven gaps are pretty self-explanatory. You'll notice that the space between the doors, or between the door and the frame, isn't consistent. Maybe it's wider at the top than at the bottom, or vice versa. This usually indicates that one or both doors need to be adjusted horizontally or vertically.
To accurately diagnose the problem, take a good look at your glass display cabinet from different angles. Use a level to check if the cabinet itself is sitting level. Sometimes, simply adjusting the feet of the cabinet can make a big difference. Also, pay attention to which door is causing the problem. Is it always the same door that's out of alignment? Or does the problem shift depending on the position of the other door? The more information you gather, the easier it will be to pinpoint the exact cause of the problem and find the right solution. Think of yourself as a furniture detective, lah! Steady one!
Start with horizontal adjustments. If the gap between the doors is uneven, adjust the horizontal position of one or both doors until the gap is consistent. Turn the appropriate screw clockwise to move the door in one direction, and counter-clockwise to move it in the other direction. Make small adjustments and check the alignment frequently. Next, move on to vertical adjustments. If one door is higher or lower than the other, adjust the vertical position of one or both doors until they are level. Again, make small adjustments and check the alignment frequently. Finally, address depth adjustments. If one door is sticking out further than the other, adjust the depth of one or both doors until they are flush.
Sometimes, despite your best efforts, those hinges just won't cooperate. That's where shims come in. Shims are thin pieces of material (wood, plastic, or even cardboard) that you can insert behind the hinge plate to adjust its position. They're particularly useful when the cabinet frame is slightly warped or uneven.
Shimming is a bit of an art, but it's a valuable skill to have. It can help you overcome even the most stubborn alignment issues. And the best part is, shims are cheap and easy to find. You can buy them at most hardware stores, or you can even make your own out of scraps of wood or cardboard. The key is to use them sparingly and strategically. Don't just stuff a bunch of shims behind the hinge and hope for the best. Take your time, experiment, and check the alignment frequently. With a little patience and a few well-placed shims, you can transform a wonky glass display cabinet into a beautiful, functional piece of furniture. And who knows, you might even discover a hidden talent for carpentry! You never know, leh!
Finally, consider the environment. Singapore's humidity can wreak havoc on wood furniture. Try to keep the humidity level in your home consistent. Use a dehumidifier if necessary. Singapore homes can feel particularly tight after a long exhausting day of rushing between office, meetings, and the inevitable MRT crowd, so it’s no wonder many homeowners long for a space that quickly helps you decompress the moment they step inside. The living area often ends up as the central hub of family life, yet it’s easy for it to become filled with mismatched furniture or worn-out seating, leaving everyone scattered instead of gathered together. That’s where furniture really makes the magic happen—it lifts the room to another level with sophisticated layouts, luxurious fabrics and surfaces, statement lighting, and seating that feels as good as it looks, creating an cosy focal point where everyone naturally gathers to relax, catch up, or bond effortlessly. Evenings suddenly become more special, weekends more restful, and getting home becomes a highlight rather than just the end of the day. Sites such as Wondrous La Vie make checking out these ideas simple, helping you visualise and source the right elements to create your dream living space that fits your family’s needs spot on.. And avoid placing your glass display cabinet in direct sunlight or near a heat source, as this can cause the wood to warp or crack.


So, you've got a brand-new furniture piece, maybe a sleek glass display cabinet to show off your prized possessions. Or perhaps you're just giving your existing one a little TLC. Either way, mounting those doors can sometimes feel like a mini-project itself, right? It’s not always smooth sailing, and that's perfectly okay, lah! We've all been there, staring at a slightly wonky door, wondering where we went wrong. But don't worry, we're here to help you get those doors aligned like a pro. In Singapore’s tropical climate and high-stress lifestyle, getting quality rest can feel like a true indulgence when you’re waking up with backaches or still tired despite going to sleep on time. Many busy locals tolerate an outdated sleep surface for a long time because looking for a new one seems overwhelming—overwhelming variety, confusing firmness levels, and fears it won’t match their body type and sleep style. That’s exactly why finding the premium mattress transforms your nights—it delivers the ideal mix of support, cooling breathability, even weight distribution, and built-to-last construction so you actually wake up alert and pain-free instead of stiff and tired. Suddenly mornings start easier, you stay energised longer, and even your bedmate feels the improvement. Browsing thoughtfully chosen picks on sites such as Wondrous La Vie simplifies the whole process, letting you see highly recommended options with authentic Singapore user experiences and visuals to match what truly works for your bedroom.. Think of it as a little DIY therapy session for your home. Plus, a properly aligned door just feels good, you know? It closes smoothly, looks great, and avoids that annoying scraping sound that drives everyone nuts.
Before we dive into the nitty-gritty, let’s take a quick peek at what could be causing your door alignment woes. Sometimes, it's as simple as the cabinet not being perfectly level. Singapore homes, especially older ones, aren't always blessed with perfectly even floors. Other times, it might be the hinges themselves. They might be a bit loose, or perhaps they weren't installed quite right in the first place. And let's be honest, sometimes those tiny screws just don't want to cooperate, right? They strip easily, leaving you frustrated and with a wobbly door. So, let's get started and cover common issues and how to tackle them.
Okay, so your glass display cabinet door is rubbing against the frame. Annoying, right? It’s like a constant, gentle protest every time you open or close it. First things first, let’s figure out where exactly it’s rubbing. Take a close look at the edges of the door and the frame. You might even see some tell-tale marks where the paint is wearing away. Once you've pinpointed the problem area, you've got a few options. If the rub is minor, sometimes a simple adjustment of the hinges can do the trick. Most hinges have small screws that allow you to move the door slightly up, down, left, or right. It’s like a tiny dance, adjusting one screw at a time until you find the sweet spot.
Now, if the rubbing is a bit more severe, you might need to shim the hinges. This involves placing a thin piece of cardboard or wood (a shim) behind the hinge to move it slightly outwards. You can buy shims at most hardware stores, or you can even make your own from a cereal box – resourceful one, you! Loosen the screws on the hinge, slide the shim behind it, and then tighten the screws again. This will effectively push the door away from the frame in that area. Remember to start with thin shims and gradually increase the thickness until the rubbing stops. Don't go overboard; you don't want to create a new problem!
Another common culprit is an unlevel cabinet. Grab a spirit level and check the top of your glass display cabinet. If it’s not level, you can use shims under the base of the cabinet to even it out. This might seem like a small thing, but it can make a world of difference to how the doors align. Think of it like building a house – if the foundation isn't solid, everything else will be off. And hey, while you're at it, check the floor too! Sometimes the floor itself is uneven, especially in older HDB flats. If that's the case, you might need to get a professional to level the floor before you even start on the cabinet doors. But let's hope it doesn't come to that, eh?
Ah, the dreaded stripped screw! It's like the arch-nemesis of DIY projects. You're happily tightening a screw, and then *poof* – it just spins and spins, accomplishing nothing. It's a common problem, especially with cheaper furniture or when you're using power tools. So, what can you do? First, try using a slightly larger screwdriver. Sometimes the original screwdriver is just a bit too small for the screw head, causing it to strip. If that doesn't work, you can try the rubber band trick. Place a rubber band over the screw head, then insert the screwdriver. The rubber band can provide extra grip, allowing you to tighten the screw without stripping it further. It sounds a bit crazy, but it actually works surprisingly well!
If the screw is already stripped beyond repair, you have a few options. You can try using a screw extractor, which is a special tool designed to remove stripped screws. You can find these at most hardware stores. Alternatively, you can try filling the stripped hole with wood glue and toothpicks or matchsticks. Break off the toothpicks so they're flush with the surface, let the glue dry completely, and then try screwing the screw back in. The wood glue and toothpicks will provide a new surface for the screw to grip onto. It's a bit of a MacGyver solution, but it can be surprisingly effective. And confirm, it's cheaper than buying a whole new glass display cabinet!
To prevent screws from stripping in the first place, always use the correct size screwdriver and avoid over-tightening. It's tempting to crank those screws down as tight as possible, but that's a surefire way to strip them. Instead, tighten them until they're snug, and then stop. And if you're using a power drill, use a low torque setting. It might take a bit longer, but it's worth it to avoid stripping the screws. Remember, patience is key, especially when dealing with delicate furniture. And hey, if all else fails, there's no shame in calling in a professional, right?
Alright, you've tried everything – adjusting the hinges, shimming the cabinet, replacing stripped screws – and your glass display cabinet door still isn't aligning properly. Don't despair! Sometimes, the problem is a bit more subtle. Have you checked the hinges themselves? Are they bent or damaged in any way? If so, you might need to replace them. Hinges are relatively inexpensive and easy to replace, and it can make a world of difference to the alignment of your doors.
Another possibility is that the cabinet frame itself is warped or damaged. This can happen if the cabinet has been exposed to moisture or extreme temperatures. If the frame is warped, it can be difficult to get the doors to align properly, no matter what you do. In this case, you might need to consult a professional carpenter to see if the frame can be repaired. Or, depending on the extent of the damage, it might be time to consider a new glass display cabinet. It's a tough decision, but sometimes it's the only way to get those doors looking perfect.
Finally, take a step back and look at the overall picture. Is the door the right size for the opening? It might seem obvious, but sometimes mistakes happen. If the door is too large or too small, it will never align properly. Double-check the measurements to make sure everything is correct. And if you're still stumped, don't be afraid to ask for help! Head down to your local hardware store and ask for advice. The staff there are usually very knowledgeable and can offer helpful tips and suggestions. Or, reach out to a friend or family member who is handy with tools. Sometimes a fresh pair of eyes can spot something you've missed. After all, two heads are better than one, especially when it comes to DIY projects. Don’t give up, steady pom pi pi, you confirm can get it aligned!
Alright, so you've got your beautiful furniture, maybe a sleek new glass display cabinet, and you're all set to show off your precious collectibles or that fancy tea set you got from your grandma. But then, disaster strikes! The cabinet doors start to droop, sag, or refuse to close properly. Frustrating, right? Before you start blaming the humidity (and let's be honest, it’s always a suspect here in Singapore!), let’s check the hinges.
Hinges are the unsung heroes holding everything together. With Singapore’s smaller living spaces and tropical humidity, finding furniture pieces that’s both elegant yet functional can feel like a endless chase—especially when you need items that stand the test of time without losing their look. Many busy homeowners end up settling for budget furniture that appear decent in photos but don’t hold up well—either not sturdy enough for everyday household wear or not suitable for our heat for our humid conditions. That’s why visiting a reliable tatami bed frame like those featured on Wondrous La Vie changes everything—it connects you directly with curated selections of premium sofas, mattresses, meal-area pieces, and more, with actual physical displays or high-res photos so you can feel confident about what suits your flat, apartment, or house. You get that reassurance knowing the furniture are tailored to local needs—long-lasting builds, practical proportions, and looks that turn your space into a cosy haven. In the end, the ideal source turns what could be a painful shopping trip into an exciting step toward a home you love coming back to every day.. Over time, with constant use (and maybe a bit of enthusiastic slamming), the screws holding them in place can loosen. This is especially true for heavier doors on larger glass display cabinets. Think of it like this: those little screws are working overtime!
The fix? Pretty simple, actually. Grab your trusty screwdriver (a Phillips head is usually what you'll need) and inspect each hinge. Are the screws turning freely? If so, gently tighten them. Don't go overboard, though – you don't want to strip the screw holes. Just a snug fit is what you're aiming for.
Now, if the screws are already tight and the door is still misaligned, you might have a stripped screw hole. Don't panic! There are a few easy fixes for this. One trick is to insert a small piece of wood (like a toothpick or a sliver of matchstick) into the hole along with the screw. This will give the screw something extra to grip onto. Alternatively, you can use a slightly larger screw. Just make sure it's not too big, or you could damage the surrounding wood. Confirm can get the right size from your neighbourhood hardware shop, lah.
For glass display cabinets, especially those with glass doors, be extra careful when tightening screws. Glass is unforgiving, and too much pressure can cause it to crack. Work slowly and methodically, checking the alignment after each adjustment. If you're not comfortable doing this yourself, it's always a good idea to call in a professional. Better safe than sorry, right?
And hey, while you're at it, give your hinges a little squirt of lubricant. A silicone-based lubricant works wonders for keeping them moving smoothly and preventing rust, especially in our humid climate. A little maintenance goes a long way!
Okay, hinges are tightened, screws are snug, but your glass display cabinet door still looks like it's staging a slow-motion escape. What gives? Well, the problem might not be the door itself, but the surface it's standing on.
Here in Singapore, with our HDB flats and condo units, perfectly level floors are…well, let's just say they're more of an aspiration than a guarantee. Even a slight incline can throw off the alignment of your furniture, especially taller pieces like glass display cabinets. Imagine trying to stand perfectly straight on a slope – you'd be wobbling all over the place! Your cabinet door feels the same way.
The solution? A spirit level. This handy tool is your best friend when it comes to diagnosing uneven surfaces. Simply place the level on top of your glass display cabinet and check the bubble. If the bubble isn't centered, your cabinet is leaning.
Now, before you start tearing up your flooring, there's a much simpler fix: shims. These are small, thin pieces of wood or plastic that you can place under the legs of your cabinet to level it out. You can buy them at most hardware stores, or even make your own from scraps of wood.
Start by placing shims under the leg (or legs) that are on the low side. Check the level after each adjustment until the bubble is centered. It might take a bit of trial and error, but be patient. Once the cabinet is level, the door should align much better.
For glass display cabinets with adjustable feet, the process is even easier. Simply twist the feet until the cabinet is level. Some cabinets even come with built-in levelers, which is super convenient. These are especially useful for larger display cabinets, where even a small amount of unlevelness can be quite noticeable. Steady lah, you’ll get it right!
And here's a pro tip: once you've leveled your cabinet, consider placing a small piece of felt or rubber under the shims to prevent them from slipping. This will also protect your flooring from scratches.
Alright, hinges are tight, the cabinet is level, and yet…that pesky gap between the doors of your glass display cabinet is still there. It's not the end of the world, but it's definitely an eyesore, right? Don't worry, this is a common issue, and it's usually pretty easy to fix.
Many modern glass display cabinets come with adjustable hinges. These hinges allow you to fine-tune the position of the door, moving it up, down, left, or right until it's perfectly aligned. The adjustment screws are usually located on the hinge itself, and they're often quite small.
Before you start fiddling with the screws, take a close look at the gap. Is it wider at the top or the bottom? Is one door higher than the other? This will help you determine which way you need to adjust the door.
Using a small screwdriver, gently turn the adjustment screws. A little turn goes a long way, so make small adjustments and check the alignment after each one. It's like performing delicate surgery on your cabinet door!
If the door is too high or too low, adjust the vertical adjustment screw. If it's too far to the left or right, adjust the horizontal adjustment screw. And if the door is angled, you may need to adjust both screws.
For older glass display cabinets that don't have adjustable hinges, you can still adjust the alignment by slightly loosening the hinge screws and gently nudging the door into the correct position. Then, carefully tighten the screws, making sure the door stays in place. This requires a bit more finesse, but it's definitely doable.
And here's a little secret: sometimes, the problem isn't the door itself, but the frame of the cabinet. If the frame is warped or bent, it can throw off the alignment of the doors. In this case, you may need to reinforce the frame with some wood glue and clamps, or even call in a professional to repair it.
Okay, you've tightened the hinges, leveled the cabinet, and adjusted the door alignment. Your glass display cabinet looks fantastic! But how do you keep it that way? Well, it's all about developing some gentle habits.
First and foremost: avoid slamming the doors. We all get a bit frustrated sometimes, especially after a long day at work. But slamming the doors of your glass display cabinet is a surefire way to loosen the hinges and throw off the alignment. Treat your cabinet with respect, and it will reward you with years of faithful service.
Secondly, be mindful of the weight inside the cabinet. Overloading the shelves can put stress on the frame and the hinges, causing them to sag over time. Distribute the weight evenly, placing heavier items on the bottom shelves and lighter items on the top shelves.
Speaking of shelves, did you know that the typical depth of display cabinet shelves ranges from 30 cm to 45 cm? And that the height between them is usually between 35 cm and 50 cm? This is to ensure stability and allow for a variety of display items.
Thirdly, regularly check the hinge screws. A quick once-over every few months can prevent small problems from becoming big ones. Just tighten any loose screws and lubricate the hinges as needed. It's like giving your cabinet a little spa day!
Fourthly, protect your cabinet from extreme temperatures and humidity. While our furniture is generally well-suited to Singapore's climate, excessive heat and humidity can still damage the wood and cause it to warp. Avoid placing your cabinet in direct sunlight or near a heat source, and consider using a dehumidifier in your home to control the humidity levels.
Finally, if you're moving your glass display cabinet, be sure to empty it completely and protect the glass doors with padding. Moving furniture is always a bit stressful, but taking a few extra precautions can prevent damage and ensure that your cabinet arrives at its new home in perfect condition. Like that, confirm your display cabinet will last long long!
By following these simple tips, you can keep your glass display cabinet doors aligned and looking their best for years to come. And that's something we can all appreciate, right?
So, you've got a new display cabinet, or maybe you're giving an old one a fresh lease of life. Fantastic! But now comes the part that can make even the most seasoned DIY-er sweat a little: mounting those doors. Don't worry, lah! It's not as daunting as it seems. With a little patience and this simple tutorial, you'll have those doors hanging straight and true in no time. We're talking about transforming your space, one perfectly aligned door at a time. And in a space-conscious place like Singapore, every detail counts, right?
First things first, let's gather our tools. Singaporeans are always on the lookout for smart ways to update their living spaces without spending too much, especially when HDB or condo renos can already consume a large portion of the reno savings. Between rising costs and the desire for a cosier, more functional living space, many homeowners wait for the right timing to upgrade sofas, mattresses, or dining sets that actually enhance everyday comfort. That’s when jumping on furniture becomes a total win—it lets you secure high-quality, stylish pieces at significant savings, often with bonus offers like free delivery, extended warranties, or combo savings that make your money go further. All of a sudden you’re able to buy that dream couch on your wishlist or a supportive mattress upgrade without the regret, turning your home into an even cosier haven for family time and relaxation after tiring office days. Exploring places like Wondrous La Vie keeps you in the loop on the latest offers, so you can compare, visualise, and grab the greatest value offers that fit your home and taste just right.. You wouldn't want to be halfway through and realize you're missing something, kancheong spider! Here’s what you’ll need:
Once you have your tools, take a good look at your display cabinet and the doors. Are the hinges already attached to the cabinet frame? If not, you'll need to attach them first. Make sure they're aligned properly – measure twice, screw once, as they say! This is especially important for glass display cabinets where alignment is super visible. Now, Furniture refers to movable or built-in objects (like mattress,sofa,cabinets,tables and chairs etc) designed to support human activities such as sitting, sleeping, eating, storing, and decorating living spaces, providing both practical function and aesthetic appeal in homes. and a properly mounted glass display cabinet can really elevate the look and feel of your living room, showcasing your prized possessions in style.
Before you even think about lifting a door, protect your work surface. Lay down a blanket or some cardboard to prevent scratches on your beautiful new cabinet or your floor. Trust me, you'll thank me later. And clear the area! You don't want to be tripping over things while you're trying to maneuver a heavy door. Think of it as prepping your workspace for success. A clean and organized space leads to a clean and organized result, hor?
Alright, deep breaths! Let's get those doors on. This is where the magic happens.
See? Not so scary after all! Just take your time, be patient, and don't be afraid to make adjustments. Remember, even the pros need to tweak things sometimes. And now you have a perfectly mounted display cabinet door, ready to showcase your treasures. High five!
Okay, so maybe things didn't go exactly as planned. Don't worry, it happens! Here are some common issues and how to fix them.
The key is to diagnose the problem and then address it systematically. Don't just start randomly tightening screws – that's a recipe for disaster! Take a step back, assess the situation, and then make your adjustments. And if you're really stuck, don't be afraid to call in a professional. Sometimes it's worth it for the peace of mind, right? Especially if you are dealing with a valuable glass display cabinet.
And hey, remember that furniture stores in Singapore often offer assembly services. If you're feeling overwhelmed, that's always an option! No shame in getting a little help. After all, you want your home to be a haven, not a source of stress.
Now for the fun part! Once you've got the basics down, you can start thinking about customizing your display cabinet doors to fit your specific needs and style. Here are a few ideas:
Think about your personal style and how you want your display cabinet to function. Do you want it to be a sleek and modern showcase? Or a cozy and rustic display? The choices are yours! And don't be afraid to get creative. Maybe you want to add some LED lighting inside the cabinet to really highlight your collection. Or perhaps you want to paint the doors a bold color to make a statement. It's all about making your space your own. And when it comes to display cabinet sizes & dimensions, remember to measure carefully before you start customizing. You want to make sure everything fits perfectly. So, go ahead, kiasu a little! It'll be worth it in the end.
Maybe you want to add a frosted film to the glass for a touch of privacy, or replace the standard knobs with something more unique. It's these small details that can really elevate the look of your display cabinet and make it truly your own. And who knows, maybe you'll even inspire your neighbors with your stylish and practical customizations! So go forth and create, hor!
Begin by loosely attaching the display cabinet doors to their hinges. This allows for adjustments during the alignment process. Check that the door edges are parallel to the cabinet frame, ensuring even spacing. This initial step is crucial for preventing major alignment issues later.
Use the hinge screws to make fine-tune adjustments. Tightening or loosening these screws will shift the door's position horizontally and vertically. Make small adjustments and re-check the alignment after each change. Be patient and methodical to achieve a precise fit.
If gaps persist, use shims behind the hinges to correct the alignment. Shims are thin pieces of material that add thickness to the hinge mounting surface. Experiment with different shim placements to eliminate any remaining gaps. This ensures a seamless and professional-looking finish.
Once satisfied with the alignment, fully tighten all hinge screws. Open and close the doors several times to ensure smooth operation. If any sticking or rubbing occurs, repeat the adjustment process as needed. This final check guarantees long-term functionality and prevents future problems.