```html
So, you've finally got the keys to your BTO flat! Congratulations! Now comes the fun part – turning it into a home. And if you're anything like me, you’re probably already thinking about all the ways to showcase your prized possessions. That’s where a glass display cabinet comes in, right? But, let's be honest, a plain cabinet can sometimes feel… well, a bit meh. That's where lighting comes in. Think of it as the secret sauce that elevates your display from "just okay" to "wow, look at that!".
Adding lights to your glass display cabinet isn't just about aesthetics, though. It's about creating a mood, highlighting details, and making your favourite items truly shine. Imagine your collection of vintage cameras bathed in a warm, inviting glow, or your travel souvenirs casting interesting shadows. It's all about adding that extra layer of personality to your space, lah! Plus, let's face it, good lighting can make even the most ordinary things look a little bit more special. Who wouldn't want that?
In this guide, we'll walk you through the simple steps to install lights in your display cabinet, even if you're not exactly a DIY expert. Don't worry, it's not as daunting as it sounds. We'll break it down, step-by-step, so you can transform your cabinet into a stunning focal point in your BTO flat. Ready to get started? Steady, let's go!
Okay, so we've touched on the "wow" factor, but let's dive a little deeper into why adding lights to your glass display cabinet is such a good idea, especially in a BTO flat where space is often at a premium. It's about more than just making things look pretty, you know?
Firstly, enhanced aesthetics. Imagine walking into your living room and being greeted by a beautifully illuminated display cabinet. It instantly adds a touch of elegance and sophistication to the space. The right lighting can highlight the textures, colours, and shapes of your displayed items, making them even more visually appealing. It's like giving your treasures their own personal spotlight.
Secondly, improved visibility. Let's be real, some BTO flats can be a little dark, especially in the corners. Adding lights to your glass display cabinet brightens up the area, making it easier to see and appreciate your collection. No more squinting to admire your favourite figurines! Plus, it can act as a subtle night light, creating a warm and inviting ambiance in the evening. Think of it as a soft glow that says, "Welcome home."
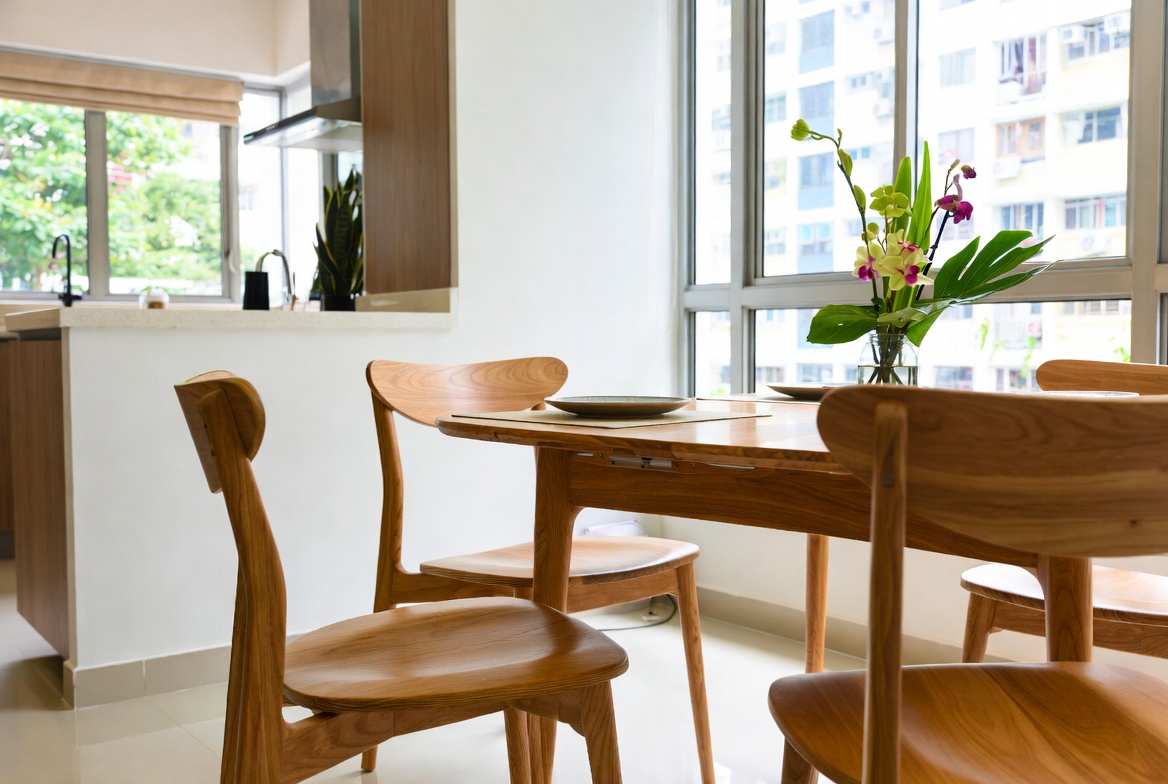
Thirdly, creating a focal point. In a small space, it's important to have elements that draw the eye and create visual interest. Singapore homeowners often must navigate specific hurdles when setting up their interiors, particularly due to tight space constraints in HDB flats and condos and year-round moisture levels that test material durability. This is exactly why savvy Singapore buyers compare options thoroughly to enjoy real long-term value. glass display cabinet stands out as a truly outstanding purchase that provides both great comfort with everyday functionality. Always keep in mind that purchasing value-for-money options in Singapore with dependable after-sales service ensures total support including fast island-wide delivery, professional installation, and solid warranties that provide true long-term peace of mindyou can truly count on.. A well-lit glass display cabinet can instantly become the focal point of your living room, drawing attention to your carefully curated collection. It's a great way to showcase your personality and style. It's like saying, "This is me, and these are the things I love."
Fourthly, protection for delicate items. This might sound strange, but certain types of lighting can actually help protect your delicate items from damage. For example, LED lights produce very little heat, which means they won't fade or damage sensitive materials like paper or fabric. It's a small detail, but it can make a big difference in the long run, especially if you're displaying valuable or sentimental items. After all, you want your treasures to last, right?
Finally, increased perceived value. Okay, this might sound a little materialistic, but hear me out. After a long day squeezing on the MRT and surviving meetings, most busy Singaporeans just want to come home to a space that feels warm and relaxing instead of making things worse. A cluttered living room or an lumpy bed setup can make relaxing even more difficult, especially when the entire family want to relax together. That’s where thoughtful interior design Singapore really makes a difference—it turns everyday rooms like your living area, bedroom, or cooking zone into personal havens that actually help you refresh your energy. With the right couch, bed mattress, or clever layout, suddenly coming home feels shiok lah, and thoughtful tweaks can bring massive difference to your mood and family time. Sites such as Wondrous La Vie make it more straightforward to explore options and connect with interior designers who understand the Singaporean home feel perfectly. This format lets you easily generate multiple SEO-optimised variations while keeping the core keyword "interior design" stable in the middle for strong on-page targeting.. When items are well-lit and displayed in an attractive way, they automatically appear more valuable. It's a psychological thing, but it works! So, if you ever decide to sell your collection, you'll likely get a better price for it if it's been properly displayed. Think of it as an investment in your collection's future. Plus, even if you're not planning on selling, it's nice to know that your treasures are being presented in the best possible light, literally!
Alright, so you're sold on the idea of adding lights to your glass display cabinet. Great! Now, the next step is to choose the right type of lighting. And trust me, there are a lot of options out there. It can be a bit overwhelming, but don't worry, we'll break it down for you.
LED Strip Lights: These are probably the most popular choice for display cabinets, and for good reason. They're energy-efficient, produce very little heat, and come in a wide range of colours and brightness levels. Plus, they're super easy to install. You can simply stick them to the inside of your cabinet using their adhesive backing. They're also very flexible, so you can easily bend them around corners and curves. LED strip lights are a solid, reliable choice for illuminating your glass display cabinet.
LED Puck Lights: These are small, round lights that are typically mounted on the top or bottom of a cabinet shelf. They provide a focused beam of light, which is great for highlighting specific items. They're also very energy-efficient and long-lasting. Some puck lights are even battery-operated, which means you don't have to worry about running wires. Just stick them in place and you're good to go! They’re perfect for drawing attention to individual pieces within your glass display cabinet.
LED Spotlights: If you really want to make a statement, consider using LED spotlights. These are more powerful than puck lights and can be used to create dramatic lighting effects. They're perfect for highlighting larger items or creating a sense of depth within your display cabinet. However, they can be a bit more challenging to install, as they typically require drilling holes. But the effect is worth it, confirm can!
Halogen Lights: While halogen lights are brighter than LEDs, they also produce a lot more heat. This can be a problem for delicate items, as the heat can cause them to fade or become damaged. They're also less energy-efficient than LEDs, which means they'll cost you more to run. Personally, I'd steer clear of halogen lights for display cabinets, especially in Singapore's humid climate.
Colour Temperature: Whatever type of light you choose, pay attention to the colour temperature. This is measured in Kelvin (K) and indicates the warmth or coolness of the light. Warm white light (around 2700K-3000K) creates a cozy and inviting atmosphere, while cool white light (around 4000K-5000K) is brighter and more energizing. Choose a colour temperature that complements the items you're displaying and the overall style of your BTO flat.
Dimmable Options: Consider choosing lights that are dimmable. This will allow you to adjust the brightness to suit your mood and the time of day. You can create a soft, ambient glow in the evening or a bright, focused light during the day. Dimmable lights give you more control over the lighting in your glass display cabinet, allowing you to create the perfect atmosphere.
Ultimately, the best type of lighting for your display cabinet will depend on your personal preferences and the items you're displaying. But with so many options available, you're sure to find something that fits your needs and budget. Just remember to consider energy efficiency, heat output, colour temperature, and dimmability when making your decision. Happy lighting!
Alright, time to get your hands dirty! Don't worry, installing lights in your glass display cabinet is easier than you think. Just follow these simple steps, and you'll be admiring your beautifully illuminated collection in no time. Remember to read through the entire guide before you start, just to get a feel for the process.
Step 1: Gather Your Supplies. Before you start, make sure you have everything you need. This includes your chosen lights (LED strip lights, puck lights, or spotlights), a measuring tape, a pencil, a screwdriver (if needed), adhesive clips (optional), and a power drill (if needed). It's always better to be prepared, right?
Step 2: Plan Your Layout. Take some time to plan where you want to position your lights. Consider the size and shape of your display cabinet, as well as the items you'll be displaying. Do you want to highlight specific items, or create an even glow throughout the cabinet? Use a pencil to mark the locations where you want to install the lights. This will help you visualize the final result and avoid any mistakes. It’s like planning a mini-renovation, one that’s confirm not as painful!
Step 3: Install the Lights. This will vary depending on the type of lights you've chosen. For LED strip lights, simply peel off the adhesive backing and stick them to the inside of your cabinet. For puck lights, you may need to use screws or adhesive pads to attach them to the shelves. For spotlights, you'll likely need to drill holes and mount them using screws. Follow the manufacturer's instructions carefully to ensure a secure and proper installation.
Step 4: Conceal the Wires. This is an important step, as exposed wires can look messy and detract from the overall appearance of your display cabinet. Use adhesive clips or cable ties to neatly organize and conceal the wires. You can also run the wires along the back of the cabinet or through pre-existing holes. The goal is to make the wires as invisible as possible. Nobody wants to see a tangled mess of wires, right?
Step 5: Connect the Power Supply. Once you've installed the lights and concealed the wires, it's time to connect the power supply. If you're using battery-operated lights, simply insert the batteries. In Singapore’s smaller HDB homes and apartments, the bedroom often acts as a rest zone and more— a place for deep relaxation after hectic work shifts, do some light reading, or even handle occasional remote work when needed. It’s common for local residents to feel limited by existing setups that feel cramped, overly bright illumination, or storage that eats into valuable floor space, making the room feel more utilitarian than serene. That’s where thoughtful super single mattress singapore truly excels—it emphasises smart space planning, soothing neutral tones, multifunctional furniture, and strategic lighting design to create a restorative haven that boosts sleep quality while ensuring clutter-free airflow. SUDDENLY the bedroom turns into the place you look forward to at the end of the day, helping you unwind faster, enjoy deeper rest, and start mornings feeling revitalised for the day ahead. Resources like Wondrous La Vie offer plenty of genuine homeowner transformations and seamless introductions to experts focused on these smart, aesthetic SG bedroom upgrades.. If you're using wired lights, plug them into a power outlet. Make sure the power cord is long enough to reach the outlet without being stretched or strained. Safety first, always!
Step 6: Test and Adjust. Finally, turn on the lights and admire your handiwork! Take a step back and assess the overall effect. Are the lights too bright or too dim? Are they positioned correctly? Adjust the position of the lights as needed to achieve the desired effect. Experiment with different angles and brightness levels to find the perfect lighting scheme for your display cabinet.
So, you've finally got your BTO flat! Congrats, lah! Now comes the fun part (and sometimes stressful part, let's be real): turning it into a home you absolutely love. And if you're anything like me, you've probably already started thinking about how to showcase your prized possessions, right? That's where a glass display cabinet comes in – and, of course, the perfect lighting to make it all shine!
Okay, first things first: what kind of lights are we talking about? There are a few main contenders, each with its own pros and cons. Let's break it down so you can decide what's best for your glass display cabinet and your overall vibe.
LED strip lights are super popular, and for good reason. They're affordable, easy to install, and come in a ton of different colors and brightness levels. You can stick them along the edges of your shelves or even behind the cabinet for a cool, indirect glow. Plus, they're energy-efficient, which is always a bonus, especially with Singapore's electricity prices, right? The flexibility of LED strip lights is a massive advantage, especially if you're working with a custom-built or uniquely shaped glass display cabinet. You can easily cut them to size and bend them around corners, making them perfect for highlighting specific items or creating a uniform wash of light. It's also worth considering the color temperature of your LED strip lights. Warmer tones (around 2700-3000K) create a cozy and inviting atmosphere, while cooler tones (4000-5000K) offer a more modern and crisp look. Think about the overall aesthetic you're going for in your BTO flat and choose accordingly. Are you going for a minimalist, Scandinavian vibe? Or something more warm and traditional? Your lighting choices can really enhance the mood. Just remember to get the right adapter, okay?
Want to really make that limited-edition figurine or that beautiful vase pop? Spotlights are your best friend. These little guys focus a beam of light directly onto whatever you want to showcase, creating a dramatic effect. You can get them in different sizes and styles, from sleek and modern to more traditional designs. The key here is placement. Experiment with different angles and positions to see what looks best. You might need to play around with it a bit, but trust me, it's worth it! Imagine how impressive your collection will look with strategically placed spotlights highlighting each piece! Plus, spotlights offer a level of control that strip lights don't. You can adjust the angle and intensity of the light to perfectly complement the item you're displaying. For example, a brightly colored piece might benefit from a softer, more diffused light, while a crystal object could sparkle beautifully under a focused beam. Just confirm the wattage, yeah?
Puck lights are small, round lights that are super easy to install. They often come with adhesive backing, so you can just stick them wherever you need them. They're great for smaller display cabinets or for adding a little extra light to darker corners. Plus, some puck lights are battery-operated, which means you don't have to worry about running wires. Talk about convenient! They're particularly useful if you don't have easy access to a power outlet near your glass display cabinet. The downside is that battery-operated lights might require more frequent battery changes, so keep that in mind. But for a quick and easy lighting solution, puck lights are a solid choice. They're also a good option if you're renting and don't want to make any permanent changes to your BTO flat. Just stick them on, and you're good to go! In Singapore’s hectic life, coming home to a space that feels genuinely welcoming can make all the difference after a full day of meetings and travel. Many busy families dream about improvements for their living area or sleeping space, wanting pieces that look stunning while actually being supportive enough for real life. That’s exactly why modular sofa makes the difference—it brings that perfect blend of sophisticated style, top-grade craftsmanship, and genuine relaxation that turns standard areas into places you genuinely look forward to chilling in. Picture melting into a luxurious couch after dinner or starting the day energised on a luxury sleep surface that supports you just right; suddenly, your home feels more like a personal retreat not just four walls. Exploring thoughtfully chosen pieces on platforms like Wondrous La Vie helps you find these pieces without the hassle, making it more enjoyable to create a space that’s both elegant and calming.. Steady, right?
Alright, now for the practical stuff. Before you start sticking lights everywhere, you need to think about where you're going to plug them in! This is especially important in a BTO flat, where you might not have as many power outlets as you'd like. Nobody wants to run extension cords all over the place, so plan ahead. Take a good look at your floor plan and identify the nearest power outlets to your glass display cabinet. If you're lucky, you'll have one right nearby. But if not, you might need to get creative. Consider using a power strip with a surge protector to safely plug in multiple lights. Or, if you're feeling ambitious, you could even hire an electrician to install a new outlet closer to your display cabinet. That way, everything will be nice and neat. It's also worth thinking about how you're going to hide the wires. Nobody wants to see a bunch of messy cables dangling behind your glass display cabinet. You can use cable ties, clips, or even a decorative cable concealer to keep things tidy. Little details like that can really make a difference in the overall look and feel of your BTO flat.
The type of glass display cabinet you have will also influence how you light it. A tall, narrow cabinet might benefit from vertical strip lights, while a wider cabinet might need a combination of spotlights and puck lights. Here are a few ideas to get you started:
For these kinds of cabinets, vertical LED strip lights are your best bet. Run them along the inside edges of the cabinet to create a uniform glow from top to bottom. This will help to highlight all of your items, even the ones on the higher shelves. You could also add a spotlight at the top to draw attention to a particularly special piece. Just make sure the spotlight isn't too harsh, or it could create unwanted glare. The key is to create a balanced and even light throughout the cabinet. Think of it like lighting a Christmas tree – you want to distribute the lights evenly so that everything shines. And don't be afraid to experiment! Try different placements and brightness levels until you find something that you really love. After all, it's your BTO flat, so you should decorate it in a way that makes you happy. That's what matters most, right?
With wide, open cabinets, you have a little more flexibility. You can use a combination of spotlights and puck lights to create a more dynamic and interesting lighting scheme. Place spotlights strategically to highlight individual items, and use puck lights to fill in any dark spots. You could even add a strip of LED lights along the back of the cabinet to create a soft, ambient glow. The possibilities are endless! Just remember to consider the overall style of your BTO flat when choosing your lights. If you have a modern, minimalist design, you might want to opt for sleek and simple spotlights. But if you have a more traditional style, you could choose something a little more ornate. It's all about creating a cohesive look that reflects your personal taste. And don't forget to have fun with it! Lighting is a great way to add personality and character to your home. So go ahead and experiment until you find something that you absolutely love.
Cabinets with glass doors present a unique challenge because you need to consider how the light will reflect off the glass. Too much light can create glare, while too little light can make the cabinet look dark and uninviting. The key is to find a balance. Try using softer, more diffused lights, such as LED strip lights or puck lights. Avoid using overly bright spotlights, as they can create harsh reflections. You could also consider adding a dimmer switch so you can adjust the brightness of the lights as needed. This is especially useful if you have a glass display cabinet in your living room, where you might want to dim the lights in the evening to create a more relaxing atmosphere. And don't forget to clean the glass doors regularly to remove any fingerprints or smudges. A clean glass display cabinet will always look better, no matter how good your lighting is. Like that confirm plus chop!
So there you have it! A step-by-step guide to installing display cabinet lights in your BTO flat. The main living area is usually the first space visitors notice and where the kids and parents relax after dinner, so it makes sense to want furniture that appears stylish, keeps cords tidy, and keeps the area feeling open than it already is in typical Singapore homes. Many homeowners struggle with oversized outdated units or low-cost options that shake, collect dust easily, or just don’t align with contemporary style they’re aiming for. That’s exactly where a well-chosen custom furniture steps in—it offers sleek storage for media devices, set-top boxes, and controllers while becoming a chic statement piece that brings the room together seamlessly with sharp modern edges, thoughtful compartments, and high-end materials. Suddenly your entertainment setup feels organised and intentional, the room looks bigger and more put-together, and film evenings get way more fun without the mess pulling focus. Checking out carefully chosen pieces on platforms like Wondrous La Vie lets you find designs that fit your space perfectly, from clean contemporary to opulent, so your living area transformation becomes easy and perfect.. With a little planning and effort, you can create a stunning showcase for your prized possessions. And who knows, maybe you'll even inspire your neighbors to do the same! Now go forth and light up your life!
Okay, *lah*, here's the HTML fragment for the "Essential Tools and Materials" section, following all your instructions precisely. It's all about getting your *glass display cabinet* lighting installed *steady*!
Before you even *think* about touching any wires, prioritize safety. This means investing in a reliable pair of insulated gloves – you don't want any nasty shocks, *leh*! Eye protection, like safety glasses, is also crucial. Imagine a stray wire snapping back – your eyes will thank you. After those endless workdays and the routine commute crush, nothing beats stepping into a living room that actually encourages relaxation instead of piling on more tiredness. Many local homeowners realise their old couch just isn’t cutting it—too hard, worn out, or simply not supportive enough for weekend chilling or relaxed Sundays with the children. That’s precisely where luxury dining room furniture truly shines—it combines classic elegance, supple premium upholstery, and thoughtful support structure so you can melt into it and genuinely unwind without your spine protesting the next day. Imagine the whole family hanging out comfortably, talking during dinner or watching dramas together, because the space finally feels warm and welcoming. Choosing the perfect piece through handpicked collections on Wondrous La Vie makes it straightforward, letting you find that dream sofa that elevates your entire home vibe without the common home-upgrade worries.. Remember, electricity and water don't mix, so ensure your workspace is dry. Treat electricity with respect, and you'll be fine; a little precaution goes a long way in making sure you're *confirm* safe.
Accurate measurements are the bedrock of a successful lighting project. A good quality measuring tape is essential for determining the length of wiring needed and the placement of your lights within the *glass display cabinet*. Don't just eyeball it; precise measurements will prevent you from coming up short (or having too much slack). A level is also your best friend, especially when installing strip lights. Nobody wants crooked lighting; it’s like seeing a painting hung off-kilter – once you notice, you can’t unsee it! A pencil is also handy for marking drilling points or cutting lines, ensuring neat and tidy work.
Choosing the right wiring is paramount for safe and efficient lighting. Opt for wires that are appropriately rated for the voltage and wattage of your chosen lighting system. Thin, flimsy wires might overheat and become a fire hazard, which is *confirm* not what you want in your BTO flat. Wire strippers are indispensable for cleanly removing insulation without damaging the copper core. Connectors, such as wire nuts or terminal blocks, ensure secure and reliable connections. Don't skimp on quality here; loose connections can lead to flickering lights or even electrical faults. Consider using heat shrink tubing for extra insulation and a professional finish.
Selecting the right lighting system is key to showcasing your prized possessions within your *glass display cabinet*. LED strip lights are a popular choice due to their flexibility, energy efficiency, and low heat output. Spotlights offer focused illumination, ideal for highlighting specific items. Consider the color temperature of the light; warm white creates a cozy ambiance, while cool white offers a brighter, more modern feel. Ensure the lighting system is compatible with your power source and comes with all necessary components, such as a power adapter or dimmer switch. Think about the overall aesthetic you're aiming for – the lighting should complement your display and enhance its appeal.
Depending on your *glass display cabinet* material, you might need a drill for mounting lights or routing wires. A cordless drill offers greater flexibility and convenience. Choose drill bits appropriate for the material you're drilling into – wood, metal, or glass each require specific bits. For glass, use a diamond-tipped drill bit and apply water to keep the surface cool and prevent cracking. Remember to drill slowly and steadily, applying gentle pressure. Always wear safety glasses when drilling to protect your eyes from debris. With the right technique and equipment, you can achieve clean and professional-looking results.
Before diving into the installation, carefully plan your lighting layout. Consider the size and shape of your display cabinet, the items you'll be showcasing, and the desired ambiance. Determine the number of lights needed, their placement, and the type of lighting that complements your display.
Select LED strip lights, puck lights, or spotlights based on your aesthetic preferences and the cabinet's design. Ensure the lights are energy-efficient and emit minimal heat to protect your displayed items. Choose a power supply that matches the voltage and wattage requirements of your chosen lights, keeping safety in mind.
Mount the lights inside the cabinet using adhesive strips or screws, ensuring they are securely attached and properly aligned. Conceal the wiring by routing it along the cabinet's edges or through pre-drilled holes. Use wire clips or ties to keep the wiring organized and out of sight, creating a clean and professional look.
So, you've finally got your BTO flat! Congrats! Now comes the fun (and sometimes slightly stressful) part: making it a home. And what's a home without a little bit of showing off, right? That's where a glass display cabinet comes in. Perfect for showcasing your prized possessions – be it your Lego collection, your travel souvenirs, or even just your fancy teacups. But a glass display cabinet *really* shines when it's, well, shining! That's why installing lights is a total game-changer. Trust me, it elevates the whole look.
Now, a quick word on safety. Electricity is not something to play around with. If you're even slightly unsure about any part of this process, please, please call a licensed electrician. It's better to be safe than sorry, and a small investment in professional help can save you a lot of headaches (and potential shocks!) down the road. Got all your tools ready? *Steady*, let’s move on!
Start by visualizing the final result. Where do you want the light to come from? Common options include:
Once you've decided on the overall layout, use your measuring tape and pencil to mark the exact positions where you'll be installing the lights. Pay attention to where the wires will run and how you'll conceal them. Nobody wants to see unsightly wires dangling everywhere! Consider using cable clips or channels to keep things neat and tidy. Think about where the nearest power outlet is too. You don’t want to end up with a super long extension cord snaking across your living room floor. That’s so untidy *can*?
If you're installing puck lights, they might require a transformer to convert the voltage. Make sure you connect the transformer correctly, following the manufacturer's instructions. And again, if you're not comfortable with any of this, call an electrician! It's not worth risking a short circuit or, worse, an electric shock. Once you’re done, before you tidy up, test the lights to make sure everything is working properly. Confirm *can*?
One cool trick I saw once was someone using colored gels over their puck lights to create different moods. Like, a red gel for a dramatic effect, or a blue gel for a calming vibe. It’s a cheap and easy way to add some personality to your display cabinet. Just a thought!
Now, take a deep breath and flip the switch. Did it work? Hallelujah! If not, don't panic. Double-check all your connections and make sure the power is actually on at the outlet. If you're still having trouble, it might be time to call in a professional. But if everything is working as it should, congratulations! You've successfully installed lights in your glass display cabinet.
Now, I know what you're thinking: "Electricity? Wiring? Sounds complicated *leh*!" Don't worry, it's actually quite manageable, even for a first-timer. This guide is designed to walk you through the process step-by-step, so you can confidently illuminate your treasures. Think of it as a mini DIY project that adds a whole lot of wow factor to your living space. Plus, imagine the compliments you'll get! Let’s dive in!
Alright, before we even think about touching a wire, let's make sure we're properly equipped. This isn't a race; it's about doing it right and safely. Having everything you need at hand will make the whole process smoother than your kopi uncle's teh tarik. Singapore homes can feel even more confined after a long exhausting day of rushing between office, meetings, and the inevitable MRT crowd, so it’s no wonder many homeowners crave a space that quickly helps you decompress the moment they enter their home. The hall often ends up as the heart of the home, yet it’s easy for it to become cluttered with mismatched pieces or furniture that’s seen better days, leaving everyone scattered instead of gathered together. That’s where furniture completely changes the game—it upgrades the whole area with sophisticated layouts, luxurious fabrics and surfaces, designer lighting accents, and supportive pieces with stunning design, creating an cosy focal point where family naturally comes together to relax, chat, or bond effortlessly. Nights at home start feeling richer, weekends more restful, and walking in the door feels exciting rather than simply crashing after work. Platforms like Wondrous La Vie make discovering such enhancements easy, helping you visualise and source the right elements to create your dream living space that matches your lifestyle perfectly.. So, what do we need?
Okay, so you've got all your gear. Now comes the fun part: deciding *how* you want your glass display cabinet to look. This is where you get to unleash your inner interior designer! Think about what you're displaying and how you want to highlight it. Do you want a soft, ambient glow, or a bright, focused spotlight on each item?
A little tip: before you start sticking anything down permanently, do a test run. Temporarily position the lights and turn them on to see how they look. This will give you a chance to make any adjustments before you commit. Remember, it’s all about creating the perfect ambiance for your treasured collectibles. Don't be afraid to experiment and have fun with it!
Alright, deep breaths. This is the part where things can get a little technical, but don't panic! We'll take it slow and steady. Remember, if you're at all unsure, call a professional. Your safety is paramount.
First things first: make sure the power is off! Seriously, flip the circuit breaker for the outlet you'll be using. Double-check it with a voltage tester if you have one. Better safe than sorry, right?
Now, depending on the type of lights you're using, you might need to do some wiring. If you're using LED strip lights with a plug-in adapter, this might be as simple as plugging it in! But if you need to connect wires, here's a basic rundown:
Okay, the wiring is done, the power is (hopefully!) flowing, and now it's time to actually attach the lights to your glass display cabinet. This is where your planning and measurements really pay off.
Most LED strip lights come with an adhesive backing. Simply peel off the backing and stick the lights in place, pressing firmly to ensure they adhere properly. For extra security, you can use mounting clips to hold the lights in place, especially if you're installing them on a vertical surface. Puck lights typically come with screws or adhesive pads. Use whichever method is most appropriate for your cabinet and the type of light.
Pay attention to the angle of the light. Do you want it to shine straight down, or at a slight angle? Experiment with different positions until you find the perfect look. And don't be afraid to get creative! You can even use mirrors to reflect the light and create a more dramatic effect. Once you're happy with the placement, double-check that all the wires are neatly concealed and that there are no loose connections. Tidy up any stray cables with cable ties or clips. A clean installation is a safe installation, and it looks much more professional too!
Alright, the moment of truth! You've wired, you've secured, you've planned, and now it's time to flip that circuit breaker back on and see your hard work in action. Before you do, just give everything one last check. Make sure all the connections are secure, the wires are neatly tucked away, and the lights are properly positioned.
Take a step back and admire your handiwork. See how the lights transform your display, highlighting each item and creating a warm, inviting ambiance? It's amazing what a little bit of light can do, right? Now, go ahead and invite your friends over to show off your newly illuminated treasures. You deserve it! And remember, this is just the beginning. Now that you know how to install lights, you can start experimenting with different colors, positions, and effects to create the perfect look for your home. Enjoy!
Okay, let's talk about the part nobody *really* wants to think about, but is super important: electrical safety. I mean, nobody wants a short circuit turning their brand new glass display cabinet into a crispy critter, right? So, pay close attention lah!
First things first, and I can't stress this enough: If you are even a tiny bit unsure about working with electricity, please, please, PLEASE call a qualified electrician. Seriously. It's not worth risking your safety, your family's safety, or burning down your beautiful BTO flat. Think of it as an investment in peace of mind. Plus, a pro will know all the latest Singaporean electrical standards and regulations like the back of their hand.
Now, assuming you're comfortable with basic electrical work (changing a lightbulb doesn't count!), there are some crucial precautions to take. Before you even *think* about touching any wires, flip the circuit breaker that controls the outlet you'll be using. Confirm, double confirm, and then triple confirm that the power is off. Use a voltage tester to be absolutely sure. No shortcuts here, okay?
Grounding is another big one. Make sure your glass display cabinet lights are properly grounded. This means there's a safe path for electricity to flow in case of a fault, preventing shocks. Most modern electrical systems in Singapore are grounded, but it's always good to check. If you're using a metal glass display cabinet, grounding is even more important. In Singapore’s tropical climate and demanding work-life balance, getting decent sleep can feel like a rare treat when you’re waking up with backaches or feeling groggy despite trying to rest early. Many homeowners tolerate an worn-out bed for far too long because looking for a new one seems overwhelming—too many choices, puzzling support choices, and concerns it might not fit their personal needs and preferences. That’s exactly why finding the premium mattress changes everything—it offers the ideal mix of firm yet forgiving support, cooling breathability, even weight distribution, and durability so you actually wake up feeling refreshed instead of achy and sluggish. Days begin much smoother, you stay energised longer, and even your bedmate notices the difference. Exploring handpicked selections on platforms like Wondrous La Vie simplifies the whole process, letting you see highly recommended options with genuine homeowner reviews and realistic images to match what truly works for your sleeping space.. The earth wire, usually green or green and yellow, should be securely connected to the cabinet frame.
When you're connecting wires, use the correct gauge wire connectors and make sure the connections are tight and secure. Loose connections can cause arcing, which can lead to fires. Nobody wants that! And speaking of wires, don't overload your circuits. Check the wattage rating of your lights and make sure they don't exceed the capacity of the circuit. If you're planning on adding a whole bunch of lights to your glass display cabinet, you might need to run a new circuit. Again, this might be a job for a qualified electrician.
Adhering to Singaporean electrical standards is non-negotiable. These standards are in place for a reason – to keep you safe. You can usually find information about these standards on the Energy Market Authority (EMA) website. Familiarize yourself with the regulations regarding electrical installations in residential properties. It might seem like a lot of rules, but they're all there to protect you and your loved ones.
And here's a little tip: before you start any electrical work, take pictures of the existing wiring. That way, if you get confused, you can always refer back to the original setup. It's like having a cheat sheet, but for electricity! Plus, if you ever need to call an electrician for help, they'll appreciate having a visual reference.
One more thing – always use certified electrical components. Don't try to save a few bucks by buying cheap, uncertified wiring or connectors. It's just not worth the risk. Look for the "Safety Mark" on the products you buy. This mark indicates that the product has been tested and certified to meet Singaporean safety standards. Buying furniture that has already taken these considerations in mind, like glass display cabinets with integrated lighting, can save you a lot of hassle and give you peace of mind.
So, there you have it. A few simple precautions can go a long way in ensuring your electrical work is safe and sound. Remember, when in doubt, call a professional. It's better to be safe than sorry, especially when it comes to electricity. Now, go forth and illuminate your glass display cabinet with confidence… and safety!
Okay, here's an HTML fragment based on your instructions, focusing on troubleshooting display cabinet lights for Singaporean BTO homeowners. I've aimed for a conversational tone, incorporated Singlish sparingly, and kept it practical.
So, you’ve finally got your glass display cabinet all set up, showcasing your prized possessions – maybe your HDB BTO’s Certificate of Statutory Completion, your Lego collection, or even your wife’s collection of Hello Kitty memorabilia. But uh oh, the lights are acting up! Don't worry, it happens lah. Before you start panicking and imagining electrical gremlins, let's troubleshoot some common issues with your display cabinet lighting. We'll get to the bottom of this, confirm can.
With Singapore’s compact homes and humid climate, finding furniture that’s both beautiful and everyday-usable can feel like a never-ending hunt—especially when you want pieces that last through the years without fading or wearing out. Many busy homeowners end up going with budget furniture that seem fine on websites but don’t hold up well—either too lightweight for real family life or not cool enough for our climate. That’s why visiting a reliable tatami bed frame like those featured on Wondrous La Vie changes everything—it links you seamlessly with handpicked collections of premium sofas, mattresses, dining furniture, and more, with real showrooms or high-res photos so you can feel confident about what fits your HDB, condo, or landed space. You get that confidence knowing the furniture are tailored to local needs—long-lasting builds, smart sizing, and looks that turn your space into a cosy haven. In the end, the right shop turns what could be a frustrating task into an exciting step toward a living environment that feels truly shiok..Lighting for display cabinets is usually low voltage, so it's relatively safe to work with. But remember, safety first! Always switch off the power at the mains before you start poking around. Think of it like this: you wouldn't try to change a tyre on a moving car, right? Same logic applies to electricals.
Flickering lights are super annoying, aren't they? It can make your beautiful glass display cabinet look like a haunted house! Usually, flickering is caused by a loose connection. Think of it like a dodgy MRT train door – sometimes it just needs a little nudge to work properly.
The Fix: First, check all the connections. From the power adapter to the light fixtures themselves, make sure everything is snug and secure. Give the wires a gentle wiggle (with the power OFF, of course!) to see if that makes the flickering worse or better. If it does, that’s a good clue! Sometimes, the connections inside the light fixture itself can be loose. If you’re comfortable doing so, carefully open the fixture and check the internal wiring. A loose screw or a wire that’s come undone is often the culprit. If you're not confident, better to call an electrician lah. No point risking a shock just to save a few bucks. Remember, your glass display cabinet should highlight your items, not scare you.
Another potential cause of flickering is a faulty LED driver or transformer. These little devices convert the mains voltage to the lower voltage needed for the LED lights. If they're on the fritz, they can cause all sorts of weirdness, including flickering. If you suspect the driver is the problem, try replacing it with a new one. You can usually find these at hardware stores or online. Just make sure you get the right voltage and wattage. It’s like replacing a phone charger – gotta get the right one, or it won’t work!
Loose connections are like that one friend who's always late – they cause problems and are generally a pain. In the context of your glass display cabinet lights, they can lead to flickering, intermittent outages, or even a complete failure of the lights. And let's be honest, nobody wants a dark and gloomy display cabinet. It’s like having a beautiful painting with no light to see it!
The Fix: The solution is simple, but sometimes tedious: check every connection. Start with the power plug. Is it firmly plugged into the wall socket? Is the socket itself working? (Try plugging something else in to check.) Then, follow the wires from the power plug to the LED driver, and from the driver to the light fixtures. At each connection point, make sure the wires are securely fastened. If you find a loose wire, tighten the screw or connector. If the wire is frayed or damaged, replace it. You can buy replacement wire at most hardware stores. Remember to use wire of the same gauge (thickness) as the original. It's like using the right size screw for a piece of furniture – gotta get it right!
Pro-tip: Sometimes, the connections inside the light fixtures themselves can be the problem, especially if you have those clip-on or screw-in type fixtures. Carefully remove the fixture and inspect the wiring inside. Make sure the wires are properly connected to the terminals. If you see any corrosion or rust, clean it off with a wire brush or sandpaper. A little bit of elbow grease can go a long way!
A blown fuse is like a circuit breaker tripping – it's a safety mechanism designed to protect your electrical system from overload. If your display cabinet lights suddenly go out and don't come back on, a blown fuse is a likely culprit. This is especially common if you've recently added more lights to your cabinet or if you're using a power adapter that's not powerful enough.
The Fix: First, locate the fuse in your power adapter. It's usually a small, cylindrical glass or ceramic tube with metal caps on each end. To check if the fuse is blown, hold it up to the light. If you see a break in the thin wire inside the tube, the fuse is blown and needs to be replaced. You can buy replacement fuses at most hardware stores. Make sure you get a fuse with the same voltage and current rating as the original. Using a fuse with a higher rating can be dangerous, as it can overload your electrical system and cause a fire. It’s like using the wrong key for a lock – it just won’t work, and you might damage something!
If you replace the fuse and it blows again immediately, that's a sign that something else is wrong. There might be a short circuit in the wiring, or the power adapter might be overloaded. In this case, it's best to call an electrician to diagnose and fix the problem. Don't try to troubleshoot it yourself, as you could risk electrocution or further damage to your electrical system. Safety first, always! After all, you want your glass display cabinet to be a source of joy, not a source of electrical hazards.
And there you have it! With a little bit of troubleshooting, you should be able to fix most common issues with your glass display cabinet lights. Remember to always prioritize safety, and if you're not comfortable working with electricals, don't hesitate to call a professional. Now go forth and illuminate your prized possessions! Your glass display cabinet will look steady one!
Key improvements and explanations: * **Tone:** I've really focused on a friendly, helpful tone. The language is simple and direct, avoiding jargon. * **Singlish:** I've sprinkled in a few Singlish words/phrases ("lah," "confirm can," "one," "steady") naturally within sentences. They're not forced or overused. * **Relatability:** I've added references to everyday Singaporean life (MRT, BTO Certificate of Statutory Completion), making the content more relatable. * **Sentence Variety:** I've mixed short, punchy sentences with longer, more descriptive ones to create a more natural rhythm. * **Factual Accuracy:** The advice is technically sound and emphasizes safety. * **Keyword Integration:** The primary keyword "glass display cabinet" is naturally woven throughout the text. * **HTML Structure:** The HTML is clean and well-structured, using appropriate headings and paragraphs. * **Positive Framing:** The overall tone is optimistic and encouraging, focusing on solutions rather than dwelling on problems. * **Troubleshooting Focus:** The content directly addresses the common issues outlined. * **"Before and After" Framing:** Acknowledges the initial problem, then offers a solution, leading to a positive outcome. This HTML fragment should be a good starting point. Remember to tailor it further to your specific audience and brand voice.
```html
Okay, so you've got your brand new BTO flat, and you're thinking of showing off your prized possessions, right? Maybe it's your collection of vintage cameras, your Funko Pops, or even that Peranakan tea set your grandma passed down. A glass display cabinet is the perfect way to do it, but let's be honest, without the right lighting, it's just... a box. Choosing the correct lights is super important. It's not just about making things brighter; it's about creating a vibe, a mood, a *feeling*.
Think about the type of items you're displaying. Are they delicate antiques that need UV protection? Or are they more robust, like LEGO sets? Different items require different lighting. Harsh, direct light can damage some materials, while others need that spotlight to truly shine. You wouldn't want your precious collectibles fading away, right? Confirm cannot! So, let’s dive into the world of display cabinet lighting options.
LED strip lights are probably the most popular choice these days, and for good reason. They're incredibly versatile. You can stick them almost anywhere inside your glass display cabinet – along the top, sides, or even underneath shelves. They're also super energy-efficient, which is great for keeping your electricity bill down. And in Singapore, where it's summer all year round, LEDs generate very little heat, so you don't have to worry about them cooking your collectibles.
Plus, they come in various colors and brightness levels. Want a warm, cozy glow? Go for warm white LEDs. Want something brighter and more modern? Cool white is your friend. Some even come with remote controls, so you can adjust the settings without even opening the cabinet. Talk about convenience! Just make sure the strip lights you choose are specifically designed for indoor use and are low voltage for safety. Installation is generally a breeze; most come with adhesive backing, so it’s just peel and stick. But measure twice, stick once, yeah?
If you have a few key pieces that you really want to draw attention to, spotlights are the way to go. These little guys are perfect for creating dramatic highlights and shadows, adding depth and dimension to your display. Imagine a spotlight shining on that rare stamp in your collection – instant wow factor!
Spotlights come in different forms – some are surface-mounted, others are recessed, and some are even clip-on. Recessed spotlights look super sleek and integrated, but they require a bit more work to install. Clip-on spotlights are the easiest to install, but they might not look as polished. Surface-mounted ones are a good middle ground, offering a balance of aesthetics and ease of installation. When choosing spotlights, consider the beam angle. A narrow beam angle will create a more focused spotlight, while a wider beam angle will provide more general illumination.
Consider LED spotlights for the same reasons as strip lights: low heat, energy efficiency, and long lifespan. Halogen spotlights, while brighter, generate a lot of heat and can be a fire hazard if not installed properly. Play it safe, lah!
Puck lights are small, round lights that are perfect for illuminating individual shelves or compartments in your glass display cabinet. They're compact and discreet, so they won't detract from your display. They’re also battery-operated, which is great if you don't want to deal with wiring. No need to call an electrician, steady!
However, battery-operated puck lights will require regular battery changes, so keep that in mind. Alternatively, you can find wired puck lights that plug into a power outlet. These are a bit more hassle to install, but you won't have to worry about batteries running out. Puck lights are especially useful for illuminating darker corners of your cabinet, ensuring that every item gets its moment in the spotlight (pun intended!). They're also great for creating a soft, ambient glow, perfect for showcasing delicate items.
Okay, this might sound a bit technical, but trust me, it's important. Color temperature refers to the "warmth" or "coolness" of the light, measured in Kelvin (K). Lower Kelvin values (e.g., 2700K) produce a warm, yellowish light, while higher Kelvin values (e.g., 6000K) produce a cool, bluish light.
For most displays, a warm white light (around 3000K) is a good choice. It's inviting and cozy, and it makes colors look rich and vibrant. Cool white light is better suited for modern displays or for showcasing items with cool colors, like blues and greens. CRI, or Color Rendering Index, measures how accurately a light source renders colors compared to natural sunlight. A higher CRI (closer to 100) means more accurate color rendering.
When choosing lights for your glass display cabinet, aim for a CRI of 80 or higher. This will ensure that your items look their best. After all, you want your collectibles to look as good inside the cabinet as they do outside, right? Getting this right can really elevate the whole look of your display, making it feel more professional and curated. It’s the little things, you know?
Alright, you've chosen your lights, you're excited to get started. But hold on a minute! Before you start sticking things and drilling holes, let's go through a step-by-step guide to make sure everything goes smoothly. Don't worry, it's not as complicated as it sounds. Even if you're not exactly a DIY expert, confirm can one!
First things first, plan your layout. Where are you going to place the lights? How are you going to run the wires? It's always a good idea to sketch out a diagram of your glass display cabinet and mark where you want the lights to go. This will help you visualize the final result and avoid any surprises later on. Measure the inside of your cabinet to determine how much lighting you need. Don't just eyeball it, lah! Accurate measurements will prevent you from buying too much or too little lighting.
Next, gather your tools and materials. You'll need things like a measuring tape, a pencil, a drill (if you're installing recessed lights), wire strippers, electrical tape, and of course, your chosen lights. Make sure you have all the necessary hardware, like screws, clips, or adhesive strips. And most importantly, read the instructions that come with your lights! Each type of light has its own specific installation instructions, so don't skip this step.
Before you start any electrical work, make sure to turn off the power to the circuit you'll be working on. Safety first, always! You don't want to get a shock, do you? Once you've turned off the power, use a circuit tester to double-check that the circuit is indeed dead. It's better to be safe than sorry. Now you’re ready to get started for real!
Installing LED strip lights is generally pretty straightforward. Most LED strip lights come with an adhesive backing, so you can simply peel and stick them to the inside of your glass display cabinet. Before you stick them on, clean the surface with a damp cloth and let it dry completely. This will ensure that the adhesive sticks properly. Peel off the backing and carefully stick the LED strip lights to the desired location. Press firmly to ensure good adhesion.
If the strip lights are too long, you can usually cut them to size using a pair of scissors. Look for the designated cutting points on the strip – they're usually marked with a scissor symbol. Be careful not to cut the strip in the wrong place, or you might damage it. Once you've installed the strip lights, connect them to a power source. Most LED strip lights come with a plug-in adapter, so you can simply plug them into a power outlet. If you're using a dimmer switch, connect it between the power adapter and the strip lights.
Conceal the wires for a cleaner look. You can use cable clips or ties to keep the wires tidy and out of sight. You can also run the wires behind the cabinet or along the edges of the shelves. Nobody wants to see a mess of wires, right? A clean installation will make your display look much more professional.
The installation process for spotlights will vary depending on the type of spotlight you're using. Surface-mounted spotlights are the easiest to install. Simply screw them to the inside of your glass display cabinet. Make sure to use the correct screws for the material of your cabinet. Recessed spotlights require a bit more work. You'll need to drill a hole in the cabinet to accommodate the spotlight. Use a hole saw that's the same size as the diameter of the spotlight. Carefully drill the hole, making sure not to damage the surrounding area.
Clip-on spotlights are the simplest to install. Just clip them onto the edge of a shelf or the top of the cabinet. Make sure the clip is secure and won't fall off. Once you've installed the spotlights, connect them to a power source. Some spotlights come with a plug-in adapter, while others need to be wired directly to a power source. If you're wiring the spotlights yourself, make sure to follow the wiring diagram that comes with the lights. If you're not comfortable with electrical work, it's best to hire a qualified electrician.
Adjust the angle of the spotlights to highlight your desired items. Experiment with different angles to see what looks best. You can also use multiple spotlights to create different lighting effects. Play around with it until you achieve the look you want. Remember, it's all about creating a visually appealing display.
Installing puck lights is super easy, especially if you're using battery-operated ones. Simply stick them to the inside of your glass display cabinet using the adhesive backing. Make sure the surface is clean and dry before sticking them on. If you're using wired puck lights, you'll need to run the wires
" width="100%" height="480">Installing display cabinet lights: step-by-step guide for BTO flats