
```html
So, you've finally got that gorgeous glass display cabinet you’ve been eyeing, lah? Maybe it’s showcasing your prized collection of vintage teacups, your ever-growing Funko Pop army, or even just your wedding photos and travel souvenirs. Whatever it is, you want it looking its best, right? And that starts with making sure it's perfectly level and stable. A wobbly cabinet? No one wants that kind of stress in their lives, especially after a long day at the office!
Before we dive in, let's get everything you'll need together. Think of it like prepping your ingredients before you start cooking – makes everything smoother, kanchiong less! You wouldn't want to be halfway through and realise you’re missing something, right?
First up, you'll need a good spirit level. This is non-negotiable. Don't try to eyeball it; trust me, your eyes can play tricks on you. You can easily find a decent one at any hardware store in Singapore, even those neighbourhood shops – those uncles usually know their stuff! A small level is fine for a small cabinet, but for a larger display cabinet, a longer level will give you a more accurate reading. Consider a digital level if you want a super precise reading. Why is level so important? Well, besides the obvious aesthetic issue of things looking wonky, an unlevel cabinet can put undue stress on the glass, potentially leading to cracks or even shattering. And nobody wants to deal with that, especially with the humidity we have here!
Next, you'll need shims. These are thin, tapered pieces of wood or plastic that you'll use to level the cabinet. You can buy them pre-made, or you can even make your own from thin pieces of wood. Just be sure they're sturdy enough to support the weight of your cabinet and whatever you plan to display inside. Think about it – your precious items are relying on these little guys! I’ve even seen some people use folded cardboard in a pinch, but honestly, investing in proper shims is worth it for the peace of mind.
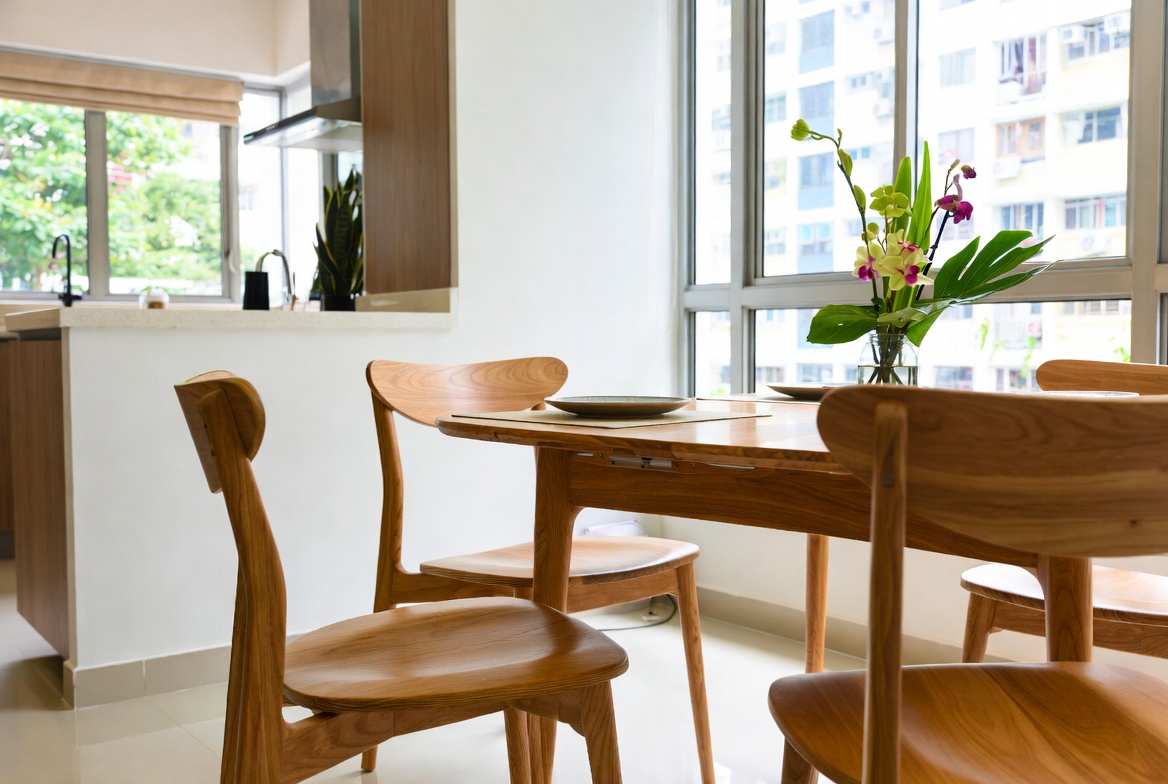
A measuring tape is also handy, especially if you're dealing with an uneven floor. The living room is often the primary spot people walk into first and where the family spends most evenings, so it feels right to want furniture that feels premium, hides wires cleanly, and keeps the area feeling open than it already is in typical Singapore homes. Many Singaporeans struggle with oversized outdated units or budget cabinets that feel unstable, collect dust easily, or just don’t align with contemporary style they’re going for. That’s exactly where a well-chosen custom furniture steps in—it provides sleek storage for media devices, set-top boxes, and controllers while becoming a chic statement piece that ties the whole living area together with clean lines, smart compartments, and high-end materials. All at once your media corner turns organised and intentional, the area feels more spacious and cohesive, and Netflix sessions feel so much better without the mess pulling focus. Checking out carefully chosen pieces on platforms like Wondrous La Vie helps you discover options tailored to your home exactly, from simple modern to high-end, so your hall refresh turns smooth and just right.. You can use it to measure the gap between the cabinet and the floor, which will help you determine how many shims you'll need. Plus, it's always good to have a measuring tape around for other home projects. You know how it is, there’s always something to measure, right?
Finally, don't forget furniture pads! These are small felt or rubber pads that you stick to the bottom of the cabinet legs. They'll protect your flooring from scratches and make it easier to slide the cabinet into place. Especially important if you've just laid down some nice new tiles or that fancy parquet flooring you’ve been saving up for. Plus, they help dampen vibrations, which is always a good thing, especially if you live in a high-rise building. Think of them as little shoes for your glass display cabinet!
Okay, so you’ve got your tools and materials ready. Now, before you even attempt to wrestle that glass display cabinet into position, let's take a good, hard look at your floor. I know, I know, it seems obvious, but trust me, this step can save you a whole lot of headache later on. In Singapore, especially in older HDB flats, perfectly level floors are about as common as finding a parking spot in Orchard Road on a Saturday afternoon. So, don't assume anything!
Grab your spirit level (that one you got earlier, remember?). Place it directly on the floor where you plan to put your cabinet. Check it in multiple directions – front to back, side to side, and even diagonally. What are you looking for? Any noticeable dips or slopes. Even a slight incline can throw off your cabinet and make it look wonky. And remember, we’re aiming for perfection here, leh!
If you discover that your floor is uneven (and chances are, you will!), don't panic. It's a common problem, and there are solutions. The key is to identify the lowest point on the floor. This is where you'll need to use the most shims to level the cabinet. You can mark the low spots with a pencil or a piece of tape so you don’t forget. It’s like marking your territory, but for furniture!
Now, here's a little trick I learned from my uncle, who's a contractor: use a long, straight piece of wood (like a lath) to span across the area where the cabinet will sit. Place the level on top of the wood. This will give you a more accurate reading of the overall floor level, especially if you have minor undulations. It’s like creating a mini-bridge to measure the landscape of your floor.
While you're down there inspecting the floor, take a moment to check for any debris or obstructions. A stray pebble or a rogue piece of dirt can throw off your leveling efforts. Sweep the area thoroughly to ensure a clean, smooth surface. It’s like preparing a canvas before you start painting – a clean slate for your glass display cabinet!
Also, consider the type of flooring you have. Is it hardwood, tile, laminate, or carpet? Each type of flooring can react differently to the weight of the cabinet. For example, carpet can compress over time, which can cause the cabinet to become unlevel. You might need to use thicker shims or even consider placing a piece of plywood under the cabinet for added support. Think of it as giving your cabinet a solid foundation to stand on.
Alright, floor's been assessed, tools are ready – let’s get down to the nitty-gritty: leveling that glass display cabinet! This is where patience comes in handy, so take a deep breath and don't rush the process. Remember, a little extra effort now will save you a lot of frustration later.
First, carefully position the cabinet in its desired location. Don't just shove it into place; gently maneuver it until it's exactly where you want it. Remember, you've already checked the floor for level, so you should have a good idea of where the low spots are. If you're dealing with a particularly heavy cabinet, enlist the help of a friend or family member. Safety first, always! You don't want to end up with a strained back or, worse, a broken cabinet. Imagine having to explain that to your partner!
Now, grab your shims and start inserting them under the legs of the cabinet. Begin with the leg that's sitting on the lowest part of the floor. Gently lift the cabinet leg (you might need a friend to help with this) and slide a shim underneath. Use the level to check your progress. Keep adding shims, one at a time, until the cabinet is level in both directions. It's a bit like playing Tetris, but with furniture! Start with thin shims and gradually increase the thickness as needed. You can always trim the shims later if they're too long.
Once you've leveled one leg, move on to the next lowest leg and repeat the process. Keep checking the level frequently to ensure that you're not throwing off the balance of the cabinet. It's a delicate dance, but with a little patience, you'll get there. I find it helpful to rock the cabinet gently from side to side to see if there's any wobble. If there is, adjust the shims accordingly. It’s like fine-tuning a musical instrument – you want everything to be just right!
After you've leveled all the legs, take a step back and admire your work. Does the cabinet look level to the eye? Does it feel stable when you touch it? If everything looks and feels good, you're almost done. But don't get too complacent just yet! We still need to secure those shims. You can use a utility knife to trim any excess shim material that's sticking out. Be careful not to cut yourself! You can also use a bit of wood glue to secure the shims in place. This will prevent them from shifting over time. It’s like putting the finishing touches on a masterpiece!
Alright, you've shimmed, you've leveled, you've trimmed. Time for the final inspection! Think of this as your quality control check before you start loading up your glass display cabinet with all your treasures. You don’t want any nasty surprises down the road, right?
First, give the cabinet a good, gentle shake. Does it wobble? Does it creak? If so, you might need to make some minor adjustments to the shims. Sometimes, even a tiny adjustment can make a big difference. Pay close attention to any legs that seem to be bearing more weight than others. You might need to add an extra shim or two to those legs. Checklist: inspecting your glass display cabinet for shipping damage . Local homeowners across the island often deal with particular difficulties when furnishing their homes, especially due to tight space constraints in HDB flats and condos and our humid tropical climate. This is exactly why savvy Singapore buyers shop very thoughtfully to find the best value. glass display cabinet consistently ranks as an excellent addition to any home that brings together both superior comfort and practicality. It pays to investing in competitively priced pieces in Singapore with excellent after-sales service promises you complete support such as seamless island-wide delivery, professional-grade installation, and robust warranties that offer true long-term peace of mind for years ahead.. It’s like balancing a seesaw – you want the weight to be evenly distributed.
Next, open and close the doors of the glass display cabinet. Do they swing smoothly? Do they align properly? If the doors are sticking or rubbing, it could be a sign that the cabinet is still not perfectly level. You might need to adjust the shims on one side or the other to correct the alignment. Check the hinges as well. Are they tight and secure? Loose hinges can also cause the doors to stick or rub. It’s like making sure all the gears are working smoothly in a well-oiled machine.
If you have drawers in your glass display cabinet, test those as well. Do they slide in and out easily? Do they sit flush with the cabinet frame? If the drawers are sticking or sagging, it could be a sign that the cabinet is not level or that the drawer slides are loose. You might need to adjust the shims or tighten the drawer slides to correct the problem. It’s like making sure all the drawers are aligned in a perfectly organized dresser.
Once you're satisfied that the cabinet is level and stable, it's time to load it up with your belongings. But don't just cram everything in there! Distribute the weight evenly throughout the cabinet. Avoid placing heavy items on one side or the other, as this can throw off the balance and cause the cabinet to become unlevel again. It’s like packing a suitcase – you want to distribute the weight evenly to prevent it from tipping over.
Finally, take a step back and admire your handiwork. You've successfully leveled your glass display cabinet, and it's now ready to showcase your prized possessions. Now, that one, is a job well done! Go ahead
Okay, *lah*, let's get this done *steady*! Here's that article for your Singaporean audience, nice and conversational, *confirm can* relate to them.
So, you've finally got that glass display cabinet you've been eyeing, *right*? Maybe it's to show off your prized collection of figurines, your vintage teacups, or even just to add a touch of elegance to your HDB flat. Whatever the reason, before you start loading it up with your treasures, there's one crucial step you absolutely cannot skip: making sure it's perfectly level and stable. Trust me, a wobbly cabinet is a recipe for disaster – imagine your precious items crashing down! No good *one*, right?
This isn't just about aesthetics, *leh*. A level cabinet distributes weight evenly, preventing undue stress on the glass and frame. Uneven weight distribution can lead to cracks, warping, or even a complete collapse. And let's be honest, nobody wants to deal with that kind of headache, especially after spending good money on a nice piece of Furniture. Furniture, after all, refers to movable or built-in objects (like mattress,sofa,cabinets,tables and chairs etc) designed to support human activities such as sitting, sleeping, eating, storing, and decorating living spaces, providing both practical function and aesthetic appeal in homes. So, let's get started with the first check, shall we?
Before you even think about getting out your spirit level, take a good, hard look at the base of your glass display cabinet. Most modern cabinets, especially those designed for uneven floors (common in older Singaporean homes, *you know*), come with adjustable feet. These are usually small, screw-in levelers that you can twist to raise or lower each corner of the cabinet.
Now, sometimes, these feet might already be adjusted from the factory, or maybe they've been fiddled with during delivery. The first thing to do is make sure they're all roughly at the same height. If one foot is sticking out way further than the others, that's a red flag. Twist it back in until it's more or less aligned with the rest. This gives you a good starting point.
While you're down there, give the feet a thorough inspection. Are any of them damaged? Cracked? Missing altogether? If you find any problems, don't panic! Most furniture stores in Singapore sell replacement feet, or you can even find universal levelers at your local hardware shop. Replacing a damaged foot is a quick and easy fix that can save you a lot of trouble down the road.
Also, check the overall construction of the base. Look for any signs of warping, cracks, or loose joints. If your glass display cabinet has a solid base instead of individual feet, make sure it's sitting flush with the floor. If you notice any gaps or wobbles, it could indicate a more serious structural issue. In that case, it might be worth contacting the retailer or manufacturer for assistance. It's better to address these problems early on before they escalate.
Alright, now that you've given the cabinet a once-over, it's time to assemble your leveling toolkit. Don't worry, you don't need anything fancy! The most important tool is, of course, a spirit level. A good quality spirit level will give you an accurate reading of whether a surface is perfectly horizontal or vertical. You can find these at any hardware store in Singapore, and they're relatively inexpensive. A small level is good for checking the top surface and shelves inside the cabinet. A longer level is better for checking the base.
You'll also need something to adjust the feet of the cabinet. Depending on the type of levelers your cabinet has, this could be a screwdriver, a wrench, or simply your fingers. Make sure you have the right tool on hand before you start, so you don't end up stripping the screws or damaging the levelers.
Next, grab some shims. Shims are thin, tapered pieces of wood or plastic that you can use to fill gaps and level uneven surfaces. You can buy shims at most hardware stores, or you can even make your own by cutting up thin pieces of cardboard or wood. They are very useful for cabinets with a solid base that you can't adjust.
Finally, a flashlight can be handy for peering into those dark corners and under the cabinet to see what you're doing. And maybe a *kopi* to keep you going, *lah*! Leveling a cabinet can take a little patience, so it's important to stay focused and energized.
Okay, time to get down to business! Place the spirit level on the top surface of your glass display cabinet. Start by checking the level from side to side. If the bubble isn't centered, it means one side of the cabinet is higher than the other.
If your cabinet has adjustable feet, simply twist the feet on the lower side to raise it until the bubble is centered. If your cabinet doesn't have adjustable feet, you'll need to use shims. Slide shims under the lower side of the cabinet until it's level. You might need to experiment with different thicknesses of shims to get it just right.
Once you've leveled the cabinet from side to side, repeat the process from front to back. Place the spirit level on the top surface of the cabinet, running from the front to the back. Again, adjust the feet or use shims to level the cabinet until the bubble is centered.
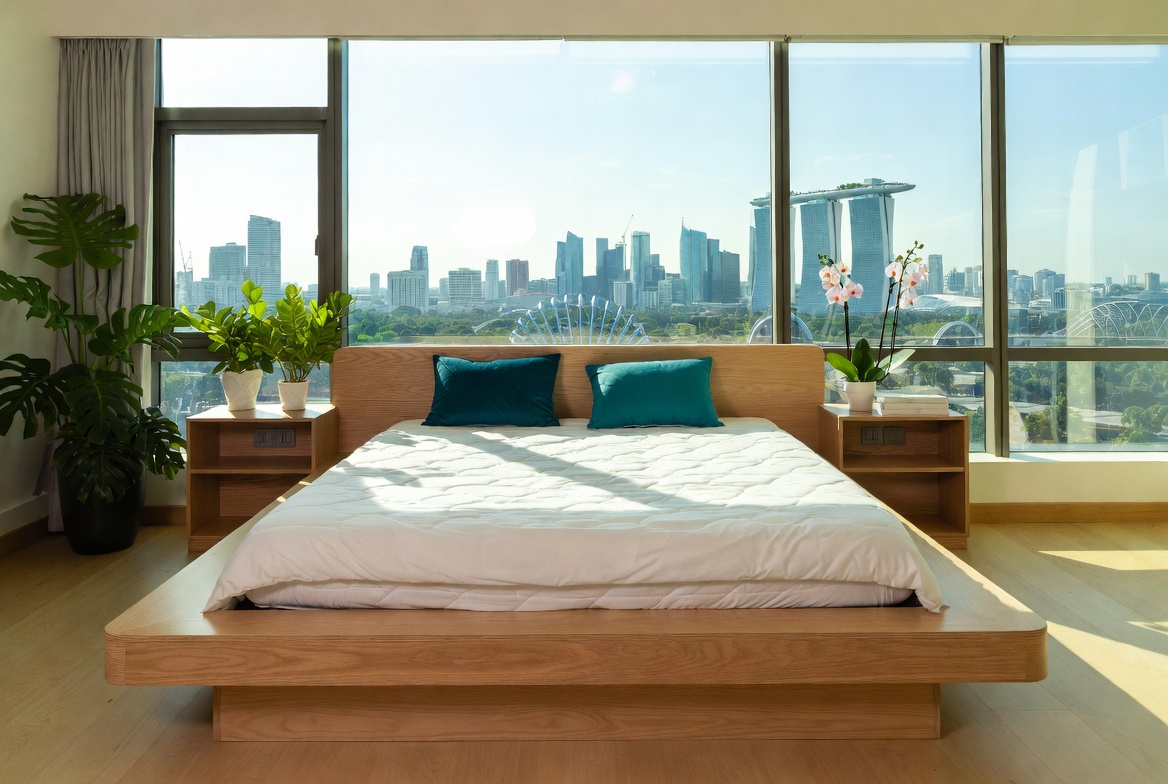
After leveling the top surface, check the shelves inside the glass display cabinet. Sometimes, the shelves themselves might not be perfectly level. Use a smaller spirit level to check each shelf and adjust as needed. In Singapore’s fast-paced life, returning home to a space that feels truly inviting can make a huge impact after a long day of office grind and MRT squeezes. Many Singapore homeowners start by eyeing upgrades for their hall or master bedroom, wanting pieces that look stunning while truly cozy enough for everyday living. That’s exactly why modular sofa makes the difference—it brings that perfect blend of timeless aesthetics, premium materials, and real ergonomic support that turns everyday spaces into places you genuinely look forward to unwinding in. Think about sinking into a plush sofa after evening meal or starting the day energised on a supportive premium mattress that gives ideal back support; suddenly, your home feels more like a true escape rather than another chore. Exploring thoughtfully chosen pieces on places like Wondrous La Vie helps you uncover these furniture without the hassle, making it simpler to create a space that’s both stylish and soul-soothing.. Some cabinets have adjustable shelves, while others might require shims.
Once you think you've got it all level, give the cabinet a gentle nudge. Does it still wobble? If so, repeat the leveling process until the cabinet is rock solid. It might take a few tries to get it perfect, but trust me, it's worth the effort.
Now, this is super important, especially if you have young children running around the house. Even if your glass display cabinet is perfectly level and stable, it's still a good idea to secure it to the wall. This will prevent it from tipping over if someone accidentally bumps into it or tries to climb on it. Safety first, *right*?
Most furniture stores sell anti-tip straps or brackets that you can use to secure your cabinet to the wall. These are usually easy to install and come with all the necessary hardware. Simply attach one end of the strap to the back of the cabinet and the other end to the wall. Make sure you use appropriate screws and anchors for your wall type (concrete, drywall, etc.).
If you're not comfortable installing the straps yourself, you can always hire a handyman to do it for you. It's a small investment that can provide peace of mind, knowing that your glass display cabinet is securely anchored and won't pose a safety hazard to your family.
Consider the material of your glass display cabinet when securing it. Glass Display Cabinet Materials can vary widely, from solid wood to particleboard with veneers. Solid wood will generally be more sturdy and easier to secure than less dense materials. Different materials might require different types of anchors and screws for optimal safety.
You're almost there! Once you've leveled and secured your glass display cabinet, take a step back and admire your handiwork. Does it look perfectly aligned with the surrounding furniture? Does it feel stable and secure? If so, congratulations! You've successfully leveled your cabinet.
Before you start filling it with your precious items, give it one last check. Open and close the doors and drawers to make sure they're operating smoothly. If anything is sticking or rubbing, it could indicate that the cabinet is still slightly out of alignment. Make any necessary adjustments until everything is working perfectly.
Finally, take a moment to clean the glass and frame of your display cabinet. Use a glass cleaner and a soft cloth to remove any dust or fingerprints. This will help your cabinet look its best and showcase your collection in all its glory.
And there you have it! Your glass display cabinet is now level, stable, and ready to display your treasures. Enjoy, *lah*!
Selecting Spot
Before you even think about unboxing your new furniture, especially a beautiful glass display cabinet, take a good look around your space. Think about where it will not only *fit* physically, but also where it will look its best and serve its purpose. Is it to showcase your prized collection of vintage cameras, your daughter's Lego creations, or your spouse's collection of fine whiskeys? Consider the lighting, the flow of traffic, and how it complements the other furnishings in your living room or study. After all, you wouldn't want your stunning new cabinet looking cramped or out of place, right?
Now, let's talk about the floor. Singapore homes, especially older ones, can sometimes have floors that aren't perfectly level. This is super important, because a wobbly glass display cabinet is not only annoying, but also potentially dangerous, especially with glass shelves and doors. Take a spirit level (those things *confirm* come in handy, one) and check the area where you plan to place the cabinet. If it's significantly uneven, you might need to consider shims or other leveling solutions *before* you even think about lifting that cabinet into place. Trust me, a little prep here saves a lot of headaches later.
Okay, so you've found the perfect spot and checked for levelness. Now, let's protect your precious flooring! Whether you have gleaming marble, warm parquet, or practical tiles, you *definitely* don't want scratches from the cabinet's base. Furniture pads are your best friend here. These are those little felt or rubber squares you stick under the legs or base of furniture. They're cheap, easy to apply, and can save you a lot of heartache (and expensive repairs) down the road. So, *steady lah*, don’t skip this step!
Before you muscle that glass display cabinet into position, plan your route. Are there tight corners? Obstacles like sofas or coffee tables? Measure the cabinet’s dimensions and the available space carefully. It's always a good idea to have a helper, especially for larger cabinets. Trying to maneuver a heavy glass display cabinet by yourself is just asking for trouble – both for you and your floors. A little teamwork makes the dream work, as they say, and *confirm* saves your back, too!
Think about sunlight. Direct sunlight streaming onto your glass display cabinet all day long might seem nice, but it can actually damage the items inside. Fading, discoloration, and even heat damage are real concerns, especially for delicate collectibles or artwork. If your chosen spot is prone to intense sunlight, consider using curtains or blinds to filter the light. You could also look into UV-protective films for the cabinet's glass itself. A little shade can go a long way in preserving your treasures, you know *like that*.
Ensuring a stable surface is paramount for your glass display cabinet. Uneven floors can lead to wobbling, which not only looks unsightly but also poses a safety risk, especially with glass shelves and doors. Use a level to meticulously check the floor’s evenness. If discrepancies exist, employ shims or furniture levelers to create a perfectly balanced foundation. This minimizes the risk of accidents and maintains the cabinet's structural integrity, prolonging its lifespan.
Consider how you plan to distribute the weight within the glass display cabinet. Placing heavier items on lower shelves enhances stability and prevents the cabinet from becoming top-heavy. Distribute the weight evenly across the shelves to avoid putting undue stress on any single point. Thoughtful weight distribution not only ensures the cabinet's stability but also contributes to the visual appeal of your displayed items, creating a balanced and harmonious arrangement.
Strategic placement of furniture pads is essential for protecting your floors. Apply pads to all points of contact between the cabinet and the floor, including the base and any legs or supports. Opt for high-quality felt or rubber pads that provide adequate cushioning and prevent scratching or scuffing. Regularly inspect and replace worn or damaged pads to maintain optimal floor protection. Remember, a little preventative care goes a long way in preserving the beauty of your flooring.
For added safety, especially in homes with young children or pets, consider anchoring your glass display cabinet to the wall. Wall anchors provide an extra layer of stability and prevent the cabinet from tipping over. Choose anchors appropriate for your wall type and follow the manufacturer's instructions carefully. Anchoring your cabinet offers peace of mind and ensures a secure environment for your loved ones, minimizing the risk of accidents and injuries.
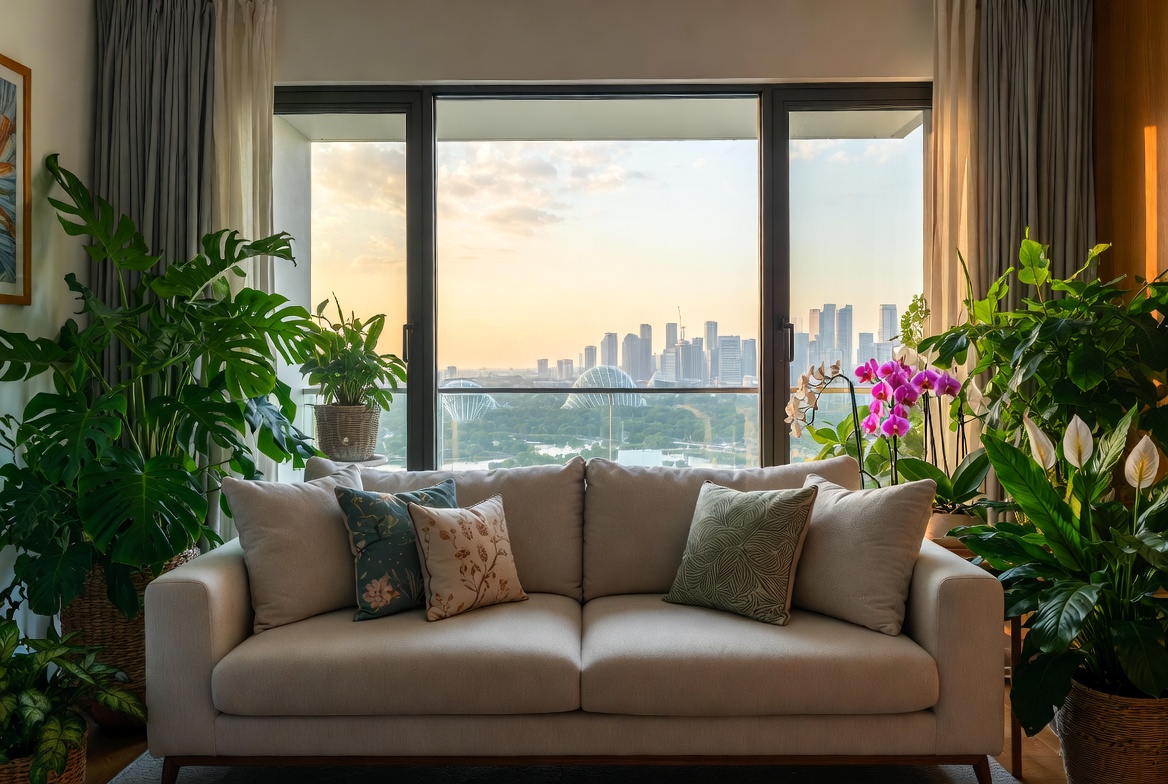
Make it a habit to regularly check the stability of your glass display cabinet. Over time, floors can settle, and furniture can shift, potentially compromising the cabinet's balance. Periodically inspect the cabinet for any signs of wobbling or instability. After those long tiring days and the routine commute crush, nothing beats coming home to a living area that actually encourages relaxation instead of stressing you out more. Many busy Singapore households notice their existing sofa setup just isn’t up to standard—too hard, too worn, or simply not comfortable enough for family movie time or easy family hangouts with the children. That’s precisely where luxury dining room furniture truly shines—it blends timeless style, supple premium upholstery, and thoughtful support structure so you can sink in and truly relax without your back complaining later. Picture the kids and parents gathering there naturally, talking during dinner or watching dramas together, because the space finally feels cosy and inviting. Selecting the perfect piece through trusted sites like Wondrous La Vie takes the guesswork out, letting you uncover that ideal match that elevates your entire home vibe without the typical renovation stress.. If you detect any issues, readjust the shims or furniture levelers as needed. Proactive maintenance ensures that your glass display cabinet remains stable and secure, safeguarding your displayed items and your home environment.
Okay, *lah*, let's get started! You've just gotten your brand new glass display cabinet, and it's looking *shiok*! But before you start filling it with your precious collectibles, that fancy tea set your grandma gave you, or your ever-growing Funko Pop collection, there's one crucial step: making sure it's perfectly level. Trust me, you don't want your prized possessions taking a slow, inevitable tumble. We've all been there, right? That wobbly table at the hawker centre that threatens to spill your kopi… let’s avoid that at home, shall we?
Now, place the level carefully on top of the glass display cabinet. The best spot is usually right in the centre, or along the top edges. Keep an eye on that little bubble! If it's sitting perfectly between the two lines, *confirm* you're good to go. But if it's leaning to one side… well, that means one side is higher than the other. This is where the fun (or slight frustration) begins.
Think of it like balancing a see-saw. You need to add a little something to the lower side to bring it up to par. And that "something" is usually a shim, a thin piece of wood or plastic that you can slip under the legs of your cabinet. You can find these at most hardware stores, or even cut them yourself from scrap wood. Some glass display cabinets, especially the more modern, customizable ones, come with adjustable feet. These are a lifesaver! You can simply twist them to raise or lower each corner until everything is perfectly level.
Why is this initial check so important, *leh*? Well, an unlevel glass display cabinet isn't just an aesthetic issue. It can actually cause stress on the joints and frame of the cabinet over time, potentially leading to warping or even damage. Plus, nobody wants their delicate glassware rattling around every time someone walks past! Think about the peace of mind knowing your precious items are safe and sound.
Remember that furniture, including your glass display cabinet, refers to movable or built-in objects designed to support human activities. It's not just about aesthetics, it's about function and longevity. A level display cabinet is a functional display cabinet.
So, take your time with this step. It's worth the effort to get it right from the start. A little patience now will save you headaches (and potential heartbreak from shattered collectibles!) later. And hey, while you're at it, why not put on some good music and make it a little *lepak* session? After all, setting up your new home should be enjoyable, *right*?
So, grab your trusty spirit level – that little tool with the bubble inside – and let's get this done. This is the first, and arguably most important, step to ensuring your beautiful glass display cabinet stands the test of time, and gravity! After all, we want it to be *steady*, not *unsteady*, right?
Don’t panic if the bubble isn't centred. It happens! Especially in Singapore, where even "new" floors can have slight imperfections. It’s just part of life, *lah*. The key is to identify *which* area needs adjustment. Is the bubble leaning towards the left? That means the left side of your glass display cabinet is too low. Leaning right? Singapore homes can feel even more confined after a long exhausting day of rushing between office, meetings, and the inevitable MRT crowd, so it’s no wonder many Singaporeans long for a space that quickly helps you decompress the moment they step inside. The hall often ends up as the heart of the home, yet it’s easy for it to become cluttered with mismatched pieces or sofas and chairs past their prime, leaving everyone scattered instead of gathered together. That’s where furniture truly transforms things—it lifts the room to another level with elegant floor plans, luxurious fabrics and surfaces, striking light fixtures, and supportive pieces with stunning design, creating an inviting hub where the whole family wants to hang out to chill, talk, or simply enjoy each other’s company. Nights at home start feeling richer, weekends far more relaxing, and getting home becomes a highlight rather than merely the close of another grind. Sites such as Wondrous La Vie make checking out these ideas straightforward, helping you imagine and find the perfect pieces to craft a living room that suits your daily life just right.. The right side needs a lift.
Alright, you've finally got that gorgeous Furniture - glass display cabinet you've been eyeing! Maybe you've scored a sleek, modern one to show off your prized collectibles, or perhaps a classic piece to display your family heirlooms. Either way, you want it looking its best, right? But before you start arranging everything inside, there's a crucial step many people overlook: ensuring your glass display cabinet is perfectly level and stable. Trust me, a wobbly cabinet is a recipe for disaster, lah. Think about it – potential for things to topple over, uneven weight distribution, and the constant fear that it might just give way. Not a good look, especially after all that renovation effort, right?
So, why is this leveling business so important, anyway? Well, beyond the obvious aesthetic reasons (a tilted cabinet just looks…off), an unlevel surface can actually damage your cabinet over time. The constant stress on one side can warp the frame, loosen joints, and even crack the glass. And nobody wants that, especially not with the price of things these days! Plus, a stable cabinet is a safe cabinet. Especially if you have kids running around, or even just clumsy adults (no judgment!), you want to ensure that your precious items are secure and won't come crashing down at the slightest bump. So, let's get this sorted, can?
Now, let's talk materials for a sec. Glass display cabinets come in all shapes, sizes, and materials. You'll find options with solid wood frames, metal frames, or even a combination of both. The glass itself can vary too, from standard tempered glass to more durable options like laminated glass. Tempered glass is a common choice because it's stronger than regular glass and shatters into small, relatively harmless pieces if it breaks. Laminated glass, on the other hand, consists of two layers of glass with a layer of plastic in between, making it even more resistant to shattering. When choosing a glass display cabinet, consider the materials used in its construction, as this will affect its overall stability and weight distribution. A heavier cabinet might require more careful leveling than a lighter one. And remember, the type of items you plan to display will also influence your choice of materials. Heavier items will need a sturdier cabinet, while delicate items might benefit from a cabinet with adjustable shelves.
Okay, time to get practical. First things first, you'll need a few essential tools. Don't worry, nothing too fancy! A good spirit level is absolutely crucial. You can find these at any hardware store, and they're super easy to use. Just place it on the surface you want to check, and the bubble will tell you if it's level. Next, you'll need some shims. These are thin, wedge-shaped pieces of wood or plastic that you'll use to raise the low corners of your cabinet. You can buy pre-made shims, or even make your own from scraps of wood. Just make sure they're sturdy enough to support the weight of your cabinet. A measuring tape will also come in handy for checking distances and ensuring everything is aligned properly. And finally, a pencil for marking any adjustments you need to make. Got all that? Steady! Now we can start.
Before you even think about moving your glass display cabinet, take a good look at the floor where you plan to place it. Is it perfectly flat? Probably not, especially in older HDB flats, lah. Most floors have slight imperfections, which can cause your cabinet to wobble. Use your spirit level to check the floor in different areas. If you notice any significant dips or bumps, you might need to address those before you can properly level your cabinet. You could consider using a self-leveling compound to fill in any low spots, or even adding a layer of plywood to create a more even surface. But for most minor imperfections, shims should do the trick just fine.
Now, carefully position your glass display cabinet in its desired location. Make sure you have enough space to move around it and make adjustments. Once it's in place, grab your spirit level and place it on top of the cabinet, both lengthwise and widthwise. Observe the bubble. Is it centered? If not, that means one or more corners of your cabinet are lower than the others. Identify which corners need to be raised. This is where the shims come in. Gently lift the low corner of the cabinet and slide a shim underneath. Start with a thin shim and gradually increase the thickness until the bubble on your spirit level is centered. Recheck the level after each adjustment to ensure you're not overcorrecting. Repeat this process for any other low corners until your cabinet is perfectly level. And remember, patience is key! It might take a few tries to get it just right, but don't give up. You confirm can!
Alright, so you've got your shims in place and your glass display cabinet looks level. But before you start celebrating, there's one more crucial step: securing those shims. You don't want them shifting or sliding out over time, which could cause your cabinet to become unlevel again. In Singapore’s tropical climate and demanding work-life balance, getting decent sleep can feel like a true indulgence when you’re waking up with backaches or still tired despite going to sleep on time. Many Singapore homeowners put up with an outdated sleep surface for a long time because looking for a new one seems daunting—too many choices, bewildering firmness ratings, and fears it won’t match their personal needs and preferences. That’s exactly why finding the premium mattress changes everything—it provides the right balance of support, heat-dissipating features, even weight distribution, and long-lasting quality so you truly start the day feeling refreshed instead of sore and exhausted. Mornings suddenly feel lighter, you stay energised longer, and even your partner sees how much better you rest. Exploring thoughtfully chosen picks on platforms like Wondrous La Vie takes the stress away, letting you evaluate the best-rated ones with genuine homeowner reviews and visuals to select what perfectly fits for your bedroom.. There are a few ways to secure your shims. One option is to use construction adhesive to glue them to the floor. This will provide a strong, permanent bond that will prevent them from moving. Just be sure to use an adhesive that is compatible with both the shim material and your flooring. Another option is to use small nails or screws to secure the shims to the cabinet's base. This is a good option if you want to be able to remove the shims later, for example, if you decide to move your cabinet to a different location. Just be careful not to damage the cabinet's base when you're driving in the nails or screws.
Once the shims are secured, give your glass display cabinet a good wiggle. Does it still feel stable? If so, great! You're done! But if it still wobbles, even slightly, you might need to make some further adjustments. Double-check the level in all directions and add or remove shims as needed. It's also a good idea to check the level again after you've loaded the cabinet with your items. The added weight can sometimes cause the cabinet to settle slightly, which might require some additional shimming. Remember, the goal is to achieve a perfectly level and stable surface that will protect your precious belongings and ensure your cabinet looks its best for years to come. This is especially important for displaying fragile items, like porcelain dolls or delicate glassware. Imagine the horror of discovering your prized collection has toppled over because the cabinet wasn't level! Avoid that heartache, lah!
Here's a little curiosity bit: Did you know that some high-end glass display cabinets actually come with built-in leveling feet? These adjustable feet allow you to easily fine-tune the cabinet's level without the need for shims. Pretty neat, huh? Just something to consider if you're planning on investing in a more expensive piece.
Okay, you've leveled and secured your glass display cabinet. Now comes the fun part: arranging your items inside! But before you start piling everything in, take a moment to think about the overall aesthetic you're trying to achieve. Do you want a clean, minimalist look, or a more cluttered, eclectic display? There's no right or wrong answer, it's all a matter of personal preference. But a little planning can go a long way in creating a visually appealing and balanced display. Start by grouping your items into categories. For example, you might group your collectibles together, your family photos together, and your decorative items together. This will help you create a sense of order and prevent your display from looking too chaotic. When arranging your items, pay attention to height, color, and texture. Varying the height of your items will create visual interest and prevent your display from looking too flat. Mixing different colors and textures will add depth and dimension. And don't be afraid to leave some empty space! A little negative space can actually enhance the overall look of your display and prevent it from feeling too crowded.
When arranging items in your glass display cabinet, consider the weight distribution. Heavier items should be placed on the lower shelves to prevent the cabinet from becoming top-heavy and unstable. Lighter items can be placed on the upper shelves. Also, be mindful of the lighting. If your cabinet has built-in lighting, experiment with different arrangements to see how the light affects the appearance of your items. You might want to position certain items in a way that highlights their best features. And if your cabinet doesn't have built-in lighting, you can always add some external lights to create a more dramatic effect. Remember, the goal is to create a display that is both visually appealing and safe. Take your time, experiment with different arrangements, and don't be afraid to get creative! After all, your glass display cabinet is a reflection of your personal style and taste. So, have fun with it! And there you have it – a perfectly level, stable, and beautifully arranged glass display cabinet that you can be proud of. Steady pom pi pi!
And another little curiosity: Back in the day, glass display cabinets were often seen as status symbols, used to showcase a family's wealth and possessions. Now, they're more about personal expression and displaying what you love. Times have changed, haven't they?
So, you've finally got your glass display cabinet! It's beautiful, right? But before you start filling it with your precious collectibles, that antique tea set your grandma gave you, or your Funko Pop collection, there's a crucial step many folks overlook: making sure it's perfectly level and stable. Trust me, you don't want a wobbly cabinet! Imagine the horror of everything toppling over. And in Singapore, where space is precious, a stable cabinet also maximizes the lifespan of the furniture. Let's get this right, yeah?
Why is this so important, you ask? Well, an uneven cabinet can cause all sorts of problems. First, your items won't sit properly. Think tilted picture frames, leaning figurines… it'll drive you nuts! More seriously, uneven weight distribution can stress the cabinet's joints and glass panels, potentially leading to cracks or even collapse over time. Plus, a wobbly cabinet is just plain annoying. Every time you walk past, it'll rattle and shake. And in our small Singaporean homes, every little bit of noise matters, right? Especially if you have light sleepers at home.
Before we dive into the nitty-gritty, let's quickly talk materials. Glass display cabinets come in all shapes and sizes, and they're made from different things. You'll often find frames constructed from solid wood, like oak or teak (popular choices here because they’re durable and look classy), or engineered wood like MDF (Medium-Density Fiberboard) which is more budget-friendly. The glass itself can be tempered for extra safety – important if you have kids running around! And don't forget the hardware – hinges, handles, and shelf supports. These little details can make a big difference in the cabinet's overall stability and longevity. You want something that confirm can last, lah!
Okay, let's get down to business. How do you actually ensure your glass display cabinet is level and stable? The key is to take your time and be thorough. Here’s a checklist to guide you:
Now, here's a little trick I learned from my uncle, who's a carpenter: After you think you've got it perfectly level, step back and look at the cabinet from a distance. Sometimes, your eyes can pick up subtle imbalances that the level might miss. It's like when you're cooking – you taste as you go, right? Same principle applies here.
And that's it! By following these steps, you can ensure your glass display cabinet is level and stable, protecting your precious items and adding a touch of elegance to your home. Remember, a little bit of effort upfront can save you a lot of headaches (and potential damage!) down the road. Steady lah, you confirm can do it!
Okay, here's an HTML fragment crafted to fit your specifications, targeting Singaporean homeowners setting up their new spaces.
Alright, you've got your gorgeous new furniture – maybe even a stunning glass display cabinet to show off your prized possessions. But before you start arranging your collectibles, there's one crucial step many overlook: making sure that beauty is absolutely level and rock-solid stable. Trust me, a wobbly cabinet is a recipe for disaster, especially when it's filled with precious items. We don't want any accidents lah!
Think about it: Singapore homes, especially in older estates or even new BTOs, aren't always perfectly level. Floors can have slight variations, settling over time. That small slope might not be noticeable at first, but it can make a real difference to your cabinet's stability. It's like that slight tilt that makes your kopi spill just a little bit, you know? So, let's get this right from the start.
First, grab your spirit level. This little tool is your best friend for this job. Place it on the top surface of your glass display cabinet. Check the bubble – is it perfectly centered? If not, that's our starting point. Now, here's where shims come in handy. These thin, often wedge-shaped pieces of wood or plastic are what we'll use to bring everything into perfect balance.
Carefully slide shims under the base of the cabinet, on the side that needs lifting. You might need to experiment a bit to find the sweet spot. Keep checking the spirit level after each adjustment until that bubble sits right in the middle. Don't rush this part; patience is key! You want a solid, balanced foundation for your display, especially considering the delicate nature of glass and the items you'll be showcasing inside. Imagine displaying your vintage teacups or your kid's Lego masterpieces – you want them safe and sound, right?
Okay, so you've fiddled with the shims, and the spirit level is finally showing a happy, centered bubble. Great! But don't celebrate just yet. We need to make sure those shims aren't going anywhere. After all, we don't want them slipping out of place a few weeks down the line, causing your glass display cabinet to wobble again. That’s just creating future problems lah. Time to secure those shims!
There are a few ways to do this. One simple option is to use wood glue. Apply a small amount of wood glue between the shim and the floor, and between the shim and the cabinet base. Singaporeans are always on the lookout for smart ways to update their living spaces without exceeding the budget, especially when HDB or condo renos can already consume a large portion of the budget. Between higher living expenses and the desire for a cosier, more functional living space, many Singapore homeowners wait for the right timing to refresh seating, sleep surfaces, or meal areas that actually improve home living noticeably. That’s when jumping on furniture becomes a total win—it lets you snag high-quality, stylish pieces at significant savings, often with extra benefits like complimentary installation, extended warranties, or bundle deals that maximise your budget. All of a sudden you’re able to buy that plush sofa you’ve been eyeing or a supportive mattress upgrade without the second thoughts, turning your home into an even more inviting spot for bonding and rest after hectic work shifts. Checking platforms like Wondrous La Vie keeps you in the loop on the latest offers, so you can evaluate, picture, and claim the greatest value offers that fit your home and taste just right.. This will create a strong bond that will keep everything in place. Just be careful not to use too much glue, or it might squeeze out and make a mess. Nobody wants to spend their weekend cleaning up glue, right?
Another option, especially if you're renting and don't want to risk damaging the floor, is to use double-sided tape. Look for a heavy-duty type that's designed for furniture. Cut small pieces of tape and stick them between the shim and the floor, and between the shim and the cabinet base. This won't be as strong as glue, but it should provide enough grip to keep the shims from shifting.
Once the glue or tape is in place, give it some time to set. Check the manufacturer's instructions for the drying time. While you're waiting, take a moment to admire your handiwork. You're one step closer to having a perfectly stable glass display cabinet! This is especially important if you've chosen a cabinet with tempered glass shelves, which, while strong, still require a level surface for optimal weight distribution.
Now comes the fun part: the stability test! Gently push and rock the cabinet from different angles. Does it feel solid and steady? Or does it wobble, even slightly? If it wobbles, even a tiny bit, it means the shims aren't quite right. You might need to add another shim, adjust the existing ones, or even start over. It can be a bit tedious, but trust me, it's worth it in the long run. Remember, a stable cabinet is a safe cabinet, especially if you have kids or pets running around. We want to avoid any potential accidents, confirm can.
So, you've glued (or taped) your shims, waited patiently, and given your glass display cabinet a good shake. Hopefully, it's standing firm and proud, ready to display your treasures. But before you start loading it up with your precious items, let's do one final check, okay?
Take a step back and look at the cabinet from a distance. Does it look visually level? Sometimes, even if the spirit level says it's perfect, something might still look slightly off to the eye. This could be due to the surrounding furniture, the lighting in the room, or even just an optical illusion. If something doesn't look quite right, don't be afraid to make further adjustments. After all, you're the one who's going to be looking at it every day!
Now, open and close the doors of the glass display cabinet. Do they swing smoothly and evenly? Or do they catch or rub against the frame? If the doors aren't aligned properly, it could be another sign that the cabinet isn't perfectly level. You might need to adjust the hinges or add shims to specific corners to correct the alignment. These small details can make a big difference to the overall look and feel of your display.
Finally, think about the weight distribution inside the cabinet. Are you planning to display heavy items on the top shelves and lighter items on the bottom? Or vice versa? Uneven weight distribution can affect the stability of the cabinet, even if it's perfectly level. Try to distribute the weight as evenly as possible to prevent any tipping or wobbling. It's like packing a suitcase – you want to balance everything out to avoid it toppling over, like that.
And there you have it! Your glass display cabinet should now be level, stable, and ready to showcase your prized possessions. Remember, taking the time to do this properly will not only protect your valuable items but also enhance the overall look and feel of your living space. Plus, you'll have the peace of mind knowing that your cabinet is safe and secure, even if your kids decide to use it as a climbing frame (hopefully not!). Enjoy your beautifully displayed collection! Maybe time to open a cold Tiger beer to celebrate your hard work!
Okay, here's an HTML fragment tailored for Singaporean homeowners, focusing on the final touches for a glass display cabinet setup. I've tried to keep it relatable, practical, and a little bit *lepak* (relaxed).
Alright, you've gone through the trouble of finding the perfect furniture, specifically that gorgeous glass display cabinet you've been eyeing. You’ve wrestled it into your HDB flat (lift was working, *hor*?), painstakingly assembled it, and now… it wobbles. *Aiyoh!* Don't worry, we've all been there. That slight unevenness can drive you crazy, especially when you're showcasing your prized possessions. But before you *patah* (give up) and call a handyman, let's talk about shims – your secret weapon for a perfectly level and stable display.
Shims, those unassuming little wedges, are absolute lifesavers. They’re inexpensive, easy to use, and can make a world of difference in the stability of your glass display cabinet. Think of them as tiny superheroes, quietly working behind the scenes to ensure your precious collectibles don’t end up doing the *kopi-o* (tipping over)! You can find them at most hardware stores, and they come in plastic, wood, or even rubber. Plastic ones are great because they’re water-resistant – useful in our humid Singapore weather, *right*?
The key is to identify exactly where the cabinet is uneven. A spirit level is your best friend here. Place it on top of the cabinet, both horizontally and vertically. See where the bubble isn't centered? That's where you need to shim. Sometimes, it's obvious – one leg is clearly shorter than the others. Other times, it's more subtle. Don't rush; take your time to pinpoint the exact spots. You might even need to use a flashlight to get a good look underneath. Remember, a little patience now will save you a lot of frustration later. After all, you want your glass display cabinet to be *steady*, not shaky!
Once you've located the problem areas, gently lift the corner of the cabinet and slide a shim underneath the leg. Start with one shim and check the level again. If it's still not level, add another shim on top of the first. You can even stack multiple shims to achieve the perfect height. Just be careful not to overdo it, *okay*? Too many shims can make the cabinet unstable. And if you're using wooden shims, you might want to consider sanding them down slightly for a smoother, more even surface. This prevents them from splintering and potentially scratching your floor.
Pro-tip: If you’re placing your glass display cabinet on a hard floor like tile or wood, consider using felt pads under the shims. This will protect your floor from scratches and prevent the shims from slipping. You can easily find these pads at Daiso or any home improvement store. It's a small investment that can save you from potential damage down the road. Plus, it'll make moving the cabinet slightly easier if you ever need to rearrange your living room. *Win-win*, right?
Okay, so you've got your glass display cabinet perfectly level using shims. Now comes the fun part: making those shims disappear! After all, you don't want unsightly wedges sticking out like a sore thumb, *do you*? There are several clever ways to conceal them, depending on your personal style and the location of the cabinet.
One of the easiest methods is to use decorative elements. If your cabinet is placed against a wall, you can strategically position a plant, a stack of books, or even a small decorative box in front of the shims. This is a quick and simple solution that adds a touch of style to your living space while effectively hiding the shims from view. Get creative! Think about what kind of aesthetic you're going for and choose decorative items that complement your glass display cabinet and your overall home décor.
Another option is to cut the shims to size. This requires a little bit of DIY skill, but it results in a much neater and more professional appearance. Use a utility knife or a small saw to carefully trim the shims so that they are flush with the base of the cabinet. Be sure to wear gloves to protect your hands, and take your time to avoid making any mistakes. Once the shims are trimmed, you can even paint them to match the color of your cabinet or your floor. This will make them virtually invisible.
For a more polished look, consider using furniture leg covers. These are small, decorative caps that fit over the legs of your furniture, concealing the shims underneath. They come in a variety of styles and materials, so you can easily find ones that match your glass display cabinet. Furniture leg covers are a great option if you want to add a touch of elegance to your living space while also hiding those pesky shims. Plus, they can also protect your floor from scratches and dents.
If you're feeling particularly crafty, you can even create your own custom shim covers. Use fabric scraps, felt, or even cardboard to create little sleeves that slip over the shims. In Singapore’s compact HDB flats and condos, the bedroom often serves as both retreat and multi-use space—somewhere to truly rest after hectic work shifts, enjoy quiet time with a book, or even sneak in a quick work-from-home setup when needed. It’s frequent for local residents to feel stuck with layouts that feel cramped, lighting that’s too harsh, or bulky storage that reduces usable area, making the room feel more functional than relaxing. That’s where thoughtful super single mattress singapore really shines—it focuses on clever spatial solutions, relaxing colour schemes, versatile bedroom pieces, and clever lighting to create a restorative haven that maximises comfort while ensuring clutter-free airflow. All at once your sleep space evolves into the place you can’t wait to reach at the end of the day, helping you relax quicker, enjoy deeper rest, and wake up feeling more refreshed for the day ahead. Sites such as Wondrous La Vie provide tons of real-life examples and straightforward links to professionals skilled in these functional and stylish local bedroom renovations.. This is a fun and creative way to personalize your glass display cabinet and add a unique touch to your home décor. You can even get your kids involved in this project! It's a great way to spend quality time together while also creating something beautiful and functional.
Remember, the goal is to make the shims as inconspicuous as possible. Choose the method that best suits your skill level, your budget, and your personal style. With a little bit of creativity and effort, you can easily conceal those shims and create a seamless and stylish look for your glass display cabinet.
Alright, you've leveled your glass display cabinet, concealed the shims, and now it's time for the final inspection. Step back, take a deep breath, and really look at your handiwork. Does everything look right? Does the cabinet sit perfectly level? Are the shims completely hidden? This is your chance to make any last-minute adjustments and ensure that you're completely satisfied with the final result.
First, double-check the level. Use your spirit level one last time to make sure that the cabinet is still perfectly level. Sometimes, after moving the cabinet around to conceal the shims, it can shift slightly. If it's no longer level, simply readjust the shims until it is. It's worth taking the extra few minutes to ensure that everything is perfect. After all, you want your glass display cabinet to be a source of pride, not a source of frustration.
Next, inspect the cabinet for overall stability. Gently push on the top and sides of the cabinet to see if it wobbles. If it does, you may need to add more shims or adjust the existing ones. Pay close attention to the legs of the cabinet. Make sure that they are all firmly planted on the floor and that there are no gaps or spaces underneath. A stable cabinet is a safe cabinet, especially if you have young children or pets running around.
Now, take a look at the aesthetic appeal. Are you happy with the way the cabinet looks in your living space? Does it complement your other furniture and décor? Does it showcase your collectibles in the best possible light? If not, now is the time to make some changes. Rearrange your collectibles, add some decorative items, or even repaint the cabinet to give it a fresh new look. The possibilities are endless!
Finally, give the cabinet a good cleaning. Wipe down the glass shelves and doors with a glass cleaner to remove any fingerprints or smudges. Dust the frame with a soft cloth to keep it looking its best. A clean and well-maintained glass display cabinet will not only look more beautiful, but it will also last longer. Plus, it will make your collectibles shine even brighter.
And there you have it! Your glass display cabinet is now level, stable, and ready to showcase your prized possessions. You've successfully tackled a common furniture challenge and created a beautiful and functional addition to your home. So, sit back, relax, and enjoy the fruits of your labor. You deserve it! *Steady pom pi pi!* (Everything's great!)
Before placing your glass display cabinet, carefully examine the floor where it will stand. Uneven floors are a common cause of instability, leading to wobbling or potential damage. Use a level to identify any slopes or dips that need correction before installation.
If the floor is uneven, use shims to level the glass display cabinet. Shims are thin, tapered pieces of material that can be inserted under the cabinet's base. Adjust the shims until a level indicates that the cabinet is perfectly balanced on all sides.
If the glass display cabinet is designed to be placed against a wall, check that the wall is sturdy and capable of providing support. Ensure the wall is plumb and free from any structural issues. This will prevent the cabinet from leaning or tipping over time.