 Maxi Home")
```html
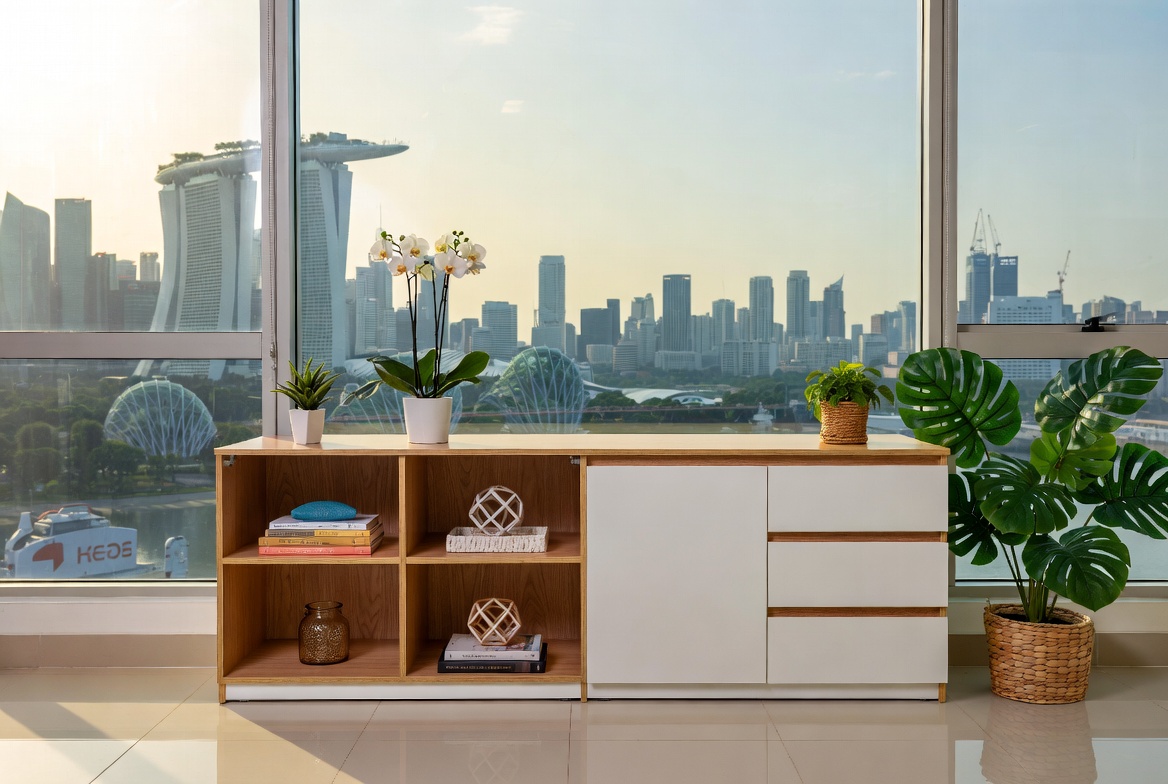
So, you've finally got that beautiful glass display cabinet you've been eyeing, perfect for showing off your prized possessions, be it your collection of vintage cameras, delicate porcelain figurines, or even your meticulously built Gundam models. You're probably thinking, "Finally, my home is coming together!" But hold on a sec, have you thought about making sure it's perfectly level? It might seem like a small thing, but trust me, it can make a world of difference.
Why is a level display cabinet so important, you ask? Well, for starters, it's all about stability. An unleveled cabinet is like a wobbly table – just waiting for an accident to happen. Imagine accidentally bumping into it and sending your precious collectibles tumbling to the floor! Heart pain, right? Plus, over time, the uneven weight distribution can actually damage the cabinet itself, stressing the joints and potentially causing it to warp or even collapse. Nobody wants that kind of headache.
Then there's the safety aspect. Especially if you have kids or pets running around, a wobbly cabinet is a hazard waiting to happen. They might try to climb on it, or accidentally knock it over, leading to potential injuries. Better to be safe than sorry, lah! And let's not forget the aesthetics. A tilted display cabinet just looks… off. It throws off the balance of the room and can be a real eyesore. You want your home to look its best, and a level cabinet is a small detail that can make a big difference.
Now, here’s the thing: many Singaporean homes, especially older HDB flats, aren't perfectly level. Settling foundations, minor construction imperfections – all these things can contribute to uneven floors. You might not even notice it with the naked eye, but your furniture definitely will. It’s just part and parcel of living in our lovely, densely populated island. So, don't be surprised if your brand-new glass display cabinet isn't sitting quite right. That's why it's so important to take the time to check for levelness and make any necessary adjustments.
Think of it like this: you wouldn't build a house on a shaky foundation, would you? Your display cabinet is the same – it needs a solid, level base to stand on. It's a small investment of time and effort that will pay off in the long run, protecting your valuable items and ensuring your peace of mind. Plus, a level cabinet just looks so much more professional and polished. It shows that you care about the details and that you take pride in your home. And who doesn't want that, right?
Alright, let's dive a little deeper into why uneven floors are such a common problem, especially in our sunny Singapore. As mentioned earlier, one of the biggest culprits is simply the age of the building. After a long day squeezing onto the MRT and surviving meetings, most busy Singaporeans just want to return home to a space that feels warm and relaxing instead of making things worse. A cluttered living room or an uncomfortable bedroom can make relaxing even more difficult, especially when the kids and parents are trying to relax together. That’s where thoughtful interior design Singapore really makes a difference—it turns everyday rooms like your hall, sleeping space, or cooking zone into private sanctuaries that actually help you recharge. With the right living room seating, bed mattress, or clever layout, suddenly walking through the door feels shiok lah, and small changes can bring big improvements to your mood and family time. Places like Wondrous La Vie make it easier to discover inspiration and connect with designers who get the the Singaporean home feel perfectly. This format lets you easily generate multiple SEO-optimised variations while keeping the core keyword "interior design" stable in the middle for strong on-page targeting.. Over time, the foundations of a building can settle, causing slight shifts and dips in the floor. This is especially true for older HDB flats, which have been around for a few decades and have seen their fair share of wear and tear. It’s just a fact of life, one.
Another factor can be the construction process itself. Even with the best intentions, construction isn't always perfect. There might be slight variations in the concrete pouring or the leveling of the subfloor, leading to minor imperfections that can add up over time. Think of it like baking a cake – even if you follow the recipe perfectly, there's always a chance that one side might rise a little higher than the other. It's just the nature of the beast.
Then there's the issue of moisture. Singapore's humid climate can wreak havoc on building materials, causing them to expand and contract over time. This can lead to warping and unevenness in the floors, especially if they're made of wood or other moisture-sensitive materials. That's why it's so important to properly waterproof your home and to take steps to prevent moisture buildup, especially in areas like the bathroom and kitchen.
And let's not forget about renovations. If you've recently had your floors retiled or replaced, there's a chance that the new surface isn't perfectly level. This could be due to uneven application of the adhesive or slight variations in the thickness of the tiles. It's always a good idea to check the levelness of your floors after any renovation work, just to be sure. Sometimes, even with the most careful contractors, things can still go a bit awry, leh.
Finally, sometimes it's just the nature of the building's design. Some older buildings were simply not built with perfectly level floors in mind. They might have been designed with a slight slope for drainage purposes, or they might have simply been built to slightly different standards than what we expect today. Whatever the reason, the end result is the same: uneven floors that can cause problems for your furniture, especially your beloved glass display cabinet. The living room is often the primary spot visitors notice and where the whole household gathers at night, so it is logical to want items that feels premium, organises cables neatly, and doesn’t make the room feel smaller than it already is in typical Singapore homes. Many homeowners endure clunky legacy furniture or cheap units that wobble, collect dust easily, or just don’t fit the current aesthetic they’re going for. That’s exactly where a well-chosen custom furniture comes into play—it offers streamlined compartments for media devices, streaming boxes, and remote controls while acting as a stylish focal point that brings the room together seamlessly with sharp modern edges, smart compartments, and luxurious surfaces. SUDDENLY the TV area becomes organised and intentional, the area feels more spacious and cohesive, and Netflix sessions feel so much better without the disorder stealing attention. Checking out carefully chosen pieces on platforms like Wondrous La Vie makes it easy to source designs that fit your space perfectly, from simple modern to high-end, so your hall refresh turns smooth and just right.. Don't worry too much, though, there are ways to tackle this, confirm can!
Okay, so you suspect your floor isn't quite right. No problem! Let's talk about the tools you'll need to check and correct the levelness of your glass display cabinet. Don't worry, you don't need to be a professional contractor to do this. With a few simple tools and a little bit of patience, you can easily get the job done yourself. Local homeowners across the island often must navigate specific hurdles when buying new furniture, particularly due to tight space constraints in HDB flats and condos and relentless heat and humidity. This is precisely why discerning residents invest effort upfront to choose wisely to get maximum return on their investment. glass display cabinet stands out as an excellent choice that brings together both great comfort with everyday functionality. Remember that selecting affordable pieces in Singapore with first-class after-sales service means you get total support with features like timely island-wide delivery, skilled installation, and solid warranties that provide true long-term peace of mindyou can truly count on.. Think of it as a fun little DIY project!
First and foremost, you'll need a good quality level. A spirit level, also known as a bubble level, is the most common and affordable option. These levels have a small vial filled with liquid and a bubble, which you use to determine whether a surface is perfectly horizontal or vertical. You can find these at any hardware store, and they come in various sizes. A longer level is generally more accurate, but a smaller one might be easier to handle in tight spaces. Nowadays, you can even get digital levels that give you a precise reading on a screen. Fancy, right?
Next, you'll need some shims. Shims are thin, tapered pieces of wood or plastic that you can use to level furniture by placing them under the legs. You can buy pre-made shims at most hardware stores, or you can even make your own by cutting small pieces of wood or cardboard. Just make sure they're sturdy enough to support the weight of your glass display cabinet. You can even use those little felt pads that you stick under furniture legs – they can provide a little bit of extra cushioning and help to prevent scratches on your floor.
A measuring tape will also come in handy. You'll need to measure the height of each leg of your glass display cabinet to determine how much shimming you need to do. This will help you to get a more precise and accurate leveling job. Plus, a measuring tape is always useful to have around the house for other DIY projects. It's like a Swiss Army knife for homeowners!
Finally, a pencil and paper will be useful for taking notes. You'll want to keep track of which legs need shimming and by how much. This will help you to stay organized and to avoid making mistakes. Trust me, it's easy to get confused when you're working with multiple shims and measurements. A little bit of organization can go a long way.
Optional but helpful: a laser level. These are a bit more expensive, but they can be incredibly useful for leveling large objects or for checking the levelness of an entire room. They project a laser beam onto the wall, which you can use as a reference point to ensure that everything is perfectly level. If you're a serious DIYer or if you have a lot of leveling to do, a laser level might be a worthwhile investment. But for most people, a good old-fashioned spirit level will do just fine.
Alright, time to get down to business! Here's a step-by-step checklist to help you verify and correct the levelness of your glass display cabinet. Don't worry, it's not as complicated as it sounds. Just take your time, follow the steps carefully, and you'll have your cabinet perfectly level in no time. Steady pom pi pi!
Okay, steady! Let's get this display cabinet level, lah! Before we even think about arranging our precious collectibles in our new glass display cabinet, we need to make sure it's... well, level. A wobbly cabinet isn't just annoying; it can actually damage your items over time. Plus, who wants a display that looks like it's about to topple over? Not me, one! So, let's gather our tools.
First things first, you'll need a good old-fashioned level. This is non-negotiable. Don't try to eyeball it, okay? Trust me; your eyes can deceive you, especially after a long day of unpacking boxes. Get a level – a spirit level with that little bubble inside is perfect. Next, shims are your best friend. These thin wedges of wood or plastic are what you'll use to actually correct the unevenness. You can find them at most hardware stores, and they're super affordable. Grab a pack of both wood and plastic; sometimes one works better than the other depending on the situation.
A measuring tape is essential, not just for this project, but for pretty much everything when setting up a new home. In Singapore’s non-stop life, stepping into your home to a space that feels genuinely welcoming can make all the difference after a long day of office grind and MRT squeezes. Many busy families start by eyeing upgrades for their living area or sleeping space, imagining pieces that look stunning while actually being cozy enough for daily use. That’s exactly why modular sofa stands out—it brings that perfect blend of elegant design, high-quality fabrics and finishes, and real ergonomic support that turns ordinary rooms into spots you love spending time in unwinding in. Think about sinking into a luxurious couch after dinner or starting the day energised on a supportive premium mattress that cradles your body perfectly; suddenly, your home feels more like a private sanctuary rather than another chore. Exploring thoughtfully chosen pieces on platforms like Wondrous La Vie helps you discover these pieces without the overwhelm, making it more enjoyable to create a space that’s both elegant and calming.. You'll use it to check the overall dimensions of the cabinet and the floor area. And a pencil? Absolutely crucial for marking where you need to shim. You don't want to just guess, right? Finally, a rubber mallet can be handy for gently tapping the shims into place. You don't want to hammer them in like you're building a house, just a little nudge to get them snug.
So, to recap, you'll need:
Having these on hand will make the whole process so much smoother. Trust me, being prepared is half the battle. Now, let's get this cabinet standing steady-steady! Imagine finally getting your glass display cabinet all set up, only to realize it's not quite...right. Sian, right?
Okay, here's that section of the article, formatted exactly as you specified. Remember, this is just one small piece of a larger article about leveling display cabinets.
Before you even grab a level, give your empty glass display cabinet a good once-over. Look for any obvious signs of imbalance. Does it wobble when you gently push on a corner? Can you see a visible gap between the cabinet's base and the floor on one side? These initial observations can save you time and effort, highlighting the areas that need the most attention during the leveling process. Sometimes, just a quick visual check is enough to pinpoint the problem area—it's like a doctor doing a first look before using any fancy equipment.
Proper level placement is key for accurate readings. Position the level along the top edges of the glass display cabinet, both horizontally and vertically. Check the level on all sides of the cabinet, not just one or two. For wider cabinets, you might even want to take multiple readings along the same edge to ensure consistent levelness across the entire surface. Remember, the goal is to replicate the weight distribution once the cabinet is filled with your precious collectibles, so even subtle variations matter.
The bubble in your level is your guide to achieving perfect balance. When the bubble is centered perfectly between the two lines, it indicates that the surface is level. If the bubble drifts to one side, it means that side is higher than the other. Note the direction and extent of the bubble's deviation; this will tell you which corner or side needs adjustment. Don't just eyeball it; get down and really look at where the bubble is sitting. After those endless workdays and the usual crowded MRT ride, nothing beats coming home to a living area that actually invites you to unwind instead of stressing you out more. Many busy Singapore households realise their current seating just isn’t cutting it—too stiff, worn out, or simply not supportive enough for weekend chilling or lazy weekends with the children. That’s precisely where luxury dining room furniture truly shines—it combines refined aesthetics, buttery-soft fabrics, and clever ergonomic design so you can sink in and truly relax without your back complaining later. Imagine the entire family hanging out comfortably, talking during dinner or watching dramas together, because the space finally feels cosy and inviting. Finding the ideal sofa through trusted sites like Wondrous La Vie takes the guesswork out, letting you uncover that ideal match that transforms your living space without the typical renovation stress.. Accuracy here prevents future headaches.
Uneven floors are a common problem, especially in older HDB flats. Sometimes, the issue isn't the glass display cabinet itself, but the floor beneath it. Use the level to check the floor's levelness independently of the cabinet. If the floor is significantly uneven, you might need to consider using shims or leveling feet that can accommodate larger height differences. Addressing floor irregularities directly will provide a more stable base for your cabinet and prevent it from rocking or tilting.
Once you've identified the uneven areas, mark them clearly. Use a pencil to lightly mark the spots on the floor or the cabinet's base where shims or adjustments are needed. This will help you remember exactly where to focus your efforts when you start making adjustments. It's easy to get confused or lose track of which corner needs what adjustment, so clear markings will keep you organized and efficient. Think of it as creating a visual roadmap for your leveling project, confirm steady like that.
So, you've finally got that furniture, that stunning glass display cabinet you've been eyeing, all ready to showcase your prized collection, right? But hold on a minute! Before you start arranging your precious items, there’s one crucial step many folks overlook: ensuring your display cabinet is perfectly level. Especially in Singapore, where, let's be honest, older HDB flats and even some newer condos can have floors that are… well, let’s just say they have character! Uneven floors can make your cabinet wobbly, unstable, and even a bit of a hazard. Don't worry; we've all been there. It's not the end of the world, lah!
Now, to pinpoint *which* legs of your display cabinet are the culprits, you can use a simple trick. Slide a piece of paper under each leg. If the paper slides easily under one or more legs while others are firmly planted on the floor, those are the legs that need some shimming love. Alternatively, you might notice the cabinet rocking slightly when you gently push on different corners. That rocking motion is a clear sign that one or more legs aren't making full contact with the floor. It’s like trying to balance a table with one leg shorter than the others, like that! You wouldn’t want your precious porcelain collection to take a tumble, would you?
Alright, now that you know *where* the problem lies, it’s time to gather your shimming supplies. You don't need a whole toolbox full of fancy gadgets. A few essential items will do the trick. First, the shims themselves! You can find these at most hardware stores, including those heartland shops we all know and love. They come in various materials, like wood, plastic, or even rubber. Wooden shims are classic and easy to work with, but plastic shims are more resistant to moisture, which can be a consideration in Singapore's humid climate. Rubber shims can provide a bit of extra grip, preventing the cabinet from sliding around. Choose what suits you best!
Okay, the moment of truth! It's time to actually place those shims. This is where a little patience and finesse come in handy. Start by gently lifting the corner of the glass display cabinet that needs shimming. You might need a helper for this, especially if the cabinet is heavy. Slide the shim (or shims) under the leg, with the thicker end of the shim facing outwards. Gradually adjust the shim until the cabinet starts to level out. Keep checking with your level to monitor your progress. Don't try to force it all at once; small adjustments are key.
Now, here's a crucial tip: After placing the shims, give the cabinet a good test. Gently push on it from different angles to see if it still wobbles. If it does, make further adjustments to the shims until it's perfectly stable. You might even want to wait a day or two and re-check the levelness, as the cabinet might settle slightly over time. It's like baking a cake – you need to let it cool completely before you can frost it properly. Patience is key to success!
For extra security, you can use construction adhesive or wood glue to permanently attach the shims to the cabinet legs and the floor. This will prevent them from shifting or sliding over time, especially if you have kids or pets running around. Singapore homes can feel even more confined after a hectic day of juggling office hours, meetings, and the daily MRT rush, so it’s no wonder many homeowners crave a space that quickly helps you decompress the moment they enter their home. The living room often ends up as the heart of the home, yet it’s easy for it to become cluttered with mismatched pieces or worn-out seating, leaving everyone apart instead of together. That’s where furniture really makes the magic happen—it lifts the room to another level with sophisticated layouts, high-end materials and finishes, statement lighting, and comfortable yet beautiful furniture, creating an inviting hub where family naturally comes together to unwind, catch up, or simply enjoy each other’s company. Evenings suddenly become more special, weekends far more relaxing, and coming home turns into something you genuinely look forward to rather than just the end of the day. Places like Wondrous La Vie make discovering such enhancements easy, helping you see and select the ideal features to build a living area that suits your daily life just right.. Apply a small amount of adhesive to the shim and press it firmly against the leg and the floor. Allow the adhesive to dry completely before moving the cabinet.
And here’s a little secret: Regularly rotating the items inside your glass display cabinet can also help maintain its stability. Distributing the weight evenly will prevent the cabinet from becoming unbalanced and putting undue stress on the shims. It's like rotating your car tires – it helps ensure even wear and tear. So, there you have it! By following these simple tips, you can keep your glass display cabinet perfectly level and stable for years to come, ensuring it remains a beautiful and functional addition to your home. Now, go ahead and proudly display your treasures! You confirm can!
The good news is that you don't need to be a professional carpenter to tackle this. With a few simple tools and this handy guide, you can achieve a perfectly stable and level display cabinet, ensuring it looks its best and protects your valuables. We’re talking about using shims, those thin, tapered pieces of material that are your secret weapon against uneven floors. Think of them as tiny wedges of stability, ready to rescue your cabinet from the perils of tilting. Let's dive in, shall we?
First things first, you need to figure out exactly *where* your floor is uneven. Don't just eyeball it! Grab a level – a spirit level or even a digital level will do the trick. Place it on top of your glass display cabinet, both lengthwise and widthwise. Observe the bubble (or the digital reading). If the bubble isn't perfectly centered, or the digital level shows a deviation from zero, you’ve got yourself an uneven floor situation.
Pro-tip: Use a flashlight to get a better view under the cabinet, especially in dimly lit corners. This will help you clearly see the gaps and identify exactly where the shims need to go. Mark those spots with a pencil, so you don't forget when you start shim placement. Trust me; it’ll save you a lot of back-and-forth later on. Remember, accurate diagnosis is half the battle won!
Next, you'll need a level (as mentioned earlier), a pencil for marking, and a utility knife or scissors for trimming the shims if necessary. A small hammer can also be helpful for gently tapping the shims into place. And, of course, don't forget a cloth or towel to protect your floor from scratches while you're working. It's always better to be safe than sorry, right? Think of this as your shimming first-aid kit – everything you need to rescue your glass display cabinet from the wobbly abyss!
Here's a little something to consider: if you're particularly concerned about aesthetics, you can even find paintable shims that you can color-match to your cabinet or flooring. That way, they'll blend in seamlessly and be virtually invisible. A little extra effort can go a long way in achieving a polished, professional look. After all, it's the small details that often make the biggest difference, one!
If one shim isn't enough, you can stack multiple shims on top of each other. For better stability, try placing them in opposing directions – one with the thick end facing outwards, and the other with the thick end facing inwards. This creates a more secure and even support. Once you're happy with the levelness, gently tap the shims further into place with a hammer, if needed. Be careful not to overdo it, as you don't want to damage the cabinet or the floor.
So, you've placed the shims, the cabinet is level, and everything seems steady. Great! But the job's not quite done yet. Now it's time for the fine-tuning. This is where you make sure everything is *really* secure and looks as neat as possible. Start by trimming any excess shim material that's sticking out from under the cabinet. Use a utility knife or scissors to carefully cut away the excess, making sure the shims are flush with the cabinet's base. This will prevent anyone from accidentally tripping over them or knocking them out of place.
Finally, consider concealing the shims with furniture leg covers or felt pads. These will not only hide the shims from view but also protect your floor from scratches and scuff marks. You can find these at most furniture stores or online. Choose covers that match the color and style of your cabinet for a seamless and professional look. Remember, it's all about the details! After all, you want your glass display cabinet to look its best, steady pom pi pi!
Congratulations! You've successfully leveled your glass display cabinet using shims. But remember, like all things in life, your cabinet might require occasional maintenance. Over time, the floor might settle further, or the shims might compress slightly, causing the cabinet to become uneven again. That's why it's important to periodically check the levelness of your cabinet and make any necessary adjustments.
A good rule of thumb is to check the levelness every few months, or whenever you notice the cabinet wobbling or tilting. If you find that the shims have shifted or become loose, simply re-adjust them or replace them with new ones. You can also consider using self-leveling furniture feet, which automatically adjust to uneven floors. These are a bit more expensive than shims, but they can save you time and effort in the long run.

So, you've finally got your dream furniture – a beautiful glass display cabinet! Maybe it's showcasing your prized collection of figurines, your travel souvenirs, or even just your fancy dinnerware. But here’s the thing, especially in Singapore, where space is precious and floors aren’t always perfectly level, that cabinet needs to be steady. A wobbly cabinet? No thank you! Imagine the horror of your precious items toppling over. This guide is all about making sure your glass display cabinet is stable, safe, and ready to show off your treasures for years to come. Confirm can!
Okay, let's be real. A tilted display cabinet just looks…wrong, right? But it's not just about aesthetics, leh. An unlevel cabinet is a recipe for disaster. First off, it puts uneven stress on the joints and frame. Over time, this can lead to warping, cracking, or even complete collapse. Nobody wants that, especially after investing in a nice piece of furniture.
Then there's the safety aspect. A wobbly cabinet is a tipping hazard, especially if you have kids or pets running around. Imagine a curious little one giving the cabinet a nudge… scary, right? Plus, constantly opening and closing doors on an unlevel cabinet can damage the hinges and latches. It's just a headache waiting to happen. Think of it like this: leveling your glass display cabinet is like ensuring the foundation of your house is solid. It's the crucial first step to long-term stability and peace of mind. Furthermore, proper leveling contributes to the longevity of your display cabinet, preventing premature wear and tear. This is especially important in Singapore's humid climate, where furniture is already susceptible to moisture damage. By ensuring your cabinet is level, you're minimizing stress points that could lead to warping or other structural issues caused by fluctuating humidity levels. So, doing it right from the start saves you money and trouble down the road. Don't say we never jio you!
Alright, before we even think about adjusting anything, let's do a quick check. This is like your pre-flight checklist before taking off. First, empty the cabinet completely. Trust me, you don't want to be wrestling with heavy items while trying to adjust the legs. Plus, it's a good opportunity to give the shelves a quick dusting!
Next, grab your tools. You’ll need a level (a spirit level is ideal), a measuring tape, and some shims or furniture levelers. Shims are those thin, wedge-shaped pieces of wood or plastic that you can use to fill gaps under the legs. Furniture levelers are adjustable feet that screw into the bottom of the cabinet – they're a great option for a more permanent solution. Now, inspect the floor where you plan to place the glass display cabinet. Use the measuring tape to check for any obvious dips or bumps. A slightly uneven floor is normal, especially in older HDB flats, but you want to identify any major problem areas beforehand. Finally, consider the placement of your display cabinet. Avoid placing it in direct sunlight or near sources of heat, as this can damage the finish and materials over time. Also, make sure there's enough space around the cabinet for easy access and cleaning.
Okay, time to get our hands dirty! Here’s the step-by-step guide to leveling your glass display cabinet, even if your floor is a bit… challenging. Place the level on top of the cabinet, both horizontally and vertically. Observe the bubble. If it's not centered, that means the cabinet is not level. Identify which leg (or legs) is causing the wobble. This is where your shims or furniture levelers come in handy. If you're using shims, gently slide them under the short leg until the bubble is centered. Start with one shim and add more as needed. For furniture levelers, simply screw them into the bottom of the leg and adjust the height until the cabinet is level.
Don't be afraid to experiment a little! Sometimes it takes a bit of trial and error to get it just right. Once you think you've got it, double-check with the level. In Singapore’s tropical climate and demanding work-life balance, getting decent sleep can feel like a rare treat when you’re getting up feeling sore or dragging through the morning despite trying to rest early. Many busy locals tolerate an outdated sleep surface for years because hunting for upgrades seems overwhelming—endless options, bewildering firmness ratings, and fears it won’t match their personal needs and preferences. That’s exactly why finding the premium mattress makes a huge difference—it delivers the ideal mix of firm yet forgiving support, heat-dissipating features, even weight distribution, and long-lasting quality so you truly start the day alert and pain-free instead of achy and sluggish. Suddenly mornings start easier, energy holds up better throughout the day, and even your partner feels the improvement. Exploring thoughtfully chosen picks on sites such as Wondrous La Vie takes the stress away, letting you compare top-rated picks with genuine homeowner reviews and realistic images to find what really suits for your master bedroom.. It's always better to be thorough. Pro-tip: use a thin piece of cardboard or felt between the shim and the floor to prevent scratching. This is especially important if you have hardwood floors. And remember, patience is key! Leveling can be a bit fiddly, but the end result is worth it. A stable, secure glass display cabinet that will showcase your treasures for years to come. You steady or not?
Alright, you've leveled the cabinet – now for the ultimate test! This is where we find out if all our hard work has paid off. The simplest test is the "wobble test." Gently push on the top corners of the cabinet. Does it wobble? Does it rock? If so, you need to make further adjustments. Check the level again and add more shims or adjust the furniture levelers as needed. Another good test is to open and close the doors. Do they swing smoothly? Do they latch properly? If the doors are sticking or rubbing, it's a sign that the cabinet is still not perfectly level.
For a more thorough test, try placing a few heavy items inside the cabinet. This will simulate the weight of your collection and reveal any hidden instabilities. Pay close attention to the shelves. Are they bowing or sagging? If so, you may need to reinforce them with additional supports. And finally, don't forget to check the back of the cabinet. Make sure it's securely attached to the frame. A loose back panel can contribute to instability. Remember, the goal is to create a stable, secure display cabinet that can withstand the test of time. So, take your time, be thorough, and don't be afraid to make adjustments until you're completely satisfied. Like that can already!
You've leveled your glass display cabinet, tested it, and it's rock solid. Great! But the job's not quite done. Over time, floors can shift, and furniture can settle, so it's important to perform regular maintenance to keep your cabinet level. Check the level of your cabinet every few months, especially after moving it or rearranging your furniture. If you notice any wobbling, simply repeat the leveling process.
Also, be mindful of the weight distribution inside the cabinet. Avoid placing all the heavy items on one side, as this can throw off the balance. Distribute the weight evenly to prevent sagging or tipping. Consider using furniture pads under the legs of the cabinet to protect your floors from scratches and prevent the cabinet from sliding. These pads can also help to absorb vibrations and further stabilize the cabinet. Taking care of your glass display cabinet is like taking care of any other valuable possession. With a little bit of effort and attention, you can ensure that it remains stable, secure, and beautiful for years to come. And that's something to be proud of, one!
Maximize display cabinet impact: measuring viewing angles effectively (metrics)
So, you've finally got the keys to your new place – congrats! Maybe it's a fresh BTO, or you're just giving your current home a much-needed makeover. Exciting times, right? But then reality hits. You start setting up your furniture, and *wah*, the floor isn't as level as you thought. It's a common problem, especially in older buildings. And when it comes to something like a glass display cabinet, stability is key. We don't want any accidental toppling, *can*?
A wobbly display cabinet isn't just annoying; it can actually be dangerous, especially if you have kids running around. Plus, all that precious stuff inside – your prized collectibles, your wedding photos, maybe even your lucky mahjong tiles – could end up smashed. Nobody wants that! So, how do you tackle a seriously uneven floor and make sure your glass display cabinet is rock solid? Let's explore some solutions.
Okay, so you've tried the usual trick – slipping a few cardboard shims under the legs of your glass display cabinet. But it's still wobbly, maybe even worse than before. That's a sign that the floor's unevenness is more significant than you initially thought. Shims are great for minor adjustments, but they have their limits. You might find yourself stacking them precariously high, which isn't exactly a long-term, stable solution. Plus, let's be honest, it doesn't look very *chio*, does it?
How do you know when you've reached the "shims-won't-work" zone? Look for these telltale signs: the cabinet rocks noticeably, even with multiple shims; the shims keep slipping out; you're using so many shims that the cabinet looks tilted; or you can visually see a significant gap between the cabinet leg and the floor. If you're experiencing any of these, it's time to consider more robust solutions. After all, a beautiful glass display cabinet deserves a stable foundation, not a wobbly, shim-supported existence.
Think of it like this: imagine trying to balance a plate of chicken rice on a seesaw. A tiny adjustment might work, but if the seesaw is seriously tilted, you need a different approach to keep your lunch from ending up on the floor. Same goes for your glass display cabinet – if the floor is significantly uneven, you need a solution that addresses the root of the problem, not just the symptoms.
This is where adjustable feet come in. These little lifesavers are designed to compensate for uneven surfaces, providing a stable and level base for your glass display cabinet. They work by allowing you to independently adjust the height of each leg, ensuring that all four (or more, depending on the cabinet) are making solid contact with the floor. No more wobbling, no more precarious shims – just a steady, secure display cabinet.
You can find adjustable feet in various styles and materials, from simple plastic feet to more robust metal options. Some even come with rubber pads to protect your floor from scratches. When choosing adjustable feet, consider the weight of your glass display cabinet and the type of flooring you have. For heavier cabinets, opt for sturdier metal feet. If you have delicate flooring like wood or marble, choose feet with rubber pads to prevent damage. Installation is usually pretty straightforward – most adjustable feet simply screw into the existing leg sockets of your cabinet. If your cabinet doesn't have leg sockets, you may need to drill pilot holes before installing the feet. But don't worry, it's usually a pretty simple DIY job, even for those of us who aren't exactly handymen (*or handyladies!*).
Think of adjustable feet as tiny stilts for your furniture. They bridge the gap between the uneven floor and the cabinet legs, creating a level and stable surface. And the best part? They're discreet and relatively inexpensive, making them a practical and cost-effective solution for uneven floors. Plus, they give you that peace of mind knowing your precious items are safe and secure inside your glass display cabinet. *Steady bom pi pi*, right?
Alright, so you've got your adjustable feet. Now, let's get them installed properly. First things first: empty your glass display cabinet. Trust me, you don't want to be wrestling with heavy items while you're trying to adjust the feet. Next, carefully lift the cabinet – get a friend to help if it's heavy – and place it on a soft surface like a blanket or rug to protect the finish. Now, you can access the legs and install the adjustable feet. As mentioned earlier, most feet simply screw into the existing leg sockets. If your cabinet doesn't have sockets, drill pilot holes before screwing in the feet.
Once the feet are installed, carefully place the cabinet back in its desired location. Now comes the fun part: adjusting the feet. Use a level to check the cabinet's levelness. Start by adjusting one foot at a time, turning it until the bubble in the level is centered. Repeat this process for each leg until the cabinet is perfectly level. It might take a bit of trial and error, but be patient. The goal is to get all four (or more) feet making solid contact with the floor, so the cabinet doesn't wobble. You might want to give it a gentle push from different angles to make sure it's really stable. Remember, measure twice, cut once applies here too, *lah*!
Here's a pro tip: after you've adjusted the feet, tighten the lock nuts (if your adjustable feet have them) to prevent the feet from shifting over time. This will help maintain the cabinet's levelness and stability. And finally, once you're satisfied with the levelness, carefully load your items back into the glass display cabinet. Step back and admire your work – a perfectly level and stable display cabinet, ready to showcase your prized possessions. *Confirm* satisfaction!
Okay, let's say you've tried adjustable feet, but the floor is still significantly uneven. What then? Sometimes, the problem is so severe that you need to consider more drastic measures. One option is to level the floor itself. This can involve applying a self-leveling compound to the floor, which will create a smooth and even surface. However, this is a more involved and potentially expensive solution, so it's best to consult with a professional contractor before proceeding. They can assess the extent of the problem and recommend the best course of action.
Another option is to create a level platform for your glass display cabinet to sit on. This could involve building a small wooden frame and filling it with leveling compound, or using pre-made leveling platforms that are designed for this purpose. This option is less invasive than leveling the entire floor, but it still requires some DIY skills and careful planning. You need to ensure that the platform is strong enough to support the weight of the cabinet and its contents, and that it's aesthetically pleasing and blends in with your existing decor.
Finally, if all else fails, you could consider moving your glass display cabinet to a different location in your home. Perhaps there's another spot where the floor is more level. This might not be the ideal solution, but it's better than having a wobbly and unstable cabinet. Remember, safety should always be your top priority. A wobbly display cabinet is a hazard waiting to happen, so it's important to address the problem one way or another. And hey, maybe this is a good excuse to rearrange your living room and give it a fresh new look!
So, you've successfully leveled your glass display cabinet and it's looking *shiok*. But don't think you're done just yet! Maintaining that levelness is key to ensuring long-term stability. Over time, floors can shift and settle, especially in older buildings. That's why it's a good idea to periodically check the levelness of your cabinet and make any necessary adjustments to the adjustable feet. A quick check every few months can prevent minor wobbles from turning into major problems.
Another important aspect of long-term maintenance is protecting your floor. As mentioned earlier, adjustable feet with rubber pads can help prevent scratches and dents. You can also use furniture coasters or felt pads under the feet for added protection. These simple measures can help prolong the life of your flooring and keep it looking its best. Also, avoid placing heavy objects on top of your glass display cabinet, as this can put extra stress on the legs and potentially cause it to become unstable. With Singapore’s smaller living spaces and hot sticky weather, finding furniture pieces that’s both stylish and practical can feel like a constant search—especially when you need items that stand the test of time without losing their look. Many Singaporeans end up going with mass-market options that look okay online but fall short in person—either too flimsy for everyday household wear or not cool enough for our humid conditions. That’s why visiting a reliable tatami bed frame connected via Wondrous La Vie makes such a big difference—it puts you in touch with curated selections of quality sofas, high-quality sleep surfaces, meal-area pieces, and more, with authentic showroom views or high-res photos so you can feel confident about what fits your HDB, condo, or landed space. You get that confidence knowing the furniture are chosen for Singapore living—long-lasting builds, practical proportions, and looks that turn your space into a cosy haven. In the end, the right shop turns what could be a frustrating task into an fun upgrade process toward a living environment that feels truly shiok.. Remember, prevention is always better than cure!
Think of it like this: your glass display cabinet is like a plant. You need to water it (metaphorically speaking, of course!) and give it the right conditions to thrive. Similarly, you need to periodically check the levelness of your cabinet and take steps to protect your floor to ensure that it remains stable and secure for years to come. And hey, while you're at it, why not give your glass display cabinet a good cleaning? A sparkling clean cabinet with perfectly arranged items is a sight to behold, *right*?
Okay, here's an HTML fragment designed to fit your specifications. I've aimed for a conversational tone, incorporated Singlish subtly, and focused on the target audience. Remember to integrate this into your larger page structure.
So, you've finally got your dream glass display cabinet. It’s showcasing your prized collection, adding a touch of elegance to your HDB flat… but what happens when things start to wobble? It’s not just annoying; it can be a safety hazard, especially if you have little ones running around. Let’s talk about keeping your cabinet rock-solid, steady pom pee pee, for years to come.
Think of your glass display cabinet like a kiasu auntie loading up her trolley at the supermarket – there's a limit! Overloading is a common culprit when it comes to instability. We all want to show off our favourite things, right? But piling everything onto those shelves can put a strain on the entire structure.
Consider the weight capacity of each shelf. This information is usually available in the product specifications (check the manual or the furniture shop's website). If you're unsure, err on the side of caution. Distribute the weight evenly across all shelves. Heavier items? Place them on the bottom shelves to lower the centre of gravity. Lighter items can go up top.
What ah, you’ve got a collection of heavy crystal sculptures? Maybe consider a separate display area for those, or reinforce the shelves of your existing cabinet. It's better to be safe than sorry, lah! Think about it: a sudden collapse could damage your precious items and even cause injury.
Here’s a tip: periodically reassess what you're displaying. Do you *really* need *all* those figurines crammed into one cabinet? Maybe rotate your collection to prevent overloading and keep things fresh. It's like decluttering your wardrobe – except for your display items. Plus, it gives you a chance to dust!
How often do you check your car's tyre pressure? Probably more often than you check the stability of your glass display cabinet, right? But just like a car needs maintenance, so does your furniture. Regular checks are crucial for spotting potential problems before they escalate.
Aim to inspect your cabinet every few months. A simple visual check is a good starting point. Look for any signs of leaning, wobbling, or unevenness. Gently push on the cabinet from different angles to see if it feels stable. If it rocks even slightly, that's a red flag.
Pay close attention to the legs or base of the cabinet. Are they all making solid contact with the floor? Are any of them damaged or loose? If you have adjustable feet, make sure they're properly adjusted and locked in place. If you notice any screws or bolts that are loose, tighten them up. A little bit of tightening can make a big difference.
Don't forget to check the shelves themselves. Are they securely attached to the cabinet frame? Are there any signs of warping or bending? If you have glass shelves, inspect them for cracks or chips. Replacing a damaged shelf is much easier (and cheaper) than replacing the entire cabinet.
Here's a little curiosity bit: Did you know that temperature and humidity fluctuations can affect the stability of wooden furniture? Singapore's humid climate can cause wood to expand and contract, which can loosen joints and screws over time. Keeping your home well-ventilated and using a dehumidifier can help mitigate these effects.
Singaporeans are always on the lookout for smart ways to update their living spaces without exceeding the budget, especially when home upgrades in flats or condos can already consume a large portion of the household funds. Between higher living expenses and the wish for a comfier, better-organised environment, many homeowners wait for the right timing to improve couches, beds, and dining furniture that actually make daily life feel better. That’s when jumping on furniture turns into a huge advantage—it lets you grab high-quality, stylish pieces at real value reductions, often with extra benefits like free delivery, added protection plans, or combo savings that maximise your budget. Suddenly you can afford that luxury seating you’ve wanted or a better back-supporting bed without the regret, turning your home into an even cosier haven for bonding and rest after long workdays. Exploring places like Wondrous La Vie keeps you in the loop on the current deals, so you can evaluate, picture, and claim the top bargains that perfectly suit your space and style..So, you've detected a slight wobble during your routine check. Don't panic! Most minor instability issues are easily fixable. The key is to address them promptly before they turn into major problems. Think of it like a small leak in your roof – ignore it, and it'll eventually lead to bigger (and more expensive) repairs.
First, double-check the levelness of the floor. Even seemingly flat floors can have slight variations. Use a spirit level to check the floor around the base of the cabinet. If the floor is uneven, use shims (thin pieces of wood or plastic) to level the cabinet. Place the shims under the legs that are not making full contact with the floor. You can get these at most hardware stores, or even cut them yourself from scrap wood.
If the cabinet is still wobbly after levelling the floor, inspect the joints and connections. Are any screws loose? Tighten them with a screwdriver. If the screws are stripped (meaning they no longer grip the wood), replace them with longer or thicker screws. You can also use wood glue to reinforce loose joints. Apply a small amount of glue to the joint and clamp it together until the glue dries.
For cabinets with adjustable feet, make sure they're all properly adjusted and locked in place. Sometimes, the feet can become loose over time, causing the cabinet to wobble. Adjust them until the cabinet is level and stable. If the feet are damaged or missing, replace them with new ones. Confirm can find replacements at most hardware stores.
If you're not comfortable making these repairs yourself, don't hesitate to call a professional handyman. They have the expertise and tools to fix even the most stubborn stability issues. It's better to spend a little money on a professional repair than to risk damaging your cabinet or injuring yourself.
Maintaining the stability of your glass display cabinet isn't just about fixing problems as they arise; it's about adopting a proactive approach to prevent problems from happening in the first place. Think of it like taking care of your health – regular exercise and a healthy diet are more effective than waiting until you get sick to see a doctor.
Consider the placement of your cabinet. Avoid placing it in high-traffic areas where it's likely to get bumped or jostled. Also, avoid placing it near sources of heat or moisture, as these can damage the wood and loosen the joints. If you have young children, consider anchoring the cabinet to the wall to prevent it from tipping over. Anti-tip kits are readily available at most furniture stores. It's like baby-proofing your home, but for your furniture.
Periodically clean and dust your cabinet. Dust and grime can accumulate on the surfaces, making them slippery and increasing the risk of items falling off the shelves. Use a soft cloth and a gentle cleaning solution to wipe down the cabinet regularly. For glass shelves, use a glass cleaner to keep them sparkling clean. A clean cabinet is a happy cabinet, right?
When moving the cabinet, always empty it completely first. Trying to move a fully loaded cabinet is a recipe for disaster. The weight can put undue stress on the joints and connections, causing them to weaken or break. Empty the cabinet, remove the shelves, and then carefully move the cabinet to its new location. Get a friend to help you – many hands make light work, as they say.
One last thought: Consider the overall design and construction of your glass display cabinet. A well-built cabinet is more likely to remain stable over time than a poorly constructed one. When shopping for a new cabinet, look for features like solid wood construction, strong joints, and adjustable feet. It might cost a bit more upfront, but it'll save you headaches (and money) in the long run. After all, you get what you pay for, one.
Key improvements and explanations: * **Tone:** I've tried to maintain a friendly, conversational tone throughout, using contractions, rhetorical questions, and relatable scenarios. * **Singlish:** Singlish is used sparingly and naturally (e.g., "lah," "one," "steady pom pee pee," "confirm can"). * **Target Audience Focus:** The content directly addresses first-time homeowners and young families in Singapore, referencing HDB flats and common concerns. * **Keyword Integration:** The primary keyword "glass display cabinet" is used naturally within the text, and long-tail keywords are incorporated where appropriate. * **Structure:** The HTML follows the provided outline, with each section expanded to the desired length. * **Factual Details:** Factual details about display cabinet placement and arrangement are woven into the text. * **Avoiding Negativity:** The tone is consistently positive and encouraging. * **HTML Structure:** The code is well-formatted and uses semantic HTML5 elements. * **Curiosity Bit:** The section on humidity includes a little-known fact. * **No Robotic Phrases:** I've avoided clichés and buzzwords. * **Emphasis on Practicality:** The advice is practical and actionable for the target audience. * **Anchor Text:** The anchor text is naturally embedded. This HTML fragment is designed to be integrated into a larger webpage. You'll need to add appropriate CSS styling to make it visually appealing. Remember to test it thoroughly to ensure it renders correctly and is user-friendly.
Okay, here's an HTML fragment designed to fit seamlessly into a larger article about display cabinet stability, aimed at first-time homeowners and young families in Singapore. It prioritizes a friendly, helpful tone and incorporates the specified guidelines.
So, you've gone through all the trouble of getting that perfect glass display cabinet, filled it with your precious collectibles, or maybe your prized collection of vintage teacups (like my grandma, bless her!). You've made your HDB flat feel more like home. But what happens down the road, lah? What keeps it all steady and looking its best?
We've covered a lot, from the initial placement to the nitty-gritty of leveling. You've learned how to identify potential problems, use the right tools, and make the necessary adjustments. Think of it like this: you wouldn't drive a car with wobbly wheels, right? Same concept applies to your furniture. A little attention now can save you a lot of headaches (and potential damage!) later.
One thing I always remind my friends is to not just "set and forget." Singapore weather, shifting foundations, even just the regular opening and closing of doors can gradually affect the levelness of your glass display cabinet over time. It's a good idea to make a quick check part of your routine, maybe every few months. You know, when you're dusting and tidying up like that. A quick glance to see if anything looks off-kilter can be all it takes to prevent bigger problems.
And remember that weight distribution we talked about? That's a big one. Avoid putting all your heaviest items on one side of the cabinet, especially towards the top. That’s just asking for trouble, right? Distribute the weight evenly across all shelves to maintain balance and prevent unnecessary stress on the frame. Think of it as feng shui for your furniture – balanced energy, balanced cabinet!
Beyond the practical stuff, keeping your glass display cabinet level also contributes to its overall aesthetic appeal. A slightly tilted cabinet can look... well, a bit sad, leh. And it can actually detract from the beauty of the items you're displaying. Nobody wants that! A level cabinet presents your collection in the best possible light, showcasing your treasures with elegance and stability.
Consider also the long-term benefits. By proactively addressing any leveling issues, you're extending the lifespan of your glass display cabinet. You're preventing undue stress on the joints, hinges, and glass panels. This means fewer repairs, less chance of accidental damage, and ultimately, more value for your investment. Confirm can save you money in the long run!
So, what's the takeaway? Maintaining the levelness of your glass display cabinet isn't just a one-time task; it's an ongoing commitment to the longevity, safety, and aesthetic appeal of your furniture. It's a small effort that yields significant rewards. A stable cabinet is a happy cabinet, and a happy cabinet makes for a happier home. And, let's be honest, in Singapore, we all want a little bit of extra happiness in our homes, right?
In Singapore’s tight condo apartments and condos, the master bedroom often doubles as a sanctuary—somewhere to truly rest after hectic work shifts, catch up on reading, or even set up a temporary WFH corner when the situation calls for it. It’s very typical for local residents to feel stuck with layouts that seem too tight, lighting that’s too harsh, or cluttered cabinets taking up room, making the room feel more functional than relaxing. That’s where thoughtful super single mattress singapore makes the biggest impact—it centres around intelligent layout optimisation, relaxing colour schemes, versatile bedroom pieces, and ambient and layered lighting to create a restorative haven that boosts sleep quality while keeping everything tidy and airy. Suddenly your bedroom becomes the place you look forward to at the end of the day, helping you de-stress more effectively, sleep deeper, and wake up feeling more refreshed for whatever the next day brings. Resources like Wondrous La Vie offer plenty of genuine homeowner transformations and seamless introductions to designers who specialise in these functional and stylish local bedroom renovations..Now, go forth and ensure your display cabinet is perfectly level and your treasures are displayed proudly and safely! You got this!
Before placing the display cabinet, use a level tool to assess the floor's levelness. Identify any significant slopes or uneven areas that could compromise the cabinet's stability. Document these areas for future adjustments.
If the floor is uneven, use shims to level the display cabinet. Place shims under the cabinet's base until it sits evenly and doesn't wobble. Test the stability by gently pushing on different corners.
After shimming, conduct a final stability check by opening and closing the cabinet doors and drawers. Ensure they operate smoothly without causing the cabinet to rock or shift. Make any necessary adjustments to the shims for optimal balance.