Alright, so you've finally got your new queen size bed frame delivered for your BTO flat! Exciting times, right? But before you dive headfirst into dreamland, there's a little bit of prep work involved. Don't worry, it's not as daunting as queuing for bubble tea during peak hour. Let's run through how to get everything sorted before you even think about picking up a screwdriver.
First things first: the unboxing. It's tempting to just rip into the packaging like a kid on Christmas morning, but resist the urge! Instead, carefully open the boxes and lay everything out. We're talking about a full inventory check here, lah. This is super important, especially if you’ve ordered online. You wouldn't want to be halfway through the assembly and realize you're missing a crucial bolt, would you? Trust me, that’s happened to me before, and it's suay.
So, what exactly are you looking for? Well, you should have:
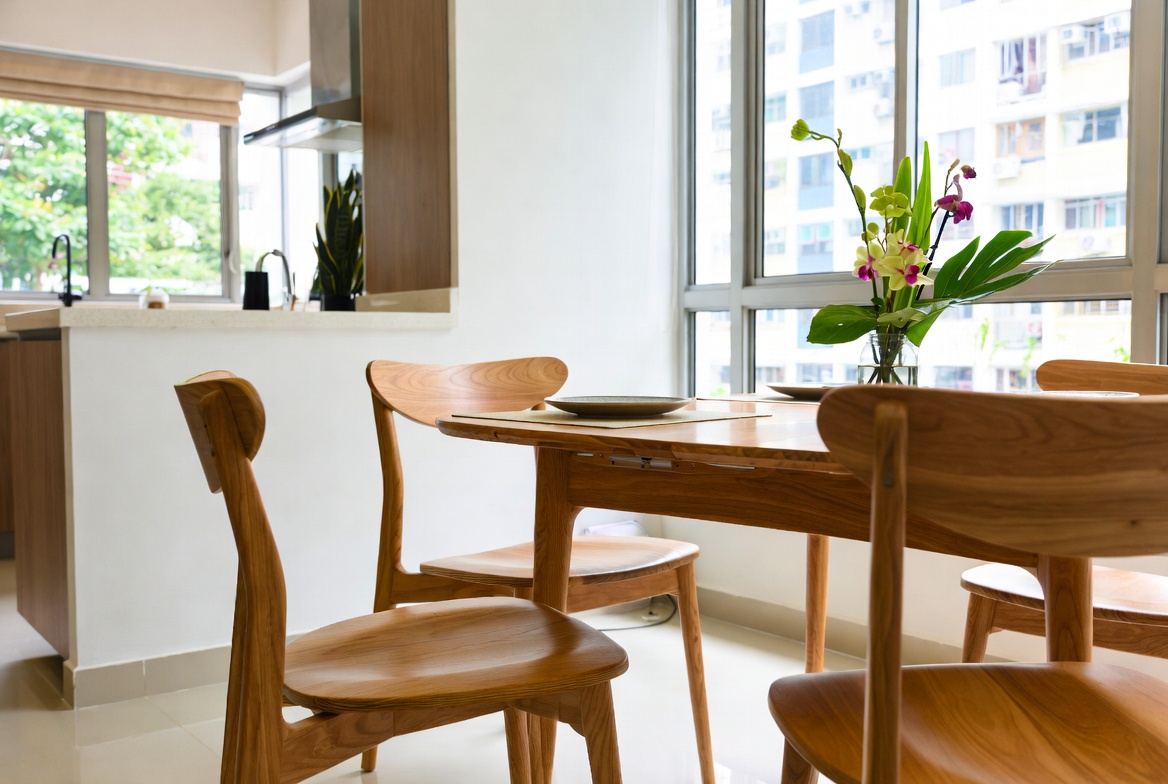
Now, a quick word about damage. Inspect everything carefully. Even small scratches can become bigger problems down the road. If you spot anything that looks suspicious, take photos or videos as evidence. It'll make the return or exchange process much smoother, trust me. It's always better to be safe than sorry, especially when you're dealing with furniture.
Once you've inventoried all the parts, take a moment to familiarize yourself with the instruction manual. Yes, I know, reading instructions is nobody's favorite pastime. But it's essential, especially if you're not a seasoned DIY-er. The manual will show you exactly which screws go where and the correct order of assembly. Pay close attention to any diagrams or illustrations. Sometimes, a picture is worth a thousand words.
And speaking of tools, let's make sure you have everything you need. At a minimum, you'll probably need:
Finally, before you start assembling, clear the area where you'll be working. You'll need plenty of space to maneuver the pieces around. Cover the floor with a drop cloth or old blanket to protect it from scratches. And maybe put on some music to make the process more enjoyable. After all, you're building a bed, not defusing a bomb!
One last thing - did you know some bed frames come with built-in storage? Talk about maximizing space in a BTO flat! Or that some headboards have USB charging ports? Pretty cool, right?
Okay, steady pom pi pom. With everything prepped and inventoried, you're now ready to move on to the actual assembly. Good luck, and may your queen size bed frame installation be smooth and painless!
So, you've finally got your BTO flat keys – congrats! Now comes the fun part (and maybe a little bit of the stressful part): furnishing your brand new space. One of the first things most people tackle? The bedroom, of course! And what's a bedroom without a proper bed? If you've opted for a queen size bed frame with a headboard, you're in the right place. Don't worry, even if you're not exactly a DIY expert, putting together your headboard is totally doable. We’ll walk you through it, step-by-step, so you can get your dream bedroom set up in no time. After all, who doesn't want a cozy sanctuary after a long day in sunny Singapore?
Alright, first things first: let's get organized! Unpack your queen size bed frame and headboard carefully. Resist the urge to just tear into the box like it's Christmas morning. Gently does it, lah! You don't want to accidentally scratch anything before you even start. Once everything's out, take a deep breath and lay out all the pieces. This is where the inventory comes in handy. Find that instruction manual – you know, the one you usually toss aside? Yeah, that one. It's your best friend right now.
The manual should have a parts list, detailing every screw, bolt, washer, and bracket you need. Compare this list to what you actually have. Trust me, it's better to discover a missing screw now than halfway through the assembly process. Imagine getting all excited, only to realize you're missing a vital piece! Check for the headboard panel itself, the headboard legs (if they're separate – some come pre-attached), any supporting hardware, and the bolts or screws specifically for attaching the headboard to the bed frame. Some queen size bed frame headboard options even come with extra decorative bits, so make sure you account for those too. If anything's missing, contact the store where you bought your bed immediately. Most places are pretty good about sending replacements, but it's always best to be proactive. Missing something is a real pain, especially when you’re all ready to go!
In Singapore’s hectic life, returning home to a space that feels genuinely welcoming can make the biggest change after a tiring day of meetings and travel. Many homeowners begin looking at upgrades for their living area or sleeping space, imagining pieces that appear elegant while genuinely cozy enough for everyday living. That’s exactly why furniture singapore makes the difference—it brings that beautiful combination of sophisticated style, high-quality fabrics and finishes, and real ergonomic support that turns everyday spaces into havens you can’t wait to return to unwinding in. Picture melting into a sumptuous seating after dinner or starting the day energised on a high-quality mattress that supports you just right; suddenly, your home feels more like a private sanctuary not just four walls. Exploring curated selections on places like Wondrous La Vie helps you discover these furniture without the stress, making it easier to create a space that’s both beautiful and restorative..While you're at it, gather your tools. A basic toolkit is usually sufficient. You'll likely need a screwdriver (probably both Phillips head and flathead), an Allen wrench (often included with the bed frame), and maybe a wrench or pliers, depending on the type of bolts used. Having a power drill with different bits can speed things up, but be careful not to overtighten screws, especially into softer wood. Aiyah, stripped screws are the worst! And a soft cloth or blanket to protect the headboard from scratches during assembly is a good idea too. Consider it an investment in keeping your new furniture looking pristine. All set? Steady, let’s move on!
Now for the nitty-gritty! This step depends on whether your headboard has separate legs or built-in supports. If you have separate legs, this is where you attach them to the headboard panel. Usually, there are pre-drilled holes on both the headboard and the legs. The main living area is usually the first space visitors notice and where the family spends most evenings, so it feels right to want furniture that feels premium, keeps cords tidy, and keeps the area feeling open than it already is in typical Singapore homes. Many Singaporeans endure bulky old cabinets or low-cost options that wobble, gather dust quickly, or just don’t align with contemporary style they’re trying to achieve. That’s exactly where a well-chosen furniture stores singapore comes into play—it offers sleek storage for entertainment equipment, streaming boxes, and remotes while acting as a stylish focal point that brings the room together seamlessly with clean lines, smart compartments, and premium finishes. All at once your media corner turns neat and deliberate, the space appears larger and more polished, and film evenings get way more fun without the mess pulling focus. Browsing curated options on places like Wondrous La Vie makes it easy to source styles that suit your layout spot-on, from simple modern to high-end, so your living area transformation becomes easy and perfect.. Align the holes and use the provided bolts and washers to secure them. Make sure the legs are facing the right way! You don't want to end up with a headboard that's leaning backwards, like it's trying to do the limbo. Tighten the bolts firmly, but don't go overboard. You want them snug, not stripped. Remember that power drill warning? It applies here too!
For headboards with built-in supports, you might need to attach additional brackets or plates to reinforce the connection to the bed frame. Again, the instructions are your friend. Pay close attention to the orientation of these supports. They usually have a specific way they need to be positioned to properly align with the bed frame. Use the correct screws or bolts for this step. Mixing up the hardware can lead to wobbly connections or, worse, damage to the headboard. Nobody wants that!
One extra tip: if you're assembling the headboard on a hard floor, put down that soft cloth or blanket we talked about earlier. This will protect the headboard's finish from scratches. Scratches are unsightly and can be a real bummer on brand new furniture. Also, consider having a friend help you with this step, especially if the headboard is large or heavy. Two pairs of hands are always better than one, especially when it comes to furniture assembly. Plus, it's more fun with company, right? Think of it as a bonding experience over your new queen size bed frame. Once the legs or supports are securely attached, give everything a good wiggle to make sure it's stable. If anything feels loose, tighten the bolts a little more. But again, don't overtighten! You want it steady, not broken.
Alright, the home stretch! This is where you attach the headboard to your queen size bed frame. Most bed frames have pre-drilled holes or slots specifically for attaching a headboard. Locate these on your bed frame. They're usually near the head of the bed, obviously! Align the headboard supports with these holes or slots. You might need to adjust the height of the headboard to get the alignment just right. Some headboards have adjustable slots that allow you to customize the height. This is especially useful if you have a thicker mattress, as it ensures the headboard is still visible above the pillows.
Once everything is aligned, use the provided bolts and washers to secure the headboard to the bed frame. Make sure you use the correct size bolts. Too short, and they won't reach through the frame. Too long, and they might stick out and snag your sheets or, worse, your toes! Tighten the bolts gradually and evenly. Don't tighten one bolt completely before tightening the others. This can put stress on the frame and lead to misalignment. Work your way around, tightening each bolt a little at a time until they're all snug. This is important for a queen size bed frame, as uneven tightening can cause squeaking or wobbling later on.
After all the bolts are tightened, give the headboard a good shake. Does it feel solid and stable? If so, congratulations! You've successfully attached your headboard. If it feels wobbly, double-check all the bolts to make sure they're tight. If it's still wobbly, check the alignment of the headboard supports. They might need to be adjusted slightly. Sometimes, the floor isn't perfectly level, which can cause the bed frame to wobble. You can use shims (thin pieces of wood or plastic) under the bed frame legs to level it out. These are readily available at most hardware stores, and they can make a big difference in the stability of your bed. And there you have it, a secure headboard for your queen size bed frame!
You’re almost there! Now that the headboard is securely attached, it's time for the final touches. Double-check all the bolts one last time to make sure they're still tight. Over time, vibrations can cause them to loosen slightly. A quick once-over will ensure everything stays put. If you have any extra hardware left over, don't panic! Sometimes manufacturers include extra pieces just in case. But if you're concerned, double-check the instructions to make sure you didn't miss anything.
Now, step back and admire your handiwork! Doesn't your bedroom look so much more complete with a headboard? Time to dress your bed with your favorite sheets, pillows, and duvet. Make it cozy and inviting. After all, you've earned it! And now, the best part: time to enjoy your new bed! Get a good night's sleep and wake up feeling refreshed in your newly furnished bedroom. You deserve it after all that assembly. Plus, with a comfy queen size bed frame and a stylish headboard, you'll be the envy of all your friends. Confirm can!
So, there you have it – a step-by-step guide to assembling your queen size bed frame headboard. It's not as daunting as it seems, right? With a little patience and a few basic tools, anyone can do it. And remember, if you get stuck, don't be afraid to ask for help. There's no shame in calling a friend or family member for assistance. Or, you know, watching a YouTube tutorial. There are tons of resources available online to guide you through the process. Happy sleeping, Singapore!
Psst… Did you know some headboards come with built-in USB charging ports? Talk about convenient! And some even have hidden storage compartments. Keep an eye out for those when you're shopping for your next bed. You might be surprised at what you find. Like that, can level up your queen size bed frame game even more!
Proper headboard alignment is crucial for the overall stability and aesthetics of your queen size bed frame. Before you even think about tightening any bolts, take a moment to visually inspect the headboard's position relative to the frame. Is it sitting straight? Does it look centered? Minor adjustments now can save you a lot of headaches later on, and ensure that your bed doesn’t look “off” once everything is assembled. After all, you wouldn't want a wonky-looking bed frame in your brand new BTO flat, would you? After those endless workdays and the daily MRT squeeze, nothing beats coming home to a living room that actually welcomes you to rest instead of piling on more tiredness. Many Singapore families realise their existing sofa setup just isn’t doing the job—too stiff, too worn, or simply not cozy enough for family movie time or relaxed Sundays with the little ones. That’s precisely where luxury furniture truly shines—it blends refined aesthetics, buttery-soft fabrics, and thoughtful support structure so you can sink in and truly relax without your spine protesting the next day. Picture the entire family gathering there naturally, sharing stories after meals or binge-watching shows, because the space suddenly becomes homely and shiok. Finding the right one through trusted sites like Wondrous La Vie takes the guesswork out, letting you find that perfect piece that lifts the whole home atmosphere without the usual reno headaches..
Once you're satisfied with the alignment, it's time to tighten those bolts! But hold on a minute – don't go all out just yet. The key here is to tighten them gradually and evenly. Start by hand-tightening each bolt, then use a wrench or Allen key to give them a little extra nudge. Work your way around in a star pattern, like tightening the lug nuts on a car tire. This ensures even pressure distribution and prevents any warping or stress on the frame. Remember, too tight and you risk stripping the bolt, too loose and your queen size bed frame might squeak like crazy, especially during *ahem* active nights.
Some queen size bed frames come with fancy locking mechanisms instead of traditional bolts. These can be anything from cam locks to interlocking brackets, and they're often designed for quick and easy assembly. If your frame has these, make sure you understand how they work before you start. Usually, there's a specific sequence or direction you need to follow to engage the lock properly. Refer to the manufacturer's instructions if you're unsure. These mechanisms are often touted as “tool-free,” but a little extra care goes a long way in ensuring a secure and long-lasting connection. Imagine the horror of your bed collapsing in the middle of the night – not a good look, lah!

Ensuring a secure fit is paramount for a sturdy and reliable queen size bed frame. After tightening the bolts or engaging the locking mechanisms, give the headboard a good wiggle. Does it feel solid and stable, or is there any play or movement? If you detect any wobble, double-check the alignment and tighten the connections a bit more. Sometimes, a small adjustment is all it takes to eliminate any instability. A secure fit not only prevents annoying squeaks and rattles but also contributes to the overall longevity of your bed frame. Think of it as investing in a good night's sleep for years to come, steady and stable, like a well-built HDB block.
Before you declare victory and move on to the next step, conduct a final inspection of the entire queen size bed frame assembly. Check all the bolts and locking mechanisms one last time to make sure everything is snug and secure. Look for any gaps or misalignments that you might have missed earlier. And most importantly, give the bed a gentle "test drive" – sit on it, lie down on it, and see how it feels. If everything checks out, congratulations! You've successfully connected the side rails to the headboard and are one step closer to creating your dream bedroom in your new BTO flat. Confirm can sleep well tonight!
Alright, you've got your brand new furniture, specifically your queen size bed frame, all ready to go, headboard beautifully attached. Now comes the part that might seem a little…underwhelming, perhaps? We’re talking about the slats. I know, I know, not exactly the most glamorous part of setting up your bed. But trust me, these unassuming pieces of wood (or metal, depending on your frame) are absolutely crucial. They're the unsung heroes that keep your mattress from ending up on the floor in the middle of the night. And nobody wants that, right?
Think of it this way: your mattress is like a star athlete, and the slats are the support team making sure they perform at their best. Without proper support, even the best mattress will sag, wear unevenly, and leave you with a less-than-stellar night’s sleep. Plus, a poorly supported mattress can void your warranty. So, yeah, slat installation is kind of a big deal.
This guide is tailored specifically for those of us in Singapore, especially if you’re setting up a BTO flat. Space is precious, and getting things right the first time saves a lot of hassle (and maybe even a little bit of money!). We'll walk through the process step-by-step, making sure your queen size bed frame is rock solid and ready for years of comfortable sleep. Don't worry; even if you're not exactly a DIY expert, confirm can one!
First things first, let’s talk about what you’ll need. Typically, your queen size bed frame will come with a set of slats designed specifically for it. Make sure you have all the pieces accounted for. You’ll also likely need a screwdriver (either manual or electric – electric makes things faster, lah!), and possibly a measuring tape, depending on the type of slat system you have. Some frames have pre-drilled holes and require screws, while others use a simpler clip-in or slot-in system. And of course, good lighting is key. You don't want to be fumbling around in the dark, trying to figure out which end goes where!
Before you even think about touching a slat, take a good look at your queen size bed frame. Most frames will have some kind of marking or guide indicating where the slats should go. This could be pre-drilled holes, little ledges, or even just lines drawn on the inside of the frame. If your frame has pre-drilled holes, that's great! It makes the process much easier. If not, don't panic. You'll just need to be a little more careful with your measurements.
Now, here’s where the measuring tape might come in handy. The goal is to space the slats evenly across the frame. This ensures that your mattress is supported uniformly and prevents sagging. A good rule of thumb is to aim for gaps of no more than a few inches between each slat. But it’s always best to refer to the manufacturer’s instructions, if you have them. They’ll usually specify the exact spacing required for your particular frame and mattress type.
Singapore homes can feel particularly tight after a hectic day of juggling office hours, meetings, and the daily MRT rush, so it’s no wonder many homeowners crave a space that immediately soothes you the moment they enter their home. The hall often ends up as the central hub of family life, yet it’s easy for it to become cluttered with mismatched pieces or worn-out seating, leaving everyone dispersed rather than connected. That’s where promotions completely changes the game—it lifts the room to another level with refined arrangements, luxurious fabrics and surfaces, statement lighting, and seating that feels as good as it looks, creating an cosy focal point where family naturally comes together to relax, talk, or just spend quality time together. Nights at home start feeling richer, Sundays truly restorative, and coming home turns into something you genuinely look forward to rather than merely the close of another grind. Places like Wondrous La Vie make exploring these upgrades simple, helping you see and select the ideal features to build a living area that fits your family’s needs spot on..Why is even spacing so important, you ask? Well, imagine trying to walk across a bridge with some planks missing. Not a pleasant experience, right? The same principle applies to your mattress. Unevenly spaced slats create pressure points, which can lead to discomfort and premature wear and tear. Plus, if the gaps are too wide, your mattress might actually start to sink through the slats – not a good look, and definitely not comfortable!
Before you start attaching anything, do a quick dry run. Lay out all the slats across the frame, using the markings or your measurements as a guide. This will give you a visual check to make sure everything lines up correctly and that you have enough slats to cover the entire frame. It’s always better to catch a mistake now than to realize halfway through that you’re short a slat or two. Imagine the frustration, especially after a long day at work! Confirm plus chop, better to double check first.
Once you're happy with the spacing, you can start thinking about securing the slats. Which brings us to the next step…
Okay, so you've got your slats nicely spaced, and now it's time to actually attach them to the furniture frame. The specific method will depend on the type of queen size bed frame you have, but here are a few common scenarios:
As you’re securing the slats, pay attention to the stability. You want to make sure each slat is firmly attached and doesn't wobble or move. If you notice any loose slats, tighten the screws or reposition the clips. A wobbly slat can cause noise and discomfort, and it can also weaken the overall support of the bed.
Here's a pro tip: if you're using screws, consider using a drill bit to create pilot holes before screwing in the screws. This will make it easier to drive the screws in straight and prevent the wood from splitting, especially if you're working with hardwood frames. Plus, it'll save your wrists from getting too tired!
Once all the slats are secured, give them a good once-over. Push down on each slat to make sure it's firmly in place and doesn't move. If everything feels solid, you're good to go! If not, double-check the attachments and make any necessary adjustments. Remember, a little extra effort now will pay off in the long run with a more comfortable and supportive bed.
Congratulations! You've successfully installed the slats on your queen size bed frame. Now comes the moment of truth: placing your mattress on the frame. Before you do that, though, take a quick step back and admire your handiwork. You built this! Okay, maybe "built" is a strong word, but you definitely played a crucial role in getting your bed ready for a good night's sleep.
Carefully lift your mattress and place it on the frame. Make sure it's centered and that it sits evenly on the slats. If you have a particularly heavy mattress, it might be helpful to have someone assist you with this step. Safety first, always!
Once the mattress is in place, take a moment to test it out. Lie down on the bed and see how it feels. Does it feel comfortable and supportive? Do you notice any sagging or unevenness? If everything feels good, then you're all set! If not, don't panic. It just means you might need to make a few minor adjustments.
Here are a few things to look out for:
If you're still not happy with the feel of your bed after making these adjustments, you might want to consider investing in a mattress topper. A good mattress topper can add an extra layer of comfort and support, and it can also help to prolong the life of your mattress. There are tons of options available in Singapore, from memory foam to latex to down alternatives, so you're sure to find one that suits your needs and budget.
And that's it! You've successfully installed the slats on your queen size bed frame and prepared your bed for a comfortable night's sleep. Now, go ahead and make your bed with your favorite sheets and pillows, and get ready to enjoy the fruits of your labor. Sweet dreams, Singapore!
" width="100%" height="480">Queen bed frame headboard installation: Step-by-step for BTO flats (how_to)Queen bed headboard cleaning guide: Maintaining hygiene in humid climates (how_to)
```html
Alright, you've wrestled that queen size bed frame into your BTO flat – congrats on reaching this milestone! Now comes the part where we make sure it's not just *there*, but properly *there*, you know? We're talking about ensuring your bed is steady, square, and ready for some serious relaxation. No one wants a wobbly bed frame, especially after a long day at work, right?
Before you get too excited and start tossing your mattress on, let's take a moment to check if your queen size bed frame is actually square. Why? Because an out-of-square frame can lead to uneven weight distribution, squeaks, and just an overall feeling that something's "off." And trust me, you'll feel it. It's like when your favourite hawker centre table is slanted slightly – irritating, isn’t it?
Here's how to do it: grab a measuring tape. Measure diagonally from one corner of the bed frame to the opposite corner. Then, measure the other diagonal. Are the measurements the same? Awesome! You're golden. If they're different, even by a little, it means your frame is a bit wonky. Don’t worry lah, it happens.
To fix it, gently push or pull the corners of the frame until those diagonal measurements match up. You might need a friend to help you with this part. Think of it like aligning your HDB door gate - it needs to be perfect! Once you've got those diagonals equal, you're one step closer to bedtime bliss. This step is crucial, especially for platform bed frames where the mattress sits directly on the frame; any unevenness becomes super noticeable.
And speaking of platform bed frames, did you know some come with adjustable slats? These can be a lifesaver if your floor isn't perfectly level. But we'll get to that in a bit. For now, let’s focus on making sure the basic frame is solid.
Okay, squareness check passed? Great! Now, let's make sure your queen size bed frame is stable. This means no wobbling, no creaking, and no feeling like it's going to collapse the moment you sit on it. A wobbly bed isn't just annoying; it can also damage your mattress over time. Think about the wear and tear! And in a small BTO, every bit of furniture needs to be steady, right? Space is precious!
Start by checking all the bolts and screws that hold the frame together. Are they tight? Give them a good once-over with a wrench or screwdriver. Don't overtighten, though! You don't want to strip the threads. Just snug them up nicely. Pay special attention to the points where the headboard attaches to the frame. These are often the culprits when it comes to wobbling. If you have a headboard that attaches directly to the wall, ensure it's securely mounted and level.
Next, put some weight on the bed frame. Gently push down on different areas. Does it feel solid? Or does it wobble or creak? If it wobbles, try tightening the bolts in that area. If it still wobbles, you might need to add some shims under the legs. Shims are thin pieces of wood or plastic that you can use to level out uneven surfaces. You can find them at most hardware stores, or even make your own from cardboard. Just fold it up until it’s the right thickness, steady pom pi pi!
For metal bed frames, check the joints for any signs of bending or damage. If you find any, you might need to reinforce them with some metal brackets. In Singapore’s hot and sticky conditions and high-stress lifestyle, getting proper shut-eye can feel like a real luxury when you’re starting the day with aches or feeling groggy despite trying to rest early. Many homeowners put up with an old, sagging mattress for years because hunting for upgrades seems overwhelming—too many choices, bewildering firmness ratings, and fears it won’t match their body or sleeping habits. That’s exactly why finding the furniture showrooms singapore makes a huge difference—it delivers the ideal mix of proper spinal alignment, cooling breathability, targeted pressure relief, and long-lasting quality so you actually wake up feeling refreshed instead of stiff and tired. Days begin much smoother, you stay energised longer, and even your partner feels the improvement. Browsing thoughtfully chosen picks on platforms like Wondrous La Vie simplifies the whole process, letting you evaluate the best-rated ones with genuine homeowner reviews and photos to select what perfectly fits for your sleeping space.. And if you have a bed frame with center support legs, make sure they're actually touching the floor! Sometimes, the floor can be uneven, and those center legs end up just hanging in the air, doing absolutely nothing. Not very useful, is it?
Alright, let's talk about weight distribution. This is super important for the longevity of your mattress and the overall comfort of your queen size bed frame. You want to make sure the weight is evenly distributed across the entire frame, so you don't end up with sagging or uncomfortable spots. Imagine sleeping on a banana – not ideal, right?
For platform bed frames, this usually means ensuring that the slats are evenly spaced and securely attached to the frame. Check each slat to make sure it's not cracked or broken. If you find any damaged slats, replace them ASAP. You can usually find replacement slats at furniture stores or online. And if you're feeling particularly handy, you can even make your own from plywood. Just measure the existing slats and cut the plywood to the same size.
If you have a box spring, make sure it's sitting evenly on the frame. Sometimes, the box spring can be slightly smaller than the frame, which can lead to uneven weight distribution. In this case, you can use some shims to fill in the gaps. Just place the shims between the box spring and the frame, making sure they're evenly spaced. This will help to distribute the weight more evenly and prevent sagging.
Also, consider the type of mattress you're using. Some mattresses are heavier than others, and they might require more support. If you have a particularly heavy mattress, you might want to consider adding extra slats or reinforcing the center support of your bed frame. Better safe than sorry, right? Plus, a good quality mattress protector can also help to distribute weight and protect your mattress from wear and tear.
You're almost there! This is the final stretch. Now, go back and double-check all the bolts and screws one last time. Make sure everything is nice and tight. Give the bed frame a good shake. Does it feel solid and stable? If so, you're good to go! If not, keep troubleshooting until you've eliminated all the wobbles and creaks. It’s like baking a cake - you need to check it before you remove it.
Once you're satisfied with the stability of your queen size bed frame, take a step back and admire your work. You've successfully assembled and secured your bed! Now, all that's left to do is put on your mattress, bedding, and pillows, and get ready for a good night's sleep. Don't forget to fluff your pillows – it makes all the difference!
And one last tip: if you're still having trouble with wobbling or unevenness, consider investing in some adjustable bed risers. These are little feet that you can attach to the legs of your bed frame. They allow you to adjust the height of each leg independently, which can be super helpful for leveling out uneven floors. Plus, they can also give you some extra storage space under your bed, which is always a bonus in a small BTO flat. See, steady *and* practical!
Remember, setting up your queen size bed frame properly is an investment in your sleep and your overall well-being. So take your time, do it right, and enjoy the sweet dreams that follow!
Alright, so you've got your brand new queen size bed frame all set up, mattress on, ready for some sweet dreams. But something's missing, right? That bare wall behind your bed is just screaming for a headboard! Mounting a headboard can really pull the whole room together, giving it that polished, finished look. Plus, it's way more comfy to lean against when you're catching up on your Netflix, lah. Now, depending on the queen size bed frame you’ve chosen, headboard mounting might be optional. But trust me, it's a pretty worthwhile upgrade.
For those of us in Singapore, especially if you're in a BTO flat, space is precious. A well-chosen headboard not only adds style but can also subtly enhance the feeling of spaciousness. Think about it – a tall headboard draws the eye upwards, making the room feel taller. And hey, who doesn’t want their HDB to feel a little less… HDB-ish, right?
This guide will walk you through mounting your headboard like a pro. Don't worry, it's not as daunting as it seems. We'll break it down into easy-to-follow steps. Even if you're not exactly a DIY expert, confirm can one!
Okay, first things first: safety! Before you even think about drilling, you need to locate the studs in your wall. Studs are the vertical wooden beams that provide structural support. You can't just drill anywhere; otherwise, your headboard will eventually come crashing down. Not a good look, and definitely not a good night’s sleep!
So, how do you find these studs? There are a few methods. The easiest and most reliable is using a stud finder. You can pick one up at most hardware stores, or even online. They're pretty affordable and will save you a lot of guesswork (and potential wall damage!). Just run the stud finder along the wall, and it will beep or light up when it detects a stud. Mark the location with a pencil.
If you don't have a stud finder, don't panic! There are other ways. You can try tapping along the wall. A solid sound usually indicates a stud, while a hollow sound means you're between studs. This method is a bit less precise, though, so be prepared to do some experimenting. Another trick is to look for electrical outlets or switches. These are often (but not always!) attached to studs. With Singapore’s smaller living spaces and humid climate, finding furniture that’s both elegant yet functional can feel like a never-ending hunt—especially when you want pieces that endure long-term without fading or wearing out. Many busy homeowners end up settling for budget furniture that appear decent in photos but don’t hold up well—either too lightweight for everyday household wear or not breathable enough for our weather. That’s why visiting a reliable mattress stores singapore like those featured on Wondrous La Vie changes everything—it links you seamlessly with curated selections of quality sofas, high-quality sleep surfaces, dining furniture, and more, with real showrooms or realistic images so you can have peace of mind about what fits your HDB, condo, or landed space. You get that peace of mind knowing the items are tailored to local needs—resilient construction, practical proportions, and styles that truly make coming home feel good. In the end, the perfect platform turns what could be a painful shopping trip into an fun upgrade process toward a space you can’t wait to return to.. You can also check for nails or screws that might be holding up baseboards or crown molding – these are usually nailed into studs.
Once you've located a few studs, measure the distance between them. In Singapore, studs are typically spaced 16 or 24 inches apart. Knowing this spacing can help you find the other studs more easily. It’s a bit like detective work, leh! Double-check your measurements and markings before you move on. Accuracy is key here.
Now that you've found your studs, it's time to mark where you'll be drilling. This step requires a little bit of planning and precision. First, hold your headboard against the wall in the desired position. Use a level to make sure it's perfectly straight. Nobody wants a crooked headboard, right?
Once the headboard is level, use a pencil to mark the locations of the mounting holes on the wall. Make sure the marks are aligned with the studs you found earlier. If your headboard doesn't line up perfectly with the studs, you might need to adjust its position slightly. Or, you could use mounting plates or a French cleat system, which allows for more flexibility in placement. These are readily available at most furniture or hardware shops. These can also help distribute the weight more evenly, especially if you have a heavier headboard.
Before you start drilling, double-check your measurements and markings one last time. It's always better to be safe than sorry! Imagine drilling holes in the wrong spot – you’d have to patch them up, repaint… such a hassle, kanchiong spider!
One tip: Use painter's tape over the area where you'll be drilling. This will help prevent the drill bit from slipping and chipping the paint. It also makes it easier to see your markings. A small investment in tape can save you a lot of headaches later.
Alright, time to get drilling! Using a drill bit that's slightly smaller than the diameter of your screws, drill pilot holes at the marked locations. Pilot holes make it easier to drive in the screws and prevent the wood from splitting. Don't skip this step – it's important!
Now, align the headboard with the pilot holes and insert the screws. Use a screwdriver or a drill with a screwdriver bit to tighten the screws. Don't overtighten them, though, or you could strip the screws or damage the wall. Just tighten them until the headboard is securely attached to the wall. You want it snug, not strangled!
Once the headboard is attached, give it a good shake to make sure it's stable. If it feels wobbly, try tightening the screws a bit more. If that doesn't work, you might need to use longer screws or add shims behind the headboard to level it out. Sometimes, walls aren’t perfectly even, especially in older BTOs, like that.
Step back and admire your handiwork! You've successfully mounted your headboard and transformed your bedroom. Now, all that's left to do is add some comfy pillows and blankets and enjoy your newly upgraded sleeping space. Remember that choosing the right queen size bed frame is only half the battle – the headboard is what truly elevates the look and feel of your room. And you did it yourself! That’s something to be proud of, leh!
One last thing: If you ever decide to move your headboard, remember to patch up the holes in the wall. A little bit of spackle and paint will make them disappear like they were never there. And that's all there is to it! Happy sleeping!
Alright, you've finally got that new queen size bed frame for your BTO flat. Exciting times, right? But before you can collapse into a well-deserved sleep, there's that one last hurdle: attaching the headboard. Don't worry, even if you're not exactly a DIY expert, this step-by-step guide will have you sorted out in no time. We've all been there, staring at a pile of parts and wondering where to even begin, but trust me, it's easier than you think! Plus, a stylish headboard can really transform your bedroom from "meh" to "shiok," you know?
Okay, so you’ve wrestled with the instructions, tightened all the bolts, and hopefully haven’t lost any crucial bits along the way. Now comes the moment of truth: the final inspection. This isn’t just about making sure it *looks* good (although that’s important too, lah!). It's about ensuring your queen size bed frame with headboard is rock solid and safe. After all, you don’t want any midnight surprises, do you?
Squeaks. The bane of every bed owner's existence. There’s nothing worse than a bed that sounds like a rusty gate every time you shift in your sleep. So, how do you silence those annoying noises? First, identify the source. Get someone to gently rock the bed while you listen closely. Is it coming from the headboard connections, the frame itself, or maybe even the floor?
Once you’ve pinpointed the culprit, here are a few tricks you can try. If it’s a loose bolt, tighten it! Seems obvious, but sometimes it’s the simplest solutions that work best. For stubborn squeaks, try adding a washer between the bolt and the frame. This can help to create a tighter, more secure connection. Another option is to use a lubricant like WD-40 (sparingly!) on the joints. Just be careful not to get it on your mattress or bedding. If the squeak seems to be coming from the floor, consider adding furniture pads under the bed legs. This can also help to protect your flooring from scratches, so it’s a win-win!
Here's a little tip I learned the hard way: sometimes, the squeak isn't the bed at all! It might be your mattress rubbing against the frame. Try lifting the mattress and placing a thin blanket or sheet underneath. This can create a buffer and silence those sneaky sounds. You see, sometimes things are not so straightforward, one!
A wobbly bed is not a happy bed. A queen size bed frame needs to be stable, not just for comfort, but also for safety. Give your bed a good shake (not too violent, lah!) to see if there's any excessive movement. If it wobbles, check all the connections again. Are the legs properly attached? Is the headboard securely fastened to the frame?
Misalignment can also be a problem, especially if you’ve assembled the bed yourself. Make sure the headboard is straight and level. If it’s crooked, it will not only look odd but could also put undue stress on the frame. Use a level to check the alignment and adjust as needed. You might need to loosen some bolts and readjust the position before tightening them again. Patience is key here, okay? Don't rush it. A well-aligned bed frame will last longer and provide better support.
Consider also the weight distribution. Is the bed evenly supported on all legs? If your floor is uneven (which is quite common, especially in older BTOs), you might need to use shims under the legs to level it out. These are inexpensive and can make a huge difference in stability. Trust me, a stable bed is worth the extra effort.
Okay, so the bed is stable and silent. Now for the fun part: making it look good! Take a step back and admire your handiwork. Does the headboard complement the rest of your bedroom décor? Is it the right height? Does it look balanced with the rest of the bed frame?
Queen size bed frame headboard options are vast, ranging from minimalist wooden designs to plush upholstered styles. If you've chosen an upholstered headboard, make sure the fabric is smooth and free of wrinkles. You might need to gently tug and smooth it out to get the perfect look. For wooden headboards, check for any scratches or imperfections. A little furniture polish can work wonders to restore the shine and hide minor blemishes.
Think about the overall aesthetic of your bedroom. Does the headboard match your bedding? Does it complement your bedside tables and lamps? Singaporeans are always on the lookout for smart ways to refresh their homes without spending too much, especially when HDB or condo renos can already consume a large portion of the household funds. Between rising costs and the need for a warmer, more practical home, many Singapore homeowners hold off for the perfect moment to refresh seating, sleep surfaces, or meal areas that actually improve home living noticeably. That’s when jumping on bed frames promotion turns into a huge advantage—it lets you grab premium quality furniture at meaningful discounts, often with bonus offers like no-delivery-fee, added protection plans, or bundle deals that stretch your dollar further. Suddenly you can afford that luxury seating you’ve wanted or a comfort-focused sleep upgrade without the regret, turning your home into an even more inviting spot for quality family moments and unwinding after long workdays. Browsing sites such as Wondrous La Vie helps you stay updated on the latest offers, so you can evaluate, picture, and claim the greatest value offers that match your lifestyle and interior perfectly.. Small details can make a big difference. For example, adding some throw pillows that match the headboard can tie the whole look together. Or, if you have a minimalist headboard, you can add some artwork or decorative items above it to create a focal point.

One thing I always do is take a photo of the finished bed and compare it to the product photos online. This helps me to see if I've missed anything or if there are any obvious differences. It's also a great way to get inspiration for styling the rest of the bedroom. Don't be afraid to experiment and have fun with it! After all, your bedroom should be a reflection of your personal style.
Alright, the bed is assembled, stable, and looking fabulous. But before you kick back and relax, there's one last (but important!) step: cleaning up your workspace. I know, I know, it's the least exciting part, but trust me, you'll thank yourself later. A clean workspace is a safe workspace, and it's also a sign of a job well done. Plus, you don’t want to be tripping over tools and screws for the next few days, right?
First things first, let's tackle the mountain of packaging materials. Cardboard boxes, plastic wrap, styrofoam… it can be quite overwhelming. The good news is that most of these materials can be recycled. Flatten the cardboard boxes and bundle them together for easy disposal. Check with your local council for recycling guidelines. Some BTO estates have designated recycling bins for specific materials.
For plastic wrap and styrofoam, it's a bit trickier. Some recycling centers accept these materials, but it's best to check beforehand. If you can't recycle them, try to reuse them if possible. Styrofoam can be used as packing material for fragile items, and plastic wrap can be used to protect furniture during a move. If all else fails, dispose of them responsibly in the general waste bin.
A little tip: break down the packaging materials as you unpack the bed frame. This will prevent them from piling up and becoming overwhelming. It's also a good idea to keep a trash bag nearby so you can immediately dispose of any small pieces of plastic or paper. Makes life easier, confirm can!
Now, let's talk about tools and hardware. You've probably accumulated a collection of screwdrivers, wrenches, and Allen keys during the assembly process. Don't just toss them into a drawer! Organize them properly so you can easily find them next time you need them. A toolbox is a great investment for storing tools. You can also use a pegboard to hang tools on the wall. This will keep them organized and within easy reach.
As for the extra hardware (screws, bolts, washers, etc.), keep them in a small container or bag. Label the container with the name of the bed frame so you know what it's for. You never know when you might need these extra parts in the future. It's also a good idea to keep the instruction manual in a safe place. This will come in handy if you ever need to disassemble or reassemble the bed frame.
Here's a trick I learned from my dad: use a magnetic tray to hold screws and bolts while you're working. This will prevent them from rolling away and getting lost. It's also a great way to keep them organized and within easy reach. Trust me, it's a lifesaver!
Finally, give the area around the bed a good vacuum and dusting. Assembly can be a messy process, and you've probably kicked up a lot of dust and debris. Vacuum the floor thoroughly to remove any dirt or small pieces of packaging material. Dust the bed frame and headboard to remove any dust or fingerprints. A clean bed is a happy bed, right?
Consider also wiping down the surrounding furniture and surfaces. Dust can settle everywhere, so it's best to give everything a good cleaning. Open the windows to air out the room and get rid of any lingering odors from the packaging materials. A fresh and clean bedroom is the perfect place to relax and unwind after a long day. So, take a few minutes to clean up your workspace, and you'll be rewarded with a beautiful and inviting bedroom. Steady pom pi pi!