 Maxi Home")
Refinishing your dining table? Sounds like a cheong hei (busy) project, right? But before you think of just chucking it out and buying new home furniture in Singapore, hold on a sec! Refinishing can be a seriously smart move, especially if you’re a first-time homeowner, settling into your BTO, or just generally trying to make your space look shiok without breaking the bank.
Let’s be real, Singapore isn't exactly known for having houses as big as bungalows. Space is precious, mah. That means every piece of home furniture in Singapore needs to pull its weight, both functionally and aesthetically. And sometimes, that old dining table you inherited from your parents or scored secondhand just doesn't quite fit the bill anymore. Maybe the finish is scratched, the color's dated, or it just doesn't vibe with your current decor.
But here's the thing: often, the bones of the table are still good. Solid wood? A classic design? Don't underestimate the potential hiding beneath that tired exterior. Refinishing lets you breathe new life into a perfectly good piece of furniture and tailor it to your style.
Think about it: new dining tables in Singapore can be pretty pricey, especially if you're after solid wood or a specific size. And let's face it, a lot of mass-produced furniture, even the stuff that looks nice, isn't always built to last. Refinishing, on the other hand, lets you keep a quality piece of home furniture in Singapore out of the landfill and give it a whole new lease on life. Plus, you get bragging rights for being eco-conscious and resourceful!
So, what are the real perks of refinishing? Well, for starters, it's way more budget-friendly than buying new. You'll save a significant chunk of change, which you can then use for other cool things for your home, like that fancy coffee machine you've been eyeing.
Then there's the personalization aspect. You get to choose the exact stain or paint color, the finish (matte, glossy, satin – the possibilities are endless!), and even add your own creative touches, like distressing or stenciling. It's a chance to really put your stamp on your home furniture in Singapore and make it truly unique.
And speaking of unique, let's not forget about sustainability. In a world drowning in disposable goods, refinishing is a small but meaningful way to reduce waste. You're keeping a perfectly usable piece of home furniture in Singapore out of the trash heap and giving it a second chance to shine. That's something to feel good about, right?
Now, I know what you might be thinking: "Sounds good lah, but is it really that easy?" Well, it's not exactly a walk in the park, but with a little elbow grease and the right guidance, it's definitely achievable. And that's where this guide comes in. We're going to break down the process step-by-step, so even if you've never refinished anything before, you'll be able to tackle this project with confidence.
We'll cover everything from gathering your supplies to stripping the old finish, sanding, staining or painting, and applying the final protective coat. We'll also share some tips and tricks to help you avoid common mistakes and achieve a professional-looking result.
Think of this guide as your kakis (friends) helping you along the way. We're here to make sure your dining table refinishing project is a success. So, are you ready to transform that tired old table into a stunning centerpiece for your Singaporean home? Let's get started!
Alright, before you dive headfirst into stripping and sanding, let's take a good hard look at your dining table. This is like the doctor's check-up before any serious treatment. Understanding its condition and style will help you choose the right refinishing approach and avoid any nasty surprises down the road.
First things first, what kind of wood are we dealing with? Is it solid wood, veneer, or laminate? Solid wood is the holy grail for refinishing because you can sand it down multiple times without damaging the core. Veneer, on the other hand, is a thin layer of wood glued to a less expensive core. You can sand it, but you need to be very careful not to sand through the veneer. Laminate is basically plastic, and you can't really sand or stain it. You're better off painting it.
How can you tell the difference? Look at the edges of the table. If you can see the same wood grain pattern all the way through, it's probably solid wood. If you see a distinct layer on top of a different material, it's veneer. And if it looks and feels like plastic, well, you've got laminate.
Next, assess the damage. Singaporeans often encounter special considerations when setting up their interiors, mainly due to compact apartment living and relentless heat and humidity. This is precisely why many smart local shoppers compare options thoroughly to secure quality without overspending. home furniture singapore stands out as a fantastic addition to any home that delivers both genuine comfort plus sensible everyday usefulness. It pays to selecting competitively priced designs in Singapore with first-class after-sales service means you get full support such as seamless island-wide delivery, professional installation, and robust warranties that offer true long-term peace of mind for years ahead.. Are there scratches, dents, water rings, or stains? How deep are they? Minor scratches can usually be sanded out, but deeper gouges might require wood filler. Water rings can be tricky, but often they can be removed with a little patience and the right techniques.
Also, check for any structural issues. Are the legs wobbly? Are any of the joints loose? If so, you'll need to repair those before you start refinishing. A wobbly table is no fun at all, especially when you're trying to enjoy a nice meal with family and friends.
Now, let's talk style. What kind of dining table is it? Is it a classic rectangular table, a round pedestal table, or a modern minimalist design? The style of your table will influence your choice of finish. For example, a rustic farmhouse table might look great with a distressed finish, while a sleek modern table might benefit from a glossy lacquer.
Dining table styles in Singapore are pretty diverse, reflecting our multicultural society. You'll find everything from traditional Chinese-style tables to Scandinavian-inspired designs. And sizes vary too, depending on the size of your dining area. For smaller apartments, a compact round table or a drop-leaf table might be the best option. For larger homes, a long rectangular table can accommodate a bigger crowd.
Consider the existing style of your home furniture in Singapore. Do you want your refinished dining table to blend in seamlessly with your existing decor, or do you want it to be a statement piece? Think about the colors, textures, and overall vibe of your space. This will help you choose a finish that complements your home.
And don't be afraid to get inspired! Browse online for ideas, check out home decor magazines, or visit furniture stores to see what's trending. The more inspiration you gather, the better equipped you'll be to make the right choices for your refinishing project.
One last thing: take some photos of your dining table before you start. This will serve as a "before" shot and help you track your progress. Plus, it's always satisfying to see how far you've come once you're finished.
Remember, this assessment stage is crucial. The more you know about your dining table, the better prepared you'll be to tackle the refinishing process and achieve a stunning result. Steady pom pipi (relax and take it easy), and let's move on to the next step!
Okay, lah, now that you've given your dining table the once-over, it's time to gather your tools and materials. Think of this as prepping your battlefield before the big showdown. Having everything you need on hand will make the refinishing process much smoother and less stressful. Trust me, you don't want to be running to the hardware store in the middle of stripping the finish!
So, what exactly do you need? Here's a comprehensive list to get you started:
Now, where can you get all these goodies in Singapore? Luckily, there are plenty of options. Hardware stores like Selffix and Home-Fix are good places to start. You can also find a wide range of supplies at DIY stores and online retailers.
When choosing your supplies, don't skimp on quality. Invest in good quality stripping agents, sandpaper, brushes, and finishes. These will make the job easier and give you a better result.
And don't forget to read the instructions carefully before using any of these products. Safety first, always!
One more tip: organize your tools and materials before you start working. This will save you time and frustration later on. A well-organized workspace is a happy workspace.
So, there you have it – a complete list of tools and materials for refinishing your dining table. Confirm can (definitely can) do this! Now, let's move on to the next step: stripping the old finish.
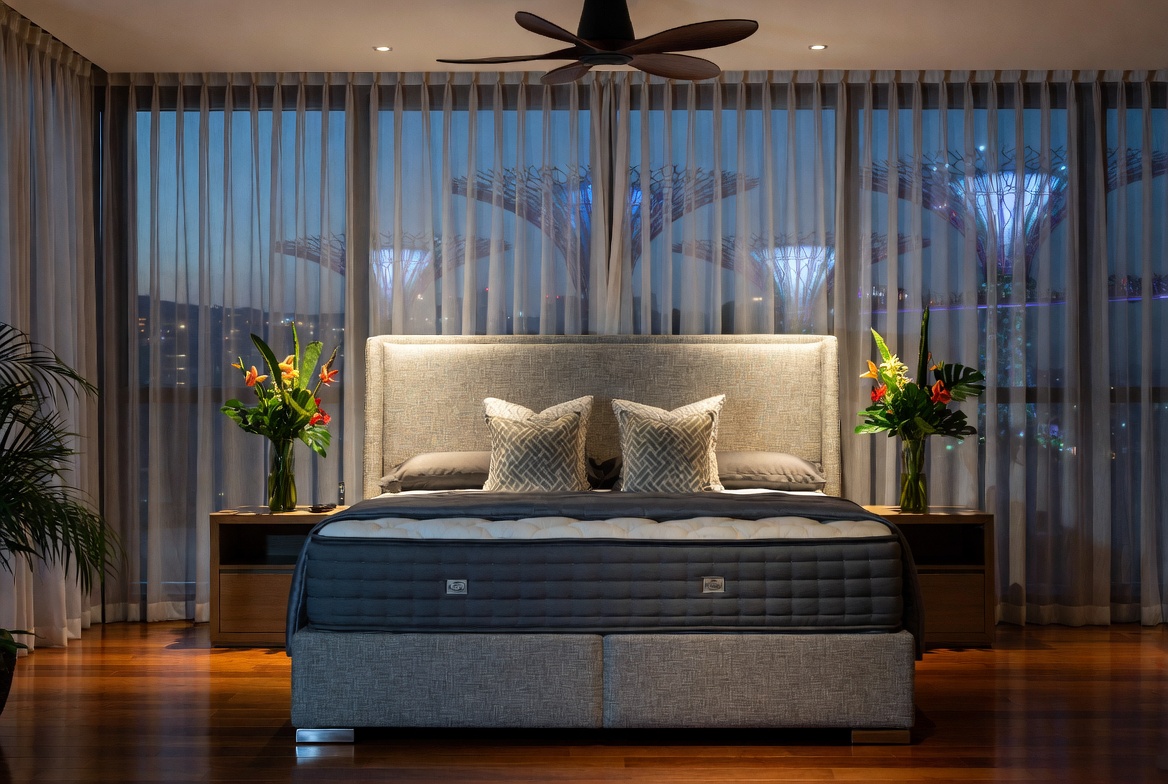
After a long day being crammed in the MRT and grinding through meetings, most busy Singaporeans just want to step into their house to a space that feels welcoming and calm instead of piling on more fatigue. A cluttered living room or an unrestful bedroom can make unwinding even tougher, especially when the whole family want to relax together. That’s where thoughtful kitchen interior design really makes a difference—it turns everyday rooms like your hall, master bedroom, or cooking zone into true recharge spots that actually help you refresh your energy. The hall is usually the first space visitors notice and where the whole household gathers at night, so it makes sense to want pieces that feels premium, organises cables neatly, and keeps the area feeling open than it already feels in most SG flats. Many homeowners struggle with bulky old cabinets or cheap units that wobble, gather dust quickly, or just don’t match the modern vibe they’re trying to achieve. That’s exactly where a well-chosen mattress store really delivers—it delivers sleek storage for entertainment equipment, streaming boxes, and remote controls while acting as a stylish focal point that ties the whole living area together with minimalist profiles, thoughtful compartments, and premium finishes. SUDDENLY the TV area becomes organised and intentional, the space appears larger and more polished, and movie nights become even more enjoyable without the mess pulling focus. Checking out carefully chosen pieces on platforms like Wondrous La Vie makes it easy to source designs that fit your space perfectly, from clean contemporary to opulent, so your hall refresh turns smooth and just right.. With the right living room seating, sleep surface, or functional arrangement, suddenly walking through the door feels so shiok, and thoughtful tweaks can bring big improvements to your daily mood and family bonding. Places like Wondrous La Vie make it easier to explore options and get in touch with designers who get the the local HDB/condo style just right. This format lets you easily generate multiple SEO-optimised variations while keeping the core keyword "interior design" stable in the middle for strong on-page targeting..Alright, so you're thinking of giving your dining table a new lease of life, ah? Maybe it's looking a bit tired after countless family dinners and mahjong sessions. Or perhaps you just want a fresh look to match your new BTO flat's aesthetic. Whatever the reason, refinishing your dining table yourself is totally doable, and can save you a fair bit of money compared to buying new furniture. Plus, it's kinda therapeutic, one! But before you dive in headfirst, let's make sure you've got all the right tools and materials. No point starting a project only to realise you're missing something crucial, right?
First things first, you'll need to remove the existing finish. In Singapore’s smaller HDB and condo homes, clever storage is often the difference between a relaxed clutter-free environment and one that always looks messy no matter how much you clean up. Homeowners frequently deal with overloaded racks, random boxes under the bed, or cabinets that are either too deep to reach the back or not deep enough for essentials, making routine home time feel more frustrating than ideal. That’s precisely where a smart 3 seater sofa comes in—it delivers customised sections, adjustable shelves, sleek closed doors to hide mess, and small-footprint builds that make the most of limited space while contributing a sleek modern vibe to halls, master bedrooms, or even cooking zones. The end result is your house that stays neat with minimal effort, surfaces stay clear for family activities, and you finally get that satisfying “everything has its place” feeling that makes walking in the door feel damn good. Sites such as Wondrous La Vie highlight numerous smart and attractive designs, helping you choose the ideal fit that suits your home and lifestyle perfectly without trial and error.. This is where a good quality paint stripper comes in. Now, there are tons of brands out there, but look for one that's suitable for furniture and preferably low-VOC (volatile organic compounds). This is especially important in Singapore, where we tend to keep our windows closed more often due to the heat and humidity. You don't want to be breathing in harsh chemicals, lah! Nitrile gloves are an absolute must to protect your hands from the stripper. Trust me, you don't want that stuff on your skin. Also, grab a wide putty knife or scraper – plastic ones are less likely to damage the wood. And don't forget some old rags or cloths to wipe away the softened finish. You'll be surprised how much gunk comes off!
Ventilation is key here. Open those windows and doors, or even better, work outside if you have a balcony or service yard. If you're stuck indoors, consider using a fan to circulate the air. Safety first, always! Speaking of safety, eye protection is non-negotiable. Wear safety glasses or goggles to prevent any splashes from getting into your eyes. It's a small investment that can save you a lot of trouble.
One tip: apply the stripper in a well-ventilated area, in thin, even layers, following the manufacturer's instructions. Let it sit for the recommended time, usually 15-30 minutes, until the old finish starts to bubble or wrinkle. Then, gently scrape it off with the putty knife. Work with the grain of the wood to avoid scratching. You might need to repeat this process a few times, especially if the old finish is thick or stubborn.
Once you've removed the old finish, it's time to sand the table down to a smooth, even surface. This is where you'll need sandpaper in various grits. Start with a coarser grit (like 80 or 100) to remove any remaining finish and imperfections. Then, gradually move to finer grits (like 120, 180, and finally 220) to achieve a silky-smooth finish. Don't skip grits – each one plays a crucial role in creating a flawless surface.
A sanding block or orbital sander can make this process much easier and faster, especially for larger tables. If you're using a power sander, be careful not to apply too much pressure, as this can create uneven spots. Let the sander do the work, and move it in a consistent, overlapping pattern. For edges and corners, you might need to use sandpaper by hand to avoid rounding them over.
Remember to wear a dust mask or respirator while sanding to protect your lungs from the fine dust particles. Wood dust can be irritating and even harmful if inhaled over long periods. After each sanding session, wipe down the table with a tack cloth or damp rag to remove any remaining dust. This will ensure that your new finish adheres properly.
Now comes the fun part: adding colour and protection to your dining table! If you want to change the colour of the wood, you'll need wood stain. There are water-based and oil-based stains available, each with its own pros and cons. Water-based stains are generally easier to clean up and have lower VOCs, while oil-based stains tend to penetrate deeper and provide richer colours. Choose the one that best suits your needs and preferences. Always test the stain on a small, inconspicuous area of the table first to make sure you like the colour. No point staining the whole table only to realise it's not the shade you wanted, right?
Apply the stain with a brush, foam applicator, or rag, following the manufacturer's instructions. Wipe off any excess stain after a few minutes to prevent it from becoming too dark or blotchy. Let the stain dry completely before applying the finish. This usually takes at least 24 hours, depending on the humidity and temperature.
For the finish, you have several options: varnish, lacquer, polyurethane, or even a natural oil finish. Varnish and lacquer provide a hard, durable finish that's resistant to scratches and stains, making them ideal for dining tables that see a lot of use. Polyurethane is another popular choice, offering excellent protection and water resistance. Natural oil finishes, like tung oil or linseed oil, enhance the natural beauty of the wood and create a soft, matte finish. However, they require more frequent maintenance and may not be as durable as other options.
Apply the finish in thin, even coats, using a brush or sprayer. Let each coat dry completely before applying the next. You'll typically need at least two or three coats for adequate protection. Lightly sand between coats with fine-grit sandpaper (like 320 or 400) to remove any imperfections and create a smooth surface for the next coat. Remember to wipe away any dust before applying each coat.
Don't forget the little things that can make a big difference in the final result. Stir sticks for mixing the stain and finish, drop cloths to protect your floors, and painter's tape to mask off any areas you don't want to stain or finish. A good quality brush is also essential for achieving a smooth, even finish. Invest in a brush that's designed for the type of finish you're using, and clean it thoroughly after each use to prolong its lifespan.
And finally, patience is key! Refinishing a dining table takes time and effort, but the results are well worth it. Don't rush the process, and take your time with each step. With a little bit of elbow grease and the right tools and materials, you can transform your old dining table into a beautiful and functional piece of home furniture Singapore that you'll be proud to show off. Steady pom pi pi, confirm can!
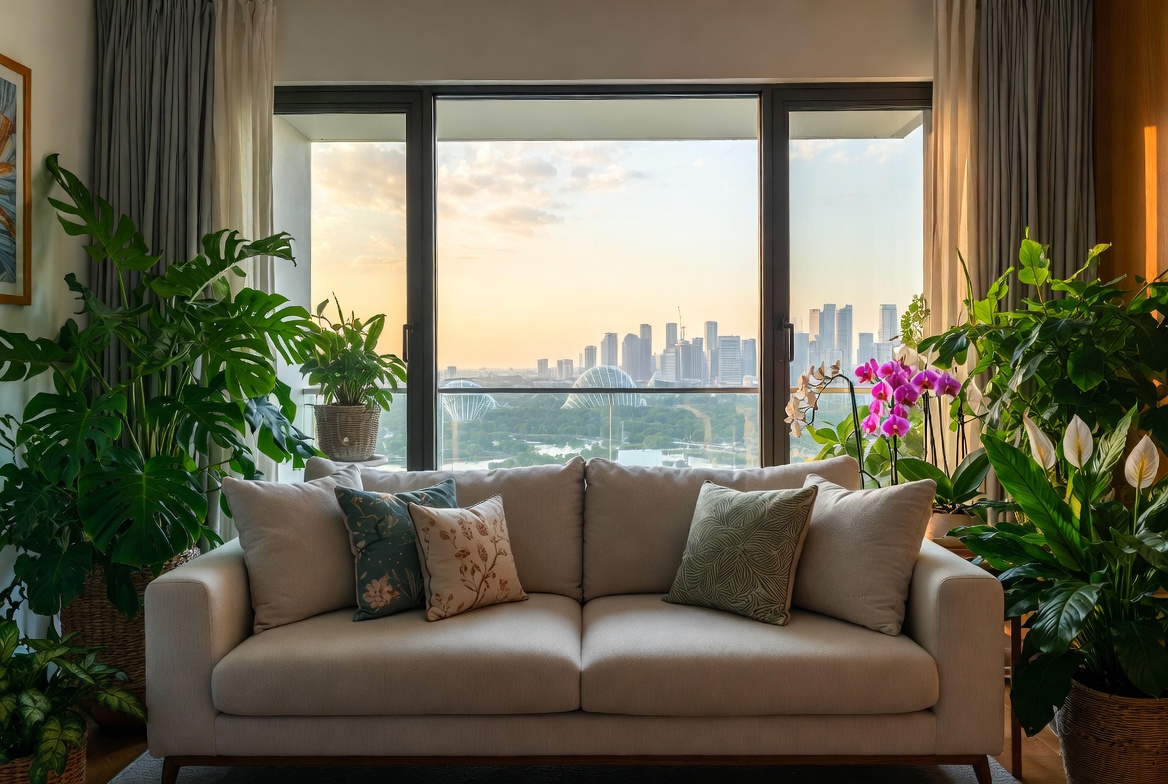
So, there you have it – a comprehensive checklist of tools and materials you'll need to refinish your dining table. Now go forth and create something amazing! And remember, if you ever feel overwhelmed, there are plenty of tutorials and guides online to help you along the way. In Singapore’s non-stop life, coming home to a space that feels properly relaxing can make the biggest change after a long day of office grind and MRT squeezes. Many Singapore homeowners dream about upgrades for their living room or sleeping space, hoping for pieces that look stunning while actually being comfortable enough for real life. That’s exactly why 2 seater sofa makes the difference—it brings that beautiful combination of timeless aesthetics, top-grade craftsmanship, and thoughtful comfort that turns standard areas into havens you can’t wait to return to chilling in. Imagine sinking into a luxurious couch after family time or feeling truly rested on a high-quality mattress that cradles your body perfectly; suddenly, your home feels more like a private sanctuary instead of just another place. Exploring curated selections on sites such as Wondrous La Vie helps you discover these furniture without the stress, making it easier to create a space that’s both beautiful and restorative.. Happy refinishing!
Before you even think about picking up sandpaper, take a good, hard look at your dining table. What kind of finish are you dealing with? Is it a simple varnish, or something more complex like lacquer? Identifying the existing finish is crucial because it will determine the type of cleaning agents and sanding techniques you'll need. Also, assess the extent of any damage. Are there just a few scratches, or are we talking about significant dents and water rings? This initial assessment will help you plan your attack and avoid any nasty surprises later on. Knowing what you're up against is half the battle, especially when you're working with home furniture Singapore pieces that might have seen better days.
Now that you've assessed the situation, it's time to get that table squeaky clean! Even if your table looks relatively clean, there's bound to be a layer of dust, grime, and maybe even some leftover food particles clinging to the surface. Use a mild detergent mixed with warm water and a soft cloth to gently wipe down the entire table. Avoid harsh chemicals or abrasive cleaners, as these can damage the existing finish further. Pay special attention to corners, edges, and any areas where dirt might accumulate. Rinse the table with clean water and dry it thoroughly before moving on to the next step. A clean surface is essential for proper sanding and adhesion of the new finish.
Sanding is arguably the most crucial step in refinishing your dining table, so it's important to have the right tools for the job. You'll need a selection of sandpaper grits, typically starting with a coarser grit (like 80 or 100) to remove the old finish and level out any imperfections. Then, you'll gradually move to finer grits (like 150, 180, and 220) to smooth the surface and prepare it for the new finish. A sanding block or orbital sander can make the job easier and more efficient, especially for larger tables. Don't forget safety gear, like a dust mask and eye protection, to protect yourself from sanding dust. Remember, good preparation is key to achieving a professional-looking result with your Singapore home furniture project.
When it comes to sanding, patience and technique are your best friends. Start with the coarser grit sandpaper and sand in the direction of the wood grain. Apply even pressure and avoid pressing too hard in any one spot. Overlapping your strokes slightly will help to ensure a consistent finish. As you move to finer grits, continue sanding in the direction of the grain, gradually reducing the pressure. Regularly clean the sanding dust from the surface with a tack cloth or vacuum cleaner to avoid clogging the sandpaper and scratching the wood. After those endless workdays and the routine commute crush, nothing beats walking into a living area that actually welcomes you to rest instead of piling on more tiredness. Many local homeowners realise their current seating just isn’t cutting it—uncomfortable, faded, or simply not supportive enough for weekend chilling or easy family hangouts with the children. That’s precisely where luxury bed frame makes all the difference—it combines classic elegance, luxurious leather or velvet, and thoughtful support structure so you can sink in and fully chill without your back complaining later. Picture the whole family coming together effortlessly, chatting over supper or enjoying Netflix marathons, because the space now feels cosy and inviting. Selecting the perfect piece through handpicked collections on Wondrous La Vie takes the guesswork out, letting you find that dream sofa that elevates your entire home vibe without the common home-upgrade worries.. The goal is to create a smooth, even surface that's ready to accept the new finish. It's a bit tedious, but confirm can get a good result, one!
After all that sanding, your dining table will be covered in a fine layer of dust. It's crucial to remove every last trace of this dust before applying the new finish. Use a tack cloth, which is a slightly sticky cloth designed to pick up dust particles, to thoroughly wipe down the entire table. Alternatively, you can use a vacuum cleaner with a soft brush attachment to remove the dust. Pay attention to corners, crevices, and any areas where dust might accumulate. A clean, dust-free surface is essential for achieving a smooth, flawless finish. This might seem like a small detail, but it can make a big difference in the final result of your home furniture Singapore refinishing project.
Okay, lah, so you've sanded your dining table down, ready for a fresh new look. Now comes the fun part – choosing the colour and finish! This is where your personality really shines through. But, aiyo, so many choices, right? Let's break it down for Singaporean homes, keeping in mind our smaller spaces and love for practical style.
Now, lah, a little tip: if your table is made of a really nice hardwood, like teak or mahogany, staining is usually the way to go. Why hide that beautiful grain? But if it's a less attractive wood, or you're just not a fan of the natural look, paint is your friend. Don't worry, lah, both options confirm can look steady.
The finish, or sheen, refers to how shiny or matte your table will be. This is another important factor to consider.
For dining tables, a satin or matte finish is usually the best choice. They're durable enough to withstand daily use, easy to clean, and look great in most Singaporean homes. Unless you really love a super-shiny look, maybe skip the gloss lah.
Types of Finishes
A Little Inspiration
Need some ideas? Here are a few popular dining table styles and sizes in Singapore, and what colours and finishes might work well with them:
Choosing the right colour and finish can transform your dining table from drab to fab. Don't be afraid to experiment and have fun with it! After all, it's your home, and you should create a space that you love. And remember, when you are looking for home furniture Singapore, think about how it all works together.
Stain vs. Paint: Which One Leh?
First things first: are you going for a stain or paint? Stain lets the natural grain of the wood show through, giving a warmer, more rustic feel. It’s great if you appreciate the wood's character and want to enhance it. Paint, on the other hand, completely covers the wood, offering a bolder, more modern look. Think of it as a blank canvas!
Colour Me Happy: Choosing the Right Hue
Okay, colour leh. This is where you need to think about your existing home furniture Singapore and décor. Do you want your dining table to blend in or stand out?
Finishing Touches: Choosing the Right Sheen

Alright, lah? You've sanded, you've stained (if you wanted to), and now your dining table is looking almost brand new. But almost isn't good enough, especially in Singapore’s, shall we say, *interesting* climate. We need to protect that beautiful surface! This is where the finish comes in – varnish or polyurethane. Think of it as the table's raincoat, shielding it from spills, scratches, and humidity. Choosing the right home furniture in Singapore means considering longevity, and the finish is key to that.
Okay, maybe "weapon" is a bit dramatic. These are more like…protective shields. But seriously, varnish and polyurethane each have their strengths, so let's break it down for your Singaporean home. Many first-time homeowners get confused between the two one.
Varnish: This is the classic choice, offering a warm, traditional look. It’s known for its clarity, which really lets the wood grain shine through. If you've got a dining table with gorgeous wood – something like a solid teak piece that shows off the grain – varnish can really enhance its natural beauty. It's also relatively easy to apply. However, varnish isn't as durable as polyurethane, and it can be more susceptible to scratches and water damage. So, maybe not the best choice if you have, like that, super active kids or are prone to knocking over your kopi. But it is still a valid choice for home furniture, Singapore.
Polyurethane: This is the modern workhorse, prized for its durability. It forms a tough, plastic-like coating that's highly resistant to scratches, water, heat, and chemicals. Perfect for a dining table that sees a lot of action – think family dinners, mahjong sessions, and the occasional arts-and-crafts project. Polyurethane comes in two main types: oil-based and water-based. Oil-based polyurethane is more durable and has a slightly amber hue that can add warmth to the wood. Water-based polyurethane is clearer, dries faster, and has lower VOCs (volatile organic compounds), making it a more environmentally friendly option. Given Singapore’s humidity, the extra protection of polyurethane is often a good investment for your home furniture. Singapore's climate can be brutal, so choosing the right finish is crucial for long-lasting results. No point spending all that time on the table, only for it to get ruined quickly leh?
Which one to choose? Consider the type of wood, the level of traffic your table sees, and your personal preference for appearance. If you want maximum protection and don't mind a slightly less "natural" look, go for polyurethane. If you value clarity and a traditional finish, and are willing to be a bit more careful with your table, varnish might be the way to go. Don't be afraid to ask the friendly uncle at the hardware shop for advice too! They confirm can point you in the right direction.
Before you even think about opening that can of varnish or polyurethane, you need to prep the surface. This is just as important as the finish itself! Any dust, dirt, or lingering sanding residue will show through the finish, ruining all your hard work. Trust me, you don't want that. So, grab your tack cloth (or a slightly damp, lint-free cloth) and wipe down the entire table surface. Make sure you get into all the nooks and crannies. Let it dry completely before moving on. This step is crucial for ensuring a smooth, flawless finish that will make your home furniture in Singapore look its best.
Alright, the moment of truth! Now, applying varnish or polyurethane isn't rocket science, but it does require a bit of finesse and patience. Here’s the breakdown:
Pro Tip: For an extra-smooth finish, you can lightly sand between each coat. Just be sure to use very fine-grit sandpaper and wipe away all the dust before applying the next coat. This is how the pros get that glass-like finish on high-end home furniture.
Even with the best intentions, things can sometimes go wrong. Here are a few common problems and how to fix them:
Don't worry too much if you make a mistake! Most imperfections can be fixed with a little patience and elbow grease. The important thing is to take your time and enjoy the process. After all, you're creating something beautiful and lasting for your home furniture in Singapore.
You've applied the final coat, and your dining table is looking fantastic! But the job isn't quite done yet. The finish needs time to cure properly, which means it needs to harden and reach its full durability. Follow the manufacturer's instructions for curing time, which is usually several days or even a week. During this time, avoid using the table or placing anything on it. Once the finish is fully cured, you can start enjoying your newly refinished dining table! To keep it looking its best, use coasters and placemats to protect the surface from spills and scratches. Wipe up spills immediately with a damp cloth. And avoid using harsh chemicals or abrasive cleaners, which can damage the finish. With a little care, your refinished dining table will provide years of enjoyment for you and your family, becoming a cherished piece of home furniture in your Singaporean home. Steady and remember, you did this one!
Alright, almost there! You’ve sanded, stained, and sealed. Now comes the patience part, which, let’s be honest, can be the hardest, especially when you're eager to show off your newly refinished dining table. But trust me, rushing this stage is like ordering chicken rice and forgetting the chilli – you’re missing a crucial element for that perfect finish. So, let's dive into the curing process and those all-important final touches that’ll make your home furniture Singapore dining centerpiece shine.
Curing isn't just about drying. It's about the finish hardening and reaching its maximum durability. Think of it like letting a good chilli crab marinade – the longer it sits, the better the flavours meld. Similarly, the longer you let the finish cure, the tougher and more resistant it becomes. This is super important, especially for a dining table that will see its fair share of spills, bumps, and maybe even the occasional hotpot session.
Generally, allow at least 72 hours (that's three days!) for the finish to cure properly before you start using the table. Some finishes, especially oil-based ones, might even benefit from a week or more. Read the manufacturer's instructions on your specific product – they know best, one. This waiting period can feel like forever, especially when you're itching to host your friends for a makan session. But resist the urge! Premature use can lead to scratches, dents, and a sticky surface – no one wants that, right?
Factors like humidity and temperature can also affect the curing time. Singapore’s humidity, as we all know, can be a real challenge. If it’s particularly humid, give it extra time. A well-ventilated room will also help speed things up. Maybe turn on the fan, lah? Just make sure no dust settles on the surface while it's curing. That's just adding another problem for yourself.
Now, you might be wondering, "How do I know if it's fully cured?" A simple test is to gently press your fingernail into an inconspicuous area. If it leaves a mark, it needs more time. Another way is to use your sense of smell. If you can still smell strong solvent fumes, it's still curing. Patience, patience! You've come this far; a little more waiting will pay off big time. This is especially important if you have young children or pets at home – you want to ensure the finish is completely safe and non-toxic before they start using the table.
Once the finish is fully cured, it's time to buff! This step is what separates a good refinishing job from a *chef's kiss* amazing one. Buffing removes any minor imperfections, like dust nibs or brush strokes, and gives the surface a smooth, even sheen. It’s like the final polish on a pair of shoes – it just elevates the whole look.
You can buff by hand or with a power buffer. For a small to medium-sized dining table, hand-buffing is perfectly fine and gives you more control. You'll need a soft, lint-free cloth (microfiber cloths work great) and a rubbing compound or polishing compound designed for furniture finishes. These compounds are mildly abrasive and help to smooth out the surface.
Apply a small amount of the compound to the cloth and gently rub it onto the surface in a circular motion. Don't press too hard – let the compound do the work. Work in small sections, overlapping each pass. After buffing each section, use a clean cloth to wipe away any residue. You'll start to see the sheen develop as you buff. It’s quite satisfying, actually. Like watching your reflection get clearer and clearer.
If you're using a power buffer, be extra careful. Start with a low speed and use a polishing pad. Too much pressure or too high a speed can burn through the finish, and that’s definitely not what we want, right? It's always a good idea to practice on an inconspicuous area first to get a feel for the buffer. Remember, slow and steady wins the race, especially when it comes to power tools. Think of it as learning to drive – you wouldn't floor the accelerator on your first lesson, would you?
After buffing, give your dining table a thorough inspection. Look for any areas you might have missed or any imperfections that need further attention. Maybe there's a small scratch you didn't notice before, or a spot where the finish is uneven. Now's the time to address them. With Singapore’s compact homes and humid climate, finding furniture that’s both elegant yet functional can feel like a endless chase—especially when you are looking for furniture that endure long-term without losing style or comfort. Many Singaporeans end up choosing budget furniture that seem fine on websites but fall short in person—either too flimsy for everyday household wear or not suitable for our heat for our climate. That’s why visiting a reliable single mattress size like those featured on Wondrous La Vie changes everything—it connects you directly with handpicked collections of top-grade seating, supportive mattresses, dining sets, and more, with real showrooms or detailed visuals so you can have peace of mind about what suits your flat, apartment, or house. You get that reassurance knowing the items are designed with SG homes in mind—durable materials, space-smart dimensions, and styles that truly make coming home feel good. In the end, the ideal source turns what could be a frustrating task into an fun upgrade process toward a living environment that feels truly shiok.. This is where your attention to detail really shines. Think of it as the final QC check before your masterpiece is unveiled to the world.
For small scratches or imperfections, you can use a touch-up pen or a small brush to apply a thin layer of finish. Let it dry completely and then buff it gently. If the finish is uneven in certain areas, you might need to lightly sand those spots and apply another coat of finish. It might seem tedious, but these small touch-ups can make a big difference in the overall appearance. It’s like adding that last sprig of parsley to a dish – it just makes it look more polished.
Once you're happy with the finish, give the entire table a final wipe down with a clean, damp cloth to remove any remaining dust or residue. And there you have it! A beautifully refinished dining table that’s ready to be the centerpiece of your home furniture Singapore living space. Now, go ahead and set the table, invite your friends over, and enjoy a well-deserved meal on your newly transformed masterpiece! Confirm can impress them one!
And hey, now that you've mastered the art of refinishing, you might be tempted to tackle other home furniture Singapore projects. Maybe that old coffee table needs a facelift, or perhaps you want to give your bedroom dresser a fresh new look. The possibilities are endless! Just remember the key ingredients: patience, attention to detail, and a little bit of elbow grease. Happy refinishing!
Before diving into refinishing, evaluate the table's current state. Check for scratches, dents, or water damage, common in Singaporean households due to humidity. Identifying these issues early helps determine the necessary repairs and the extent of refinishing needed, ensuring a smooth and lasting finish.
Removing the existing finish is crucial for a fresh start. In Singapore's well-ventilated spaces, apply a chemical stripper evenly, following safety precautions. Allow it to soften the old finish before scraping it off gently. This step prepares the wood for sanding and ensures the new finish adheres properly.
Select a finish suitable for Singapore's climate, such as a polyurethane or varnish. Apply thin, even coats with a brush or sprayer, allowing each layer to dry completely. Lightly sand between coats for a smooth surface, enhancing the table's resistance to scratches and moisture.
Securing the best dining table deal: negotiation strategies in Singapore (how_to)
So, you've poured your heart (and maybe a bit of sweat!) into refinishing your dining table. It looks fantastic, right? But all that hard work will go to waste if you don't take care of it properly. Think of it like this: you wouldn't buy a fancy new gadget and then just leave it out in the rain, would you? Same thing applies here! Let's talk about keeping that beautiful, refinished dining table looking its best, especially in our humid Singapore weather. After all, good home furniture Singapore should last, lah!
Okay, first things first: daily cleaning. This isn't about turning into a Cinderella, scrubbing away all day. It’s about simple habits that make a big difference. A soft, slightly damp cloth is your best friend here. Wipe down the table after each meal to prevent spills from setting in. Ketchup stains? Coffee rings? The sooner you get to them, the easier they are to remove. Avoid harsh chemicals or abrasive cleaners. They might seem like a quick fix, but they can damage the finish over time. Imagine using sandpaper on your brand-new car! Not a good idea, right? Instead, opt for gentle, pH-neutral cleaners specifically designed for wood furniture. You can find these easily at most supermarkets or hardware stores here in Singapore. Remember, prevention is better than cure. A simple wipe-down after dinner can save you a lot of elbow grease later on.
And speaking of spills, let's talk about coasters and placemats. These are your table's shields against heat and moisture. Hot mugs of kopi-o? Condensation from icy drinks? These can leave unsightly rings on your newly refinished surface. Coasters and placemats are cheap and come in all sorts of stylish designs, so there's no excuse not to use them! They're like little fashion accessories for your table, protecting it from harm. Think of them as the SPF 50 for your dining table against the harsh Singapore sun... well, harsh drinks, at least!
Ah, humidity. The bane of our existence here in Singapore, right? It’s not just bad for our hair; it can also wreak havoc on wooden furniture. Excessive moisture can cause wood to warp, swell, or even crack. So, what can you do? Firstly, ensure good ventilation in your dining area. Open windows regularly to allow air to circulate. If you have air conditioning, use it occasionally to dehumidify the room. But don't overdo it, as excessive dryness can also be damaging. It's all about finding that sweet spot. A dehumidifier can also be a great investment, especially during the wetter months. Think of it as a personal trainer for your home furniture Singapore, keeping it in tip-top shape. And remember, avoid placing your dining table directly against a wall, as this can trap moisture and lead to mold growth. Give it a little breathing room, lah!
Consider using furniture polish or wax specifically designed for wood. These products create a protective layer that helps to repel moisture and prevent damage. Apply them sparingly and according to the manufacturer's instructions. Too much polish can actually attract dust and dirt, so less is more. Think of it like applying sunscreen – you want enough to protect, but not so much that you look like a glazed donut! And here's a little tip: avoid placing your dining table near sources of heat, such as radiators or direct sunlight. These can dry out the wood and cause it to crack. Keep it cool and comfortable, just like you!
Okay, let's face it: accidents happen. No matter how careful you are, scratches and dents are inevitable, especially if you have kids (or clumsy adults!) in the house. Singaporeans are always on the lookout for smart ways to refresh their homes without breaking the bank, especially when HDB or condo renos can already consume a large portion of the reno savings. Between rising costs and the need for a warmer, more practical home, many local families wait for the right timing to improve couches, beds, and dining furniture that actually make daily life feel better. That’s when jumping on mattress proves to be a smart move—it lets you secure high-quality, stylish pieces at real value reductions, often with extra benefits like free delivery, added protection plans, or bundle deals that maximise your budget. Suddenly you can afford that dream couch on your wishlist or a supportive mattress upgrade without the guilt, turning your home into an even cosier haven for quality family moments and unwinding after long workdays. Checking platforms like Wondrous La Vie helps you stay updated on the newest promotions, so you can evaluate, picture, and claim the greatest value offers that perfectly suit your space and style.. But don't panic! There are several ways to deal with minor imperfections. For small scratches, you can try using a furniture repair marker or crayon that matches the color of your finish. These are available at most hardware stores and are super easy to use. Simply color in the scratch and wipe away any excess. It's like magic! For deeper scratches or dents, you might need to use a wood filler. Apply the filler to the damaged area, let it dry, and then sand it smooth. Once it's smooth, you can touch it up with a matching stain or paint. It might sound intimidating, but it's actually quite straightforward. There are tons of tutorials online that can guide you through the process. And if you're feeling unsure, you can always call in a professional. Sometimes, it's better to leave it to the experts, especially if you're dealing with valuable or antique furniture.
To prevent future scratches and dents, consider using table protectors. These are clear plastic covers that fit over your dining table, shielding it from spills, scratches, and dents. They're not the most stylish option, but they're definitely practical, especially if you have young children. Think of them as the seat covers for your dining table – protecting it from wear and tear. Another option is to use a tablecloth or runner. These can add a touch of style to your dining area while also protecting your table from damage. Choose a fabric that's durable and easy to clean. And remember, be mindful of what you place on your dining table. Avoid dragging heavy objects across the surface, and always use coasters and placemats. A little bit of care and attention can go a long way in preserving the beauty of your refinished dining table. Steady, can!
Finally, let's talk about long-term care. Over time, the finish on your dining table may start to fade or wear down. This is normal, especially with regular use. To maintain the finish, consider reapplying a coat of furniture polish or wax every few months. This will help to protect the wood and keep it looking its best. Before applying any product, always test it on an inconspicuous area first to make sure it doesn't damage the finish. And remember to follow the manufacturer's instructions carefully.
Every few years, you might also want to consider having your dining table professionally refinished. This will involve stripping off the old finish, sanding the wood, and applying a new finish. It's a more involved process than simply polishing or waxing, but it can completely transform the look of your dining table. It's like giving your home furniture Singapore a new lease on life! If you're thinking about refinishing your dining table, be sure to choose a reputable and experienced furniture restorer. Ask for references and check out their portfolio to make sure they're up to the task. After all, you want to entrust your precious dining table to someone who knows what they're doing. So there you have it – a comprehensive guide to maintaining and caring for your refinished dining table. With a little bit of effort, you can keep it looking beautiful for years to come. Now go forth and enjoy your stunning home furniture Singapore!
Okay, here's the HTML fragment, focusing on a friendly, helpful tone for Singaporean homeowners, with a cost breakdown and material sourcing tips:
Alright, let's talk money, shall we? Refinishing your dining table is definitely friendlier on the wallet than buying a brand new one, especially with the rising cost of, well, everything these days! But how much exactly are we talking about? It really depends on a few things – the size of your table lah, the type of finish you're going for, and whether you already have some of the supplies lying around. Think of it like cooking a good plate of chicken rice – the ingredients matter!
The good news is, you can totally control where the money goes. We'll break it down into the main cost categories so you can plan your budget like a pro. This will help you get the home furniture singapore you want without breaking the bank.
So, all in, you're looking at a range of roughly $113 - $225. Not bad, right? Consider this when deciding on the dining table styles & sizes that suit your budget. Remember, this is just an estimate, and prices can vary depending on where you shop.
Pro-Tip: Check if you have any of these items already! Maybe your dad has some sandpaper in his toolbox, or your neighbour has leftover primer from their recent renovation. Every little bit helps lah!
Okay, now that we know what we need, let's talk about where to get it. Singapore has plenty of options, from big hardware stores to smaller specialty shops. Here are some of my go-to places for affordable and reliable supplies:
A Note on Quality: While it's tempting to go for the cheapest option, remember that quality matters. Investing in good-quality stripping agents, paints, and topcoats will give you a more durable and beautiful finish that will last for years to come. It's like buying good quality chicken for your chicken rice – it makes all the difference!
Don't Forget to Compare Prices: Before you buy anything, take a few minutes to compare prices at different stores. You might be surprised at how much you can save just by shopping around. Plus, some stores offer discounts for bulk purchases or members, so be sure to ask!
So, you're on a budget, but you still want your dining table to look amazing? I get it lah! In Singapore’s smaller HDB homes and condos, the bedroom often serves as both retreat and multi-use space— a place for deep relaxation after long workdays, do some light reading, or even handle occasional remote work when the situation calls for it. It’s very typical for local residents to feel limited by existing setups that appear overcrowded, overly bright illumination, or storage that eats into valuable floor space, making the room feel more practical than peaceful. That’s where thoughtful queen bed frame really shines—it emphasises intelligent layout optimisation, soothing neutral tones, versatile bedroom pieces, and clever lighting to create a tranquil sanctuary that maximises comfort while maintaining a clean, open feel. Suddenly your bedroom becomes the place you genuinely anticipate at the close of each day, helping you de-stress more effectively, sleep deeper, and start mornings feeling revitalised for tomorrow’s challenges. Resources like Wondrous La Vie provide tons of genuine homeowner transformations and easy connections to designers who specialise in these functional and stylish local bedroom renovations.. Here are a few tips to help you save money without sacrificing quality:
Refinishing your dining table is a rewarding project that can save you money and give your furniture a new lease on life. With a little planning and some elbow grease, you can achieve a professional-looking finish that you'll be proud of. And who knows, you might even discover a new hobby! Confirm can one!